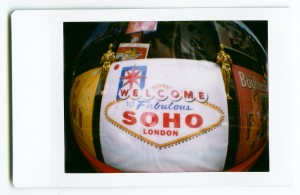
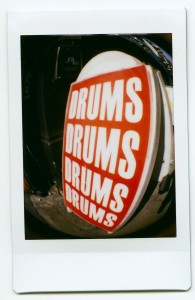
 We had the most fantastic time on Tuesday at the Lomo Lunch Workshop about the Diana Instant Back. For only £8 per person, this is a bargain considering you get
- to use and test a Diana with Instax Back for the whole afternoon
- tips and tricks on how to use it
- a free pack of Instax film
- 30% off Instax Film for the day
- all your questions answered and more
I bought this fantastic gadget for a whopping £70 a few weeks ago and was a bit unsure what to expect. Instant pictures a la Polaroid have always had a fascination with everybody who’s into photography, and Fuji is now the only manufacturer of such products (not yet counting The Impossible Project).
 I’ll give you a full review of the back another time – there’s a lot that can be said about it. If you are in town during April you should pop down to see the Lomography Gallery Store and check out the Diana World Tour downstairs. It’s an exhibition featuring 100 vintage Diana cameras and clones formerly in the collector’s hands of Allan Detrich.
The workshop itself consisted of a brief introduction to instant photography, the do’s and don’ts, and then they let you walk away and test this puppie out. If you have questions you can pop back anytime and even buy some film for 30% off the market price.
If ever I had my doubts about Lomography or their often hefty pricing structure, this workshop was fabulous – thanks to Adam and his crew! We’re doing another one on Light Leaks on Saturday – I can’t wait!
Let’s see some pictures
I brought my own Diana clone “El Toro”, the Instant Back and the 22mm Fisheye Lens. I mainly shot with this winning combination, except for a few pinholes and some with the standard 70mm lens. It’s highly addictive, especially when those shots come out great in the bright outdoor sunshine.
[nggallery id=44]
Julia had a borrowed camera with the 110mm Telephoto Lens. Adam said this is only for “Advanced Lomographers” and gives very different pictures. It’s harder to predict focus and framing but still a lot of fun 
[nggallery id=43]
Instax is an 800 ISO film, however due to a correction lens inside the Diana it becomes 400 ISO material. Exposure works best just like it says on the lens barrel:
- sunny in bright sunshine
- cloudy for shadier side streets outdoors
- and the sunny/cloudy setting for anything in between
I can imagine that the sunny setting in much brighter summer conditions may not be small enough so let’s keep an ND filter in mind should it come to that.
In contrast to that, indoor shots don’t come out very well – flash or not, they just look rubbish. I think we already know this phenomenon from Polaroid years. Long exposures work OK, but it it’s hit and miss (see the wedding couple above). The Diana Flash likes to burn out faces if you’re too close, or isn’t strong enough.
Think I need to do more testing on this subject. Good thing that Instax is available on eBay for £4.50 per pack – I’ve just put an order for 20 in yesterday

Great post!
I recently got the diana instant back and have been experimenting in the following conditions:
Indoors (ambient / no fluorescent lighting):
I find that the best results I got for my Diana Fisheye (with flash) were: setting N / sunny&cloudy
Indoors (flourescent lighting):
Diana Fisheye (no flash): setting B / sunny
Does this tally with what you were told at the Lomo lunch regarding shooting indoors?
Soon I will be testing outside, any advice with regard to settings (N/B)? – Your outdoors pictures look great
Thanks
Thanks Sam!
Indoors I sometimes use the sunny setting on bulb to get good results. Press the shutter quickly (like half a second). Other than that I use flash on cloudy.
Outdoors I find that the description is rather accurate: for bright sunshine use sunny (sometimes that’s not small enough though, but that’s only in near tropical conditions). When there’s no sun around use cloudy – anything in the middle use “sunny/cloudy”.
For pinhole shots (with or without the lens) try 2 seconds in the sun and about 4-6 in cloudy conditions.
Good luck!
cool, thanks for the advice ^_^
I am really impressed with the contrast (in terms of black levels – without it all being black) and rich colours you have got in your pictures.
Taking pictures with the instant back seems like a rather temperamental process, and from what I can tell, results depend quite a lot on shutter length control (in terms of seconds).
I also am finding it much easier to take shots using the fisheye lens (in terms of framing it seems to be a bit more generous) instead of the regular diana lens.
I haven’t tried any pinhole shots yet, probably one for the tripod, also I was thinking about double exposures – have you tried them yet? I can’t see any among your photos.
There seems to be much feedback on Flickr groups about people getting terrible results, so its nice to see someone who has a good grip on it giving advice – thanks.
You’re welcome!
I like the Fisheye Lens too – and the Super Wide Lens. I’m not so keen on the standard or telephoto lenses. The Super Close-Up one works well too but it’s a bit cumbersome having to measure the exact distance every time you want to take a shot. It can easily get out of focus which you don’t have with either the Fisheye or Super Wide.
I’ve tried some pinhole shots but I’m not that keen on the results. It’s fascinating that you can take pictures without a lens at all – they’re just not my cup of tea. There’s a trick we’ve learnt at the Lomo Lunch though for easy shutter control when taking pinholes without the lens: position the camera, set the Diana to B mode, then cock the shutter with the little plastic bit (so that it’s always open) while holding your finger over the pinhole. Then quickly take your finger off for as many seconds as you want to expose the picture and put it back. That way you don’t have to deal with taking the lens cap off at the right moment or deal with the plastic bit to keep the shutter open – it works really well for clear shots without motion blur.
Pinholes tend to get a bit bluer than normal shots – probably due to the way blue rays bend at the pinhole. Tripod is a must, or alternatively place the camera on something solid.