There are a number of super handy keyboard shortcuts for navigating the Photoshop interface. I keep forgetting them so I wrote them down here as a reference.
I’m using Photoshop CC 2014 on a Mac which means that magic trackpad gestures work well for the following:
- zooming (pinch gesture)
- panning (two finger drag)
- rotating the canvas (two finger rotate)
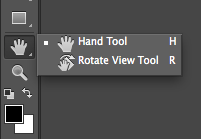
To reset canvas rotation press ESCAPE. There’s even a menu item for this which can be accessed by holding down the hand icon (or pressing R). Hold it down again to switch back the hand tool (H).
Multi Picture Navigation
You can zoom/pan/rotate multiple images at the same time by using the following shortcuts:
- zooming: CMD+SHIFT and drag left/right
- panning: SPACE+SHIFT and drag
- rotating: select the rotation tool (R), then select “rotate all windows” at the top. Drag to rotate all open images.
Screen Display Modes
Press F to toggle through 3 modes of presentation: standard with all menu bars, no title bar and full screen (total Zen).
When in full screen mode you can bring up any of the navigation bars on either side by moving the cursor to the edge of the screen. This will bring them up temporarily. They’ll disappear again if you move away from the edge.
In either mode, press TAB to hide all menu bars (except for the file name tabs). Press TAB again to bring them back.
Image Presentation
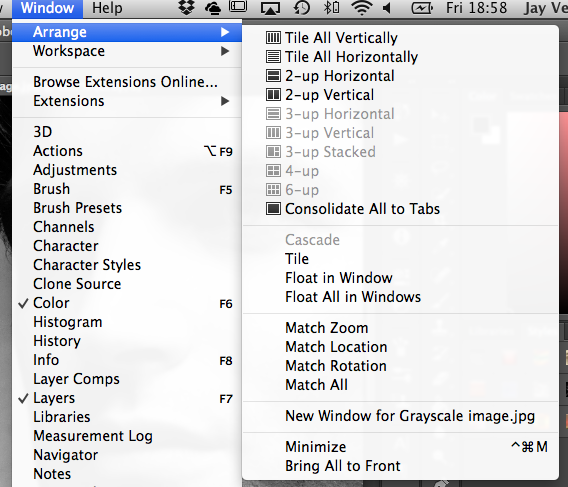
By default Photoshop opens one image in a single tab and shows this full screen. At times we may need to see more than one image side by side. Select Window – Arrange and choose one of the many options towards the top of the huge list (for example, 2-up Vertical will show two images side by side).
You can also float all open images in tabs (classic Mac annoyance mode from back in the day) and even choose to display the Application Frame (Mac only – if unticked it will show the desktop in the background).
To bring all images back into their own tabs, select Consolidate All to Tabs.

