You can export your garment from Marvelous Designer either in OBJ or FBX format. Note that at the time if writing, FBX is highly experimental and appears not to work very well. OBJ on the other hand is doing a fine job.
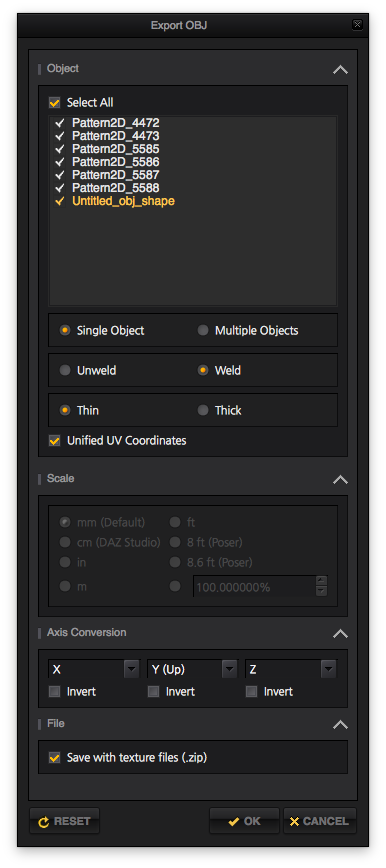
Head over to File – Export and choose OBJ. There’s also an option called “OBJ selected”. Both bring up the same dialogue in which you can indeed select which part of your garment and your scene you’d like to export.

The top section of this dialogue shows all pieces of your scene, including your avatar (it’s the orange item called Untitled in my example). The “OBJ selected” option will pre-select whatever is selected in your 2D view.
Underneath it you can specify if you’d like to export a single object or individual pieces. Single objects can be welded together as an option and will appear as one when imported into your target application.
If you only need the garment, make sure to uncheck the avatar from that list.
Notice that the scale section is greyed out – that’s a bug in the current version I’m using (MD4, 2.1.87 r10465), hopefully to be resolved soon. For now, remember that the “mm” option is ticked, which means that Marvelous Designer will export your garment with 1 unit as 1mm. Tweak accordingly in your target application.
For example, DAZ Studio expects 1 unit to be 1cm. Divide by 10 during import for the correct scale.
Unified UV Coordinates
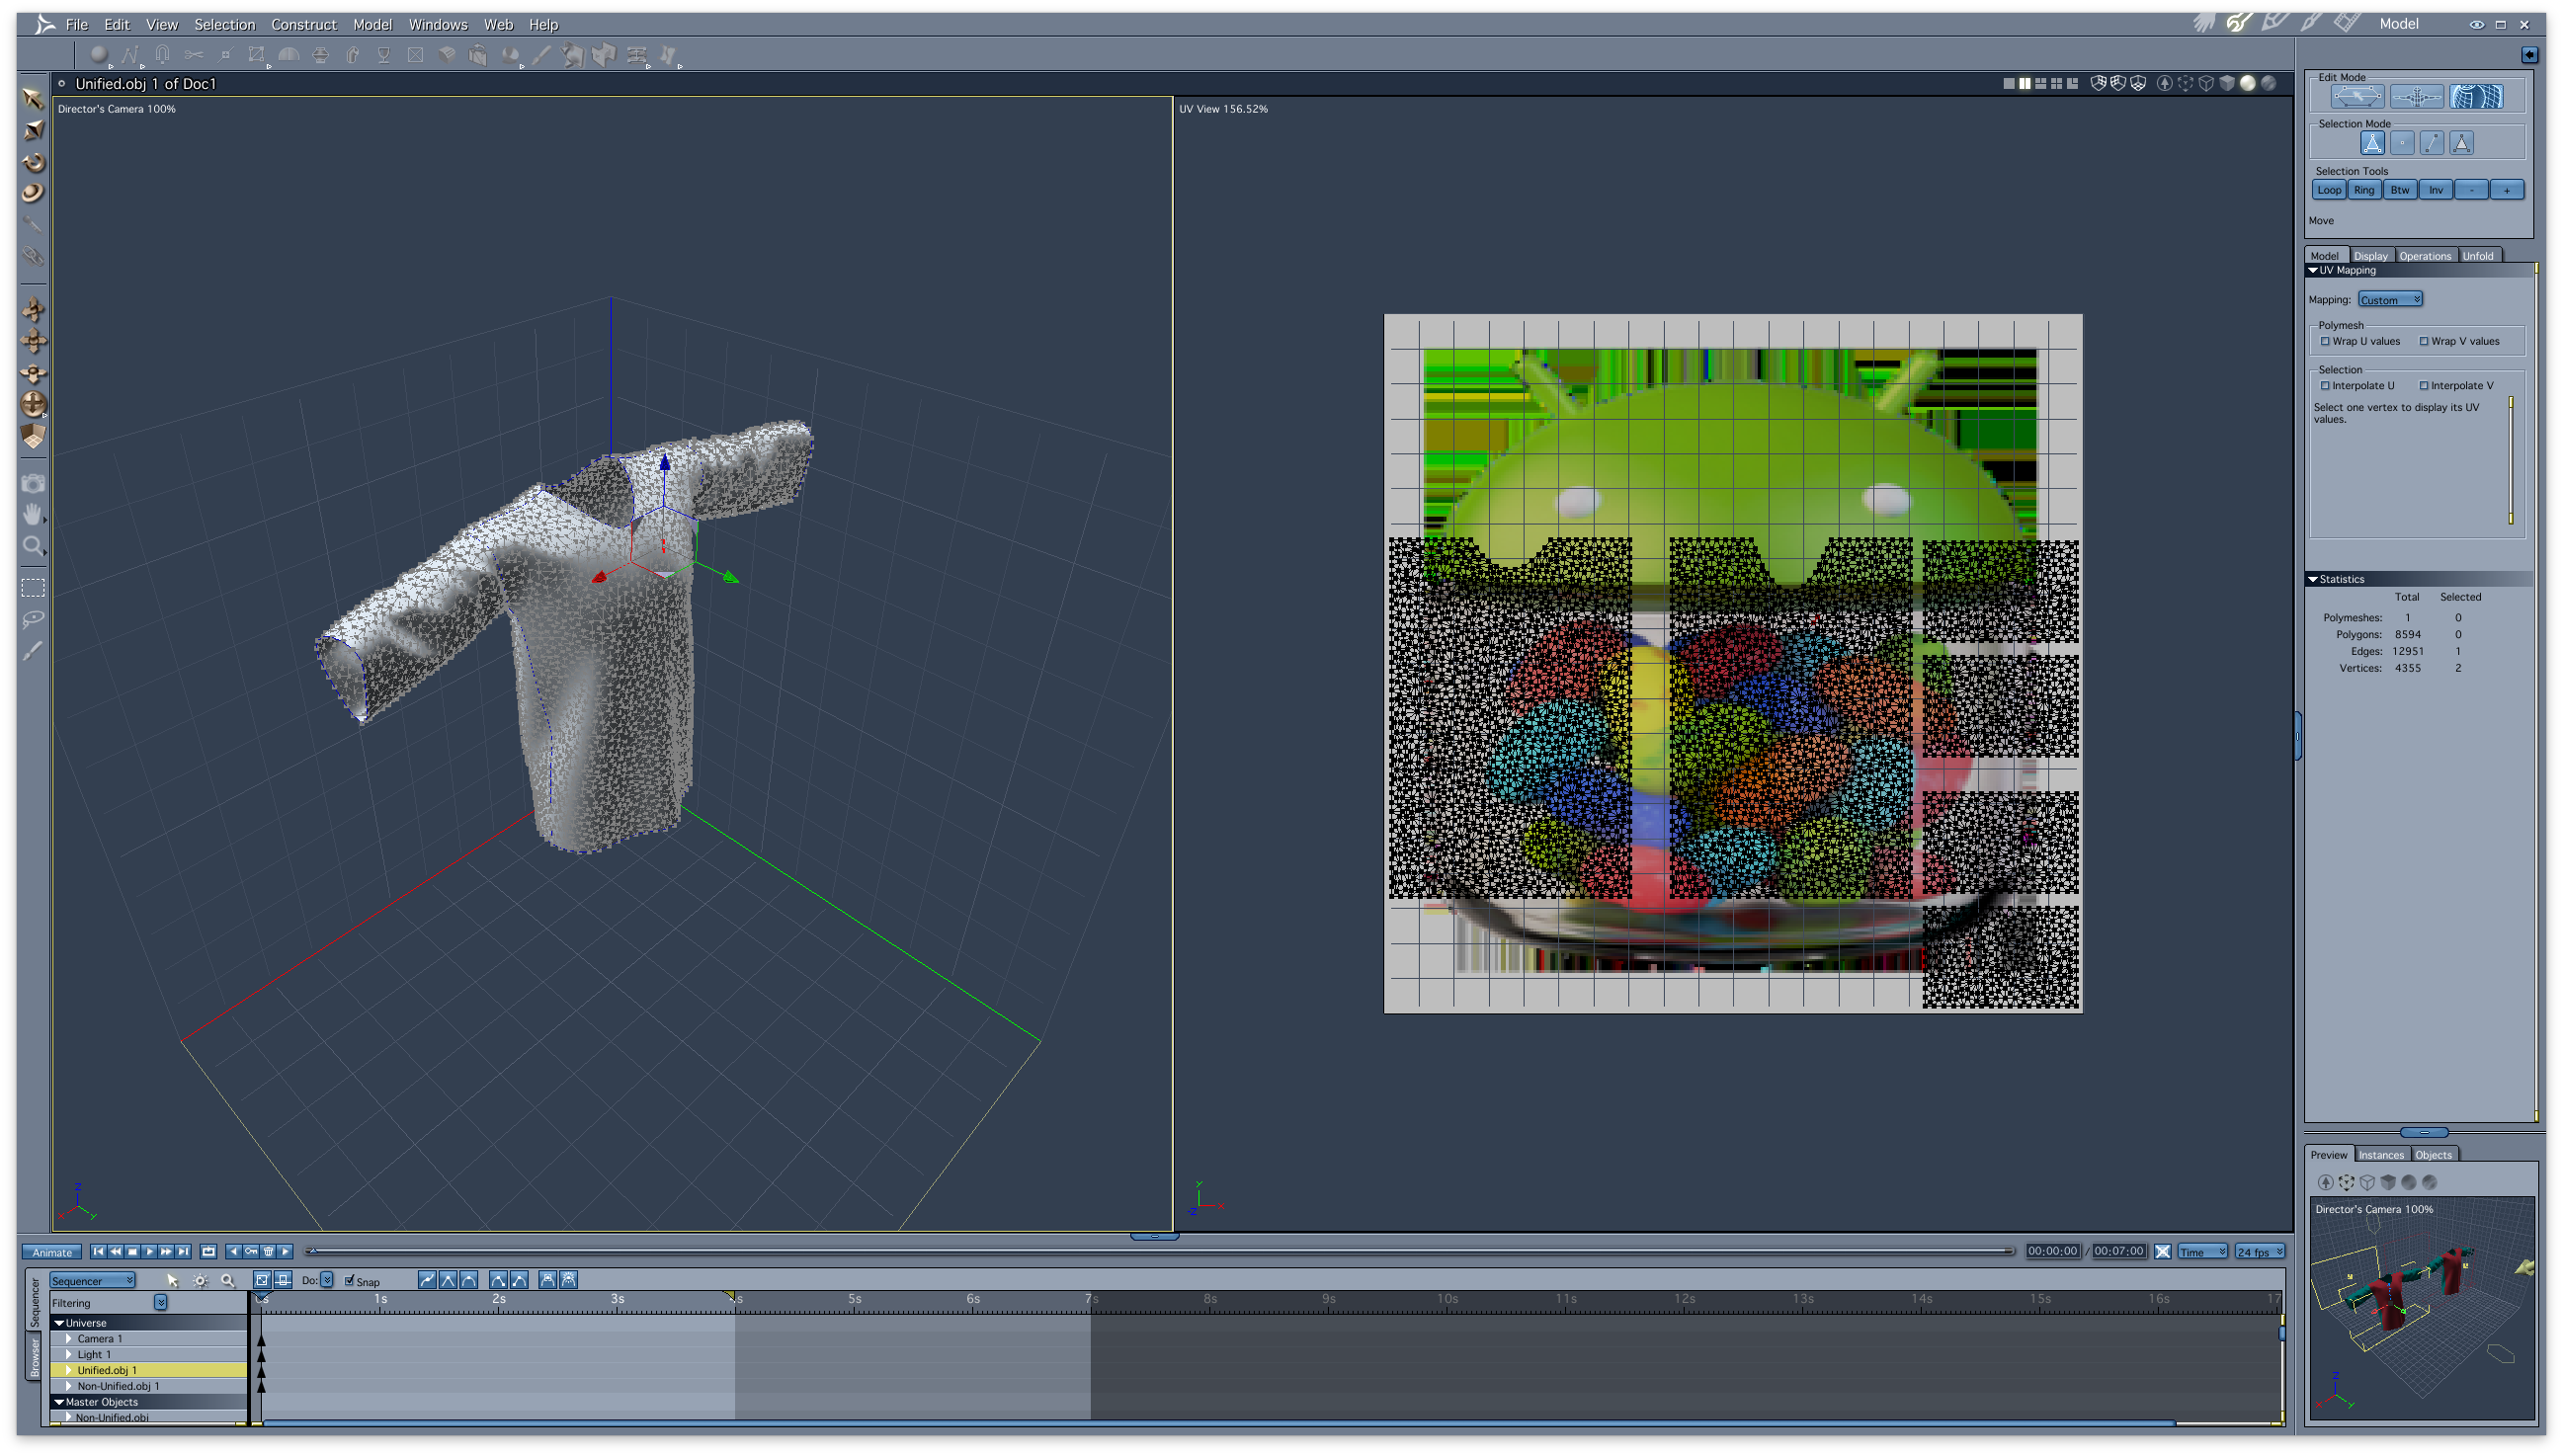
When this option is ticked, Marvelous Designer will generate a UV Map which fits all parts into a square. Therefore all parts of the garment will be on a single texture. Imagine something like this: the dark sections on top of the Android icon are the pieces of the garment on the UV Map.

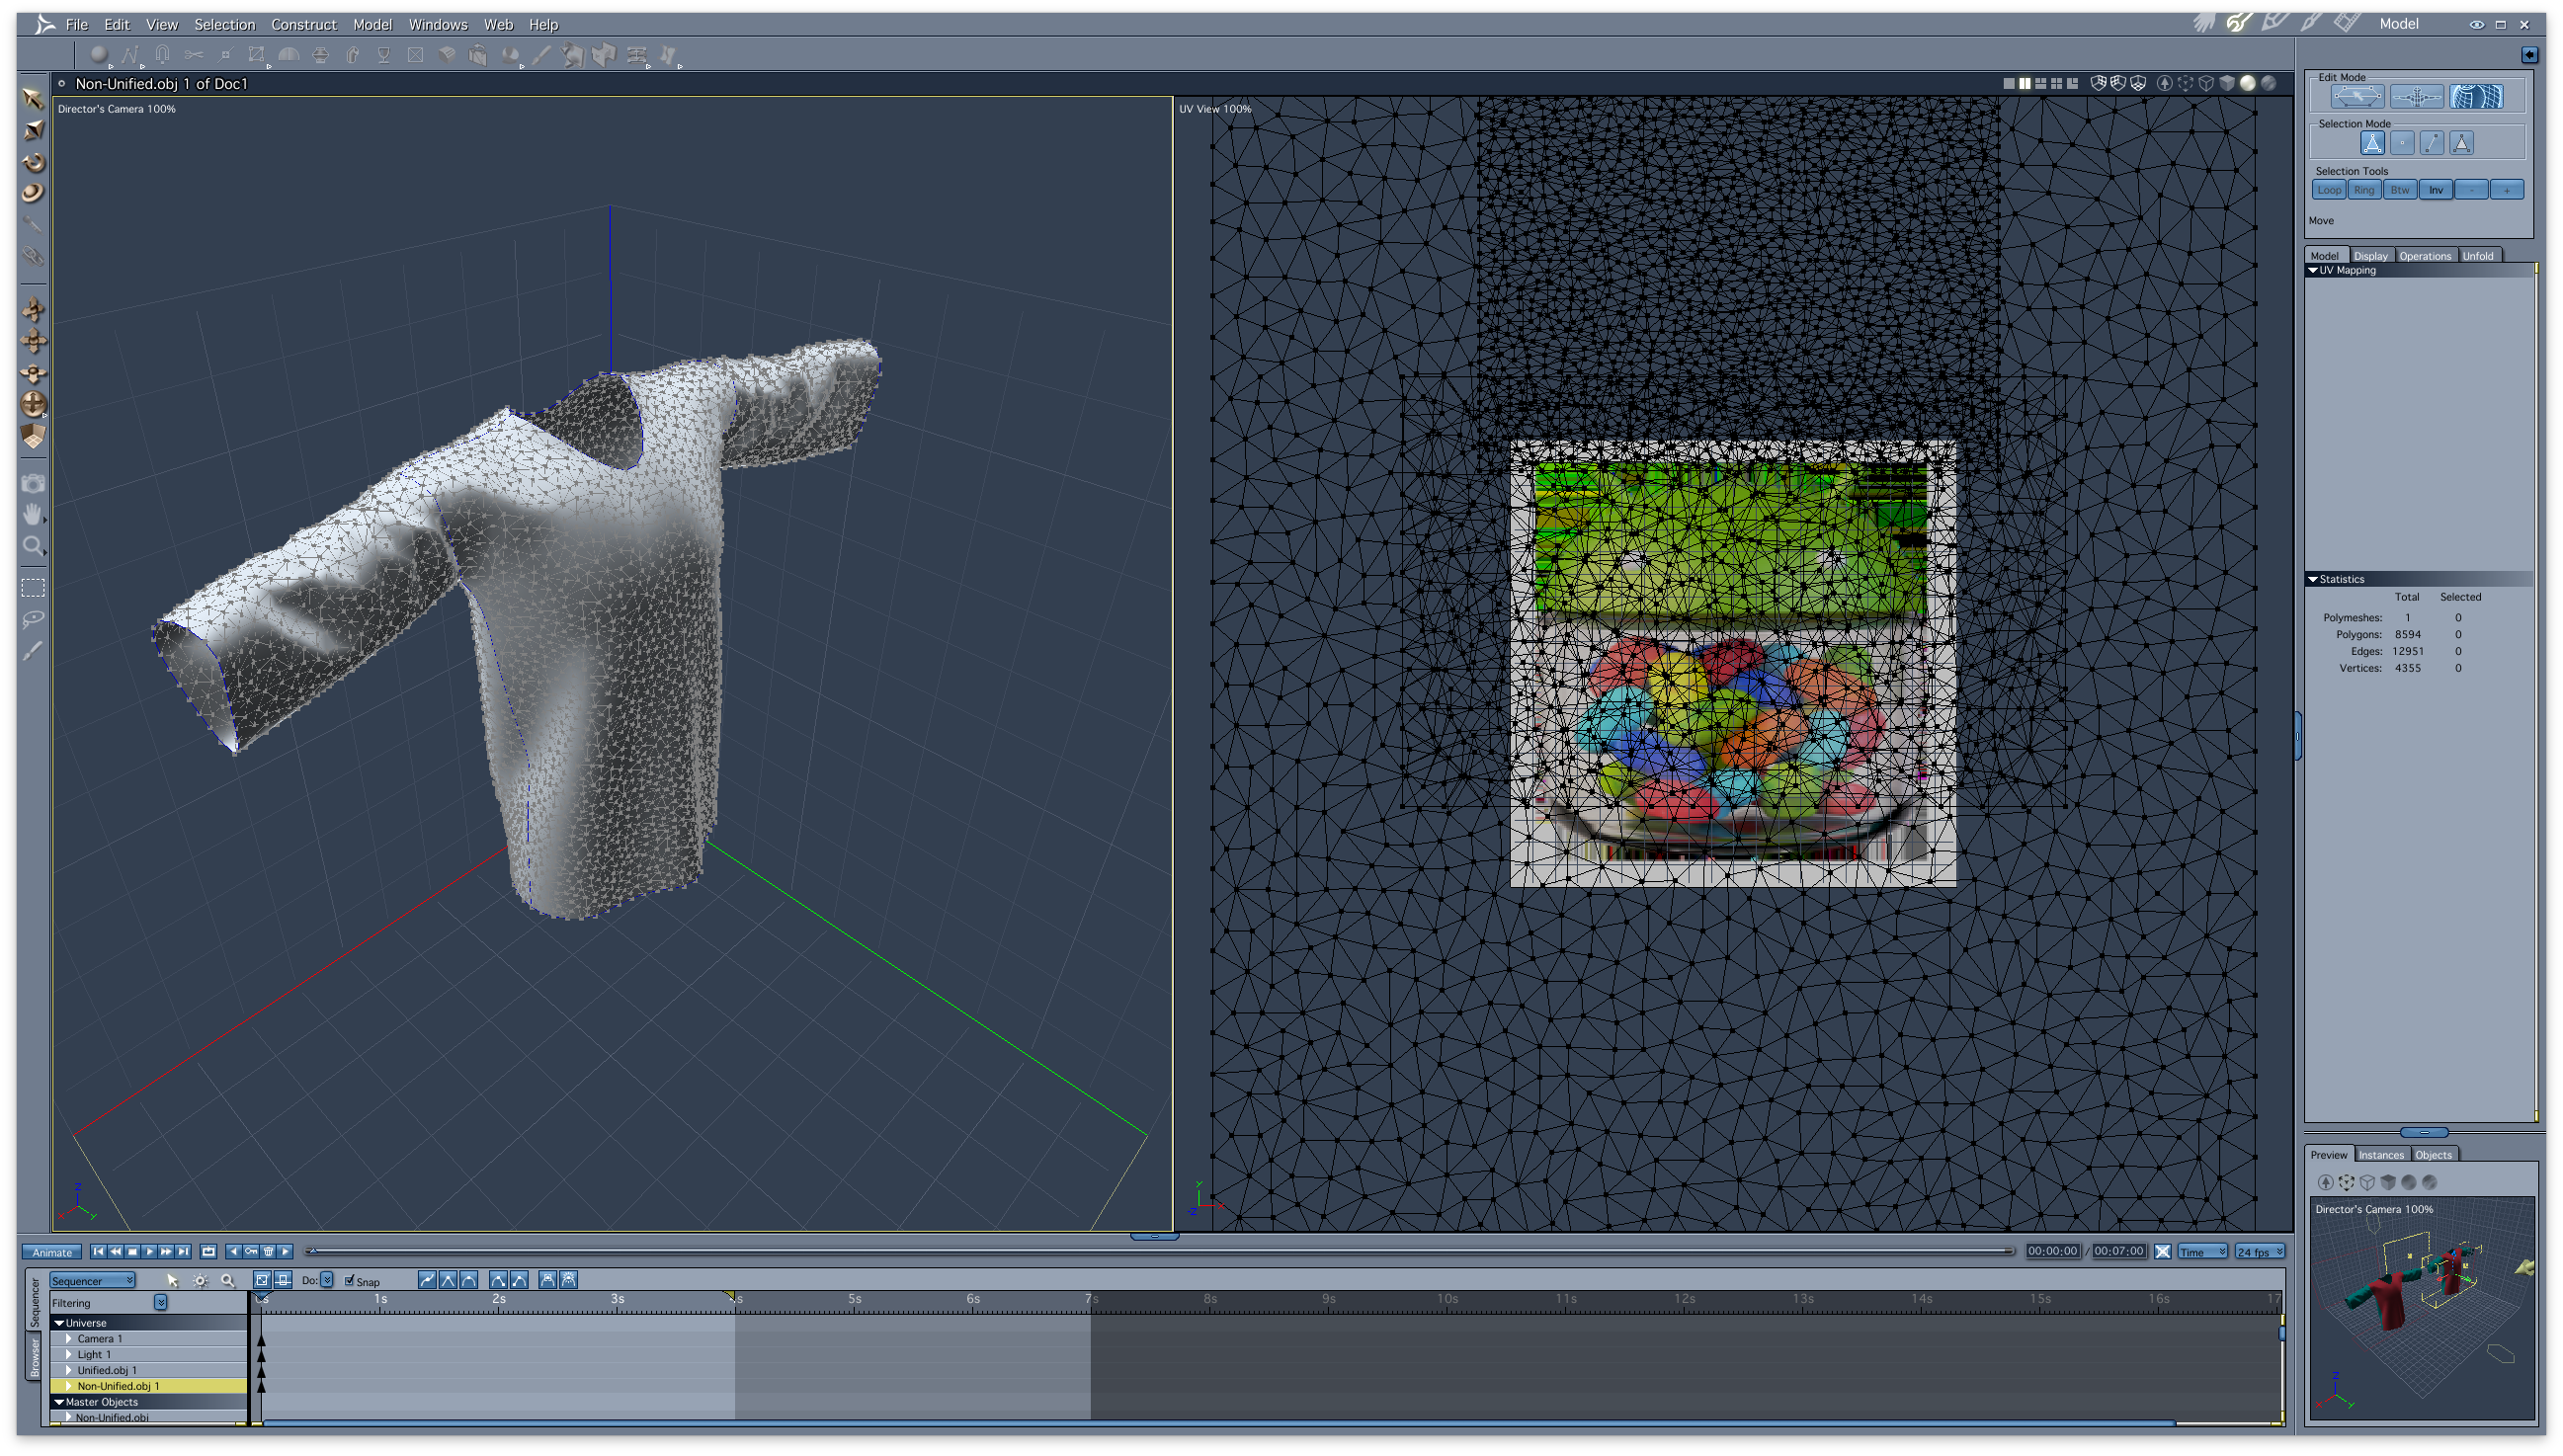
If the Unified UV Coordinates option is un-ticked, Marvelous Designer will assume you’re using an individual texture file for each piece of your garment. The scale between pieces may not be the same in relation to each other. It looks something like this:

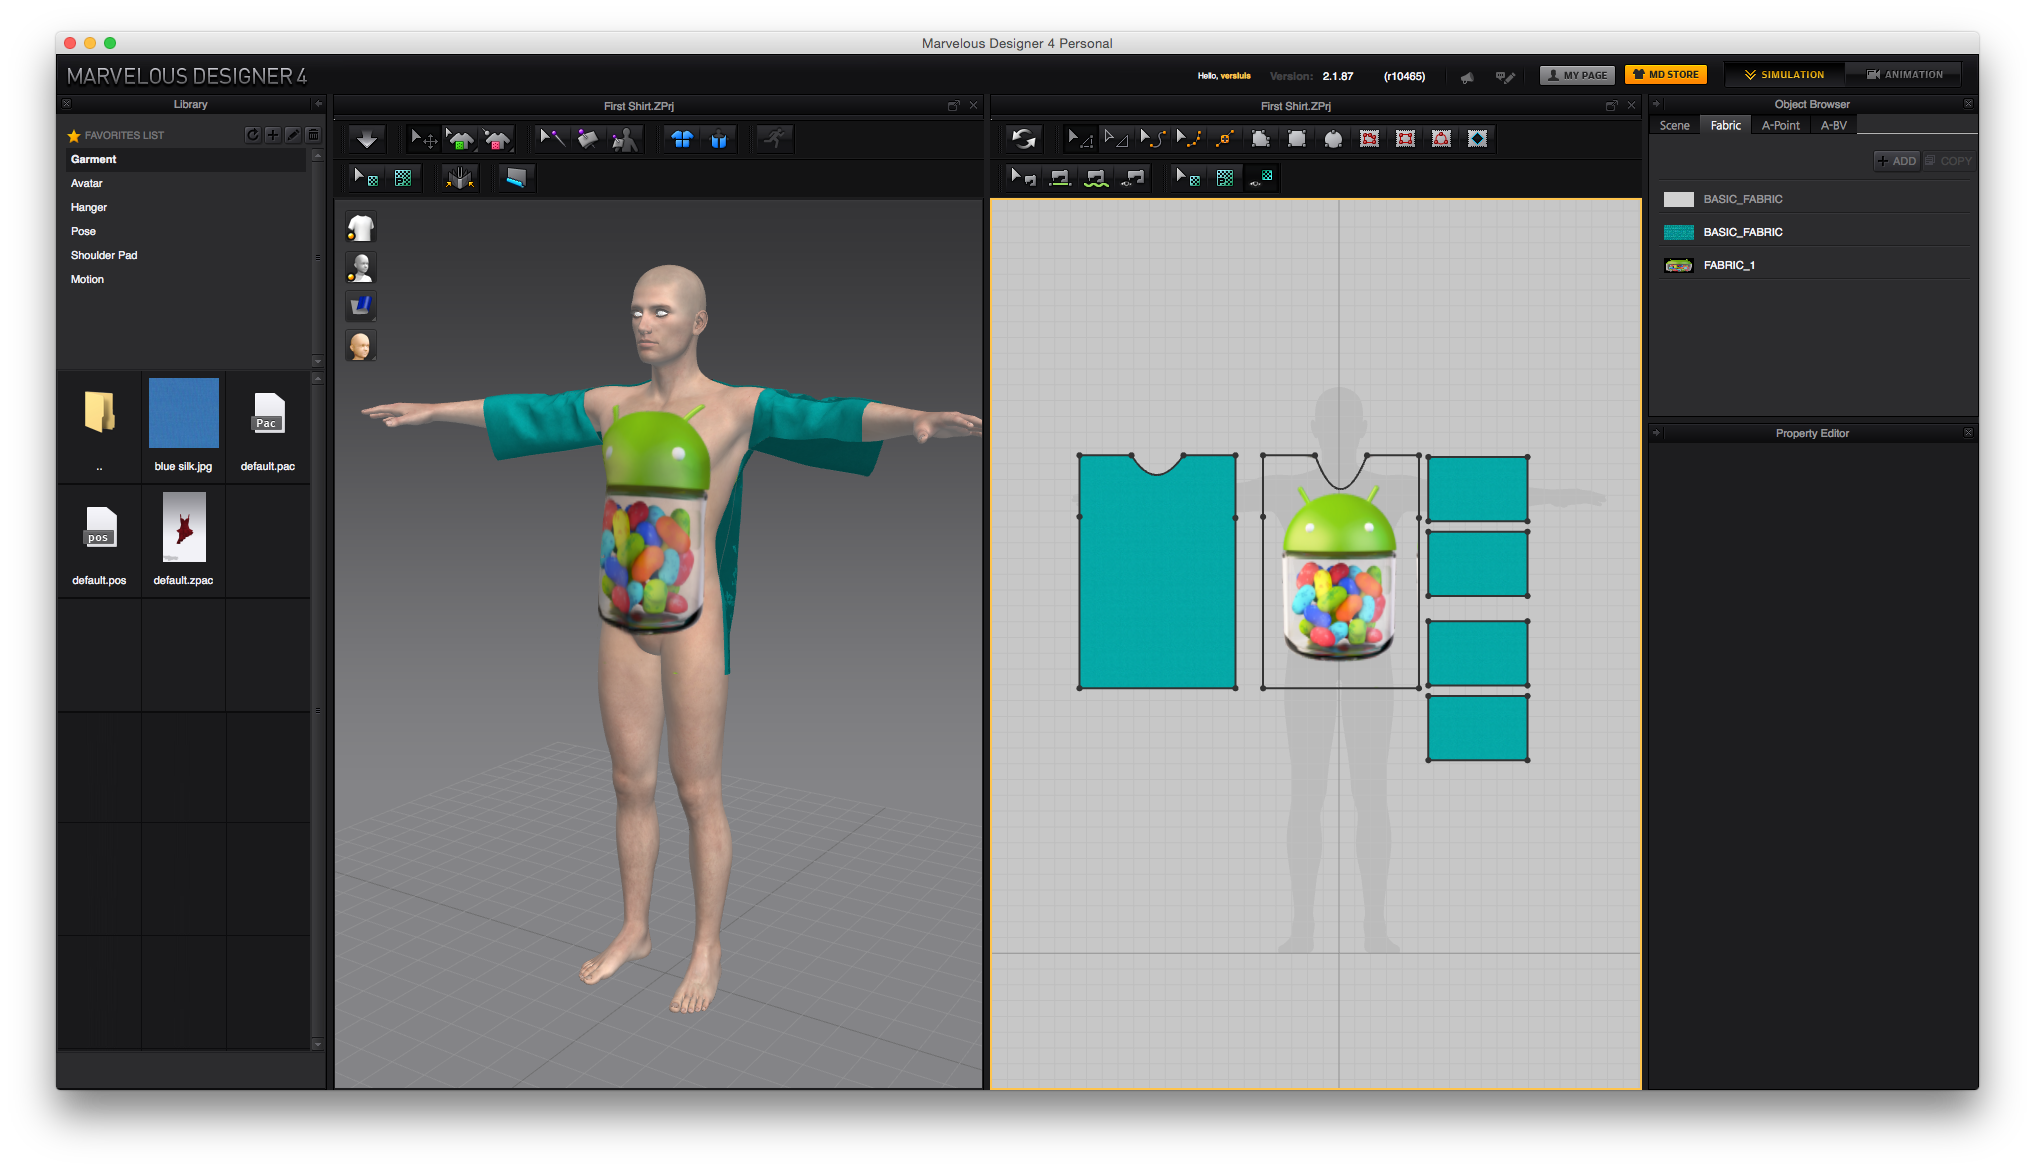
And to put this into more of a context, the original pieces in MD looked like this:

The UV Map will look as layed out in the 2D view: moving the pieces will have a direct impact on the position on the UV map when exported with unified UV coordinates.
Hit OK when you’re ready to export your garment. This will either create an OBJ and an MTL file, or a ZIP archive including these two files plus all texture patterns you’ve used.