In my previous article I’ve explained how to export an animation from DAZ Studio and import it into Marvelous Designer, where we’ve created and animated our garment. In this article I’ll show you the reverse: exporting the garment with animation and import it into DAZ Studio for rendering.
Here’s how this works in principle:
- export your garment animation from Marvelous Designer as OBJ Sequence
- import the sequence in DAZ Studio using Morph Loader Pro
- turn all those morphs into an animation
I’ve explained the whole process step by step in this video:
Exporting the garment animation from Marvelous Designer
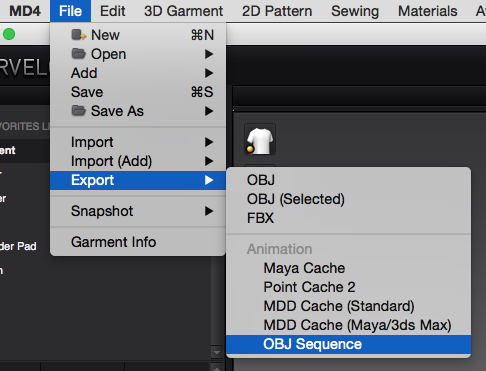
With the garment draped and animated, head over to File – Export – OBJ Sequence. This will create a standalone OBJ file for every frame of the animation.
An export dialogue will open, showing every part of your garment and your avatar in the list at the top. Deselect the avatar (in orange) so that only the garment will be exported.
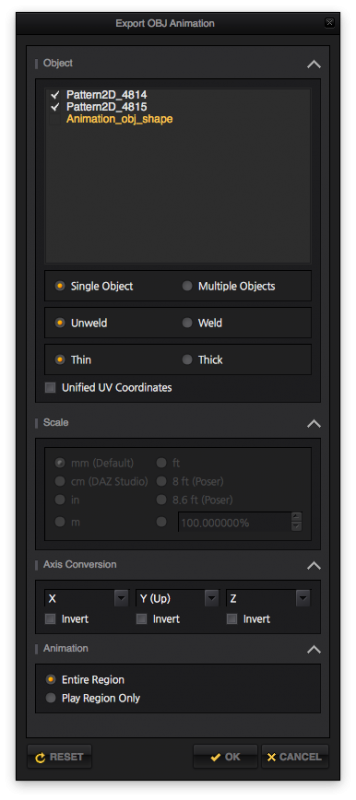
Sadly the avatar animation itself is not exportable: even with the avatar selected in the list, all we’ll ever get is a single frame of it, together with an animated garment. It would certainly be a nice feature to have exportable avatars in a future release. For now let’s deselect it to avoid trouble.
Notice that the scale section is greyed out in this dialogue: it’s a bug in the current version of Marvelous Designer. The export scale is set to mm, which means the garment will come in ten times larger than we want it to be in DAZ Studio. We’ll have to compensate on import. Make a mental note of this while this bug is present.
If your version is fixed, simply select DAZ Studio (cm). Make sure none of the axis are inverted.
Importing an OBJ Sequence into DAZ Studio
Back in DAZ Studio, head over to File – Import and select the first OBJ file in the sequence that was created by Marvelous Designer. You should have as many OBJ files as there are frames in your animation, and one MTL file describing the textures of each OBJ.
An import dialogue will appear. We’ll have a chance to fix the scale here: enter 10% instead of 100% to bring the garment in at the correct size.
If you were able to export at DAZ Studio scale in Marvelous Designer then this isn’t necessary of course. But until that bug is fixed, this is a feasible workaround.
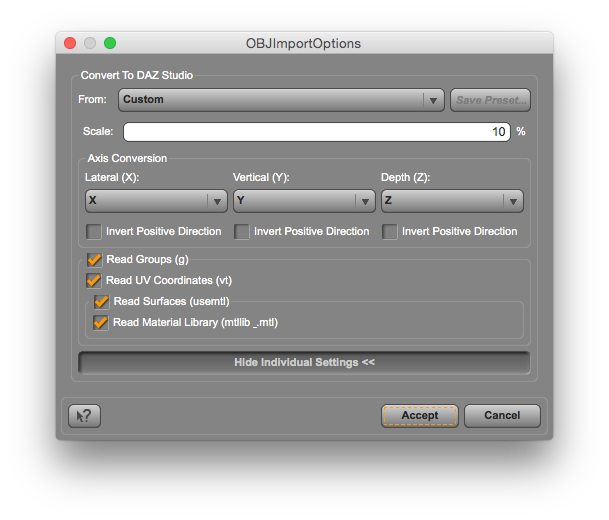
Your garment will appear in the scene, complete with textures. Make sure to select it in the scene tab.
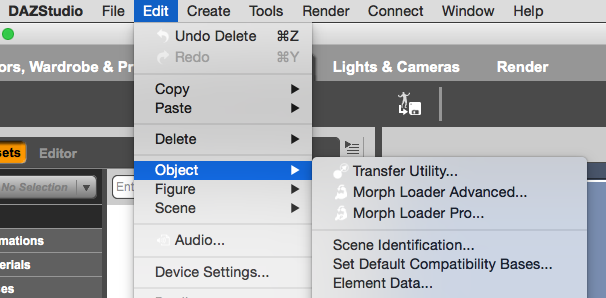
Now we’ll import the rest of the OBJ sequence using Morph Loader: head over to Edit – Object – Morph Loader Pro.
In the following import dialogue we must also set the scale for all further objects that are part of the sequence. Select “show individual settings” and set it to 10%, matching our first object.
Under Choose Morph Files, select all other OBJ files in the sequence except for the first one. Use the SHIFT key to select multiple files. Hit Accept when you’re done.
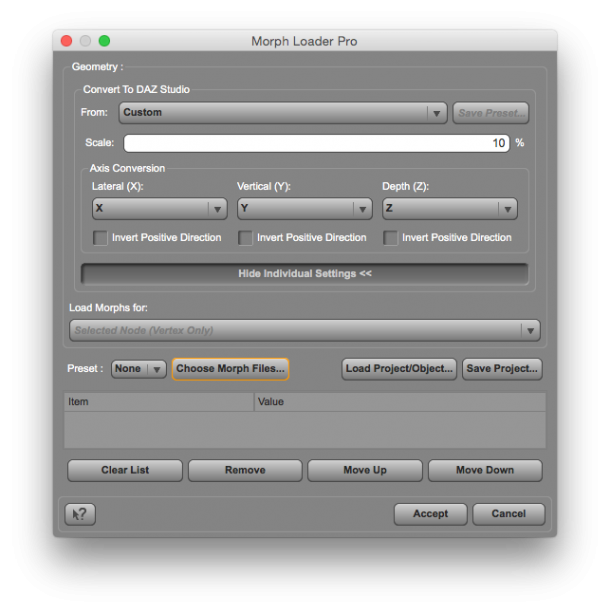
DAZ Studio will go to work and create a morph on our garment object for every frame of the animation. All we need to do now is switch on the correct morph on the correct frame of the animation and our garment will move just like in Marvelous Designer.
Creating the garment animation
Thanks to Marcus Wilm we can use a script which will do just that: it’s called animMorph and it can be downloaded from the following URL:
http://www.sharecg.com/v/76477/gallery/8/Script/animMorph- https://gist.github.com/marcuswilm/c2305cd494d54b9aba80bf5f43d0f7bf
UnZIP the file and copy its contents into your DAZ Studio application directory, into a subfolder called “scripts”. You’ll also find a scripts subfolder in your content directory, you can also copy it there. Copy the text, then save it as a animMorph.dsa and copy it into your DAZ Studio Library’s Script folder. You’ll be able to execute it from there.
Now look for it in the Content Library tab – you won’t find the script in the Smart Content pane. I’ve got it in both locations, which is why it’s showing up twice.
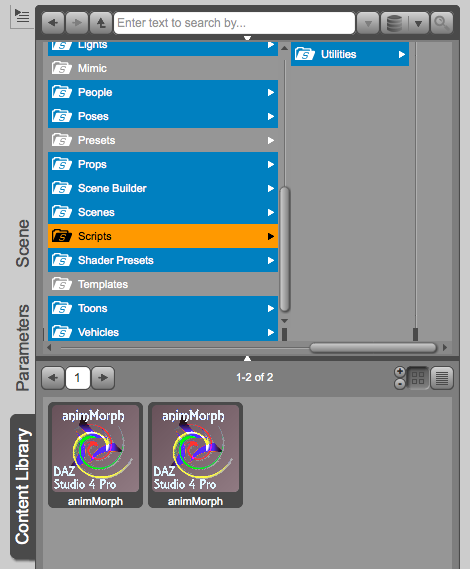
Make sure your garment object is selected in the Scene tab and execute the script with a double-click. You’ll see the following window:
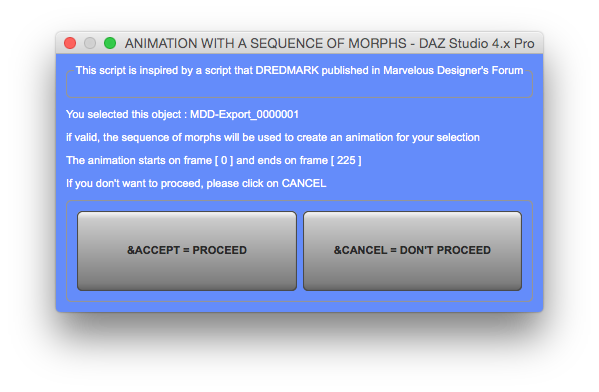
Hit Accept to turn every morph into a new frame of your animation. If all went well you can move the playhead and your garment should move in sync with your character.
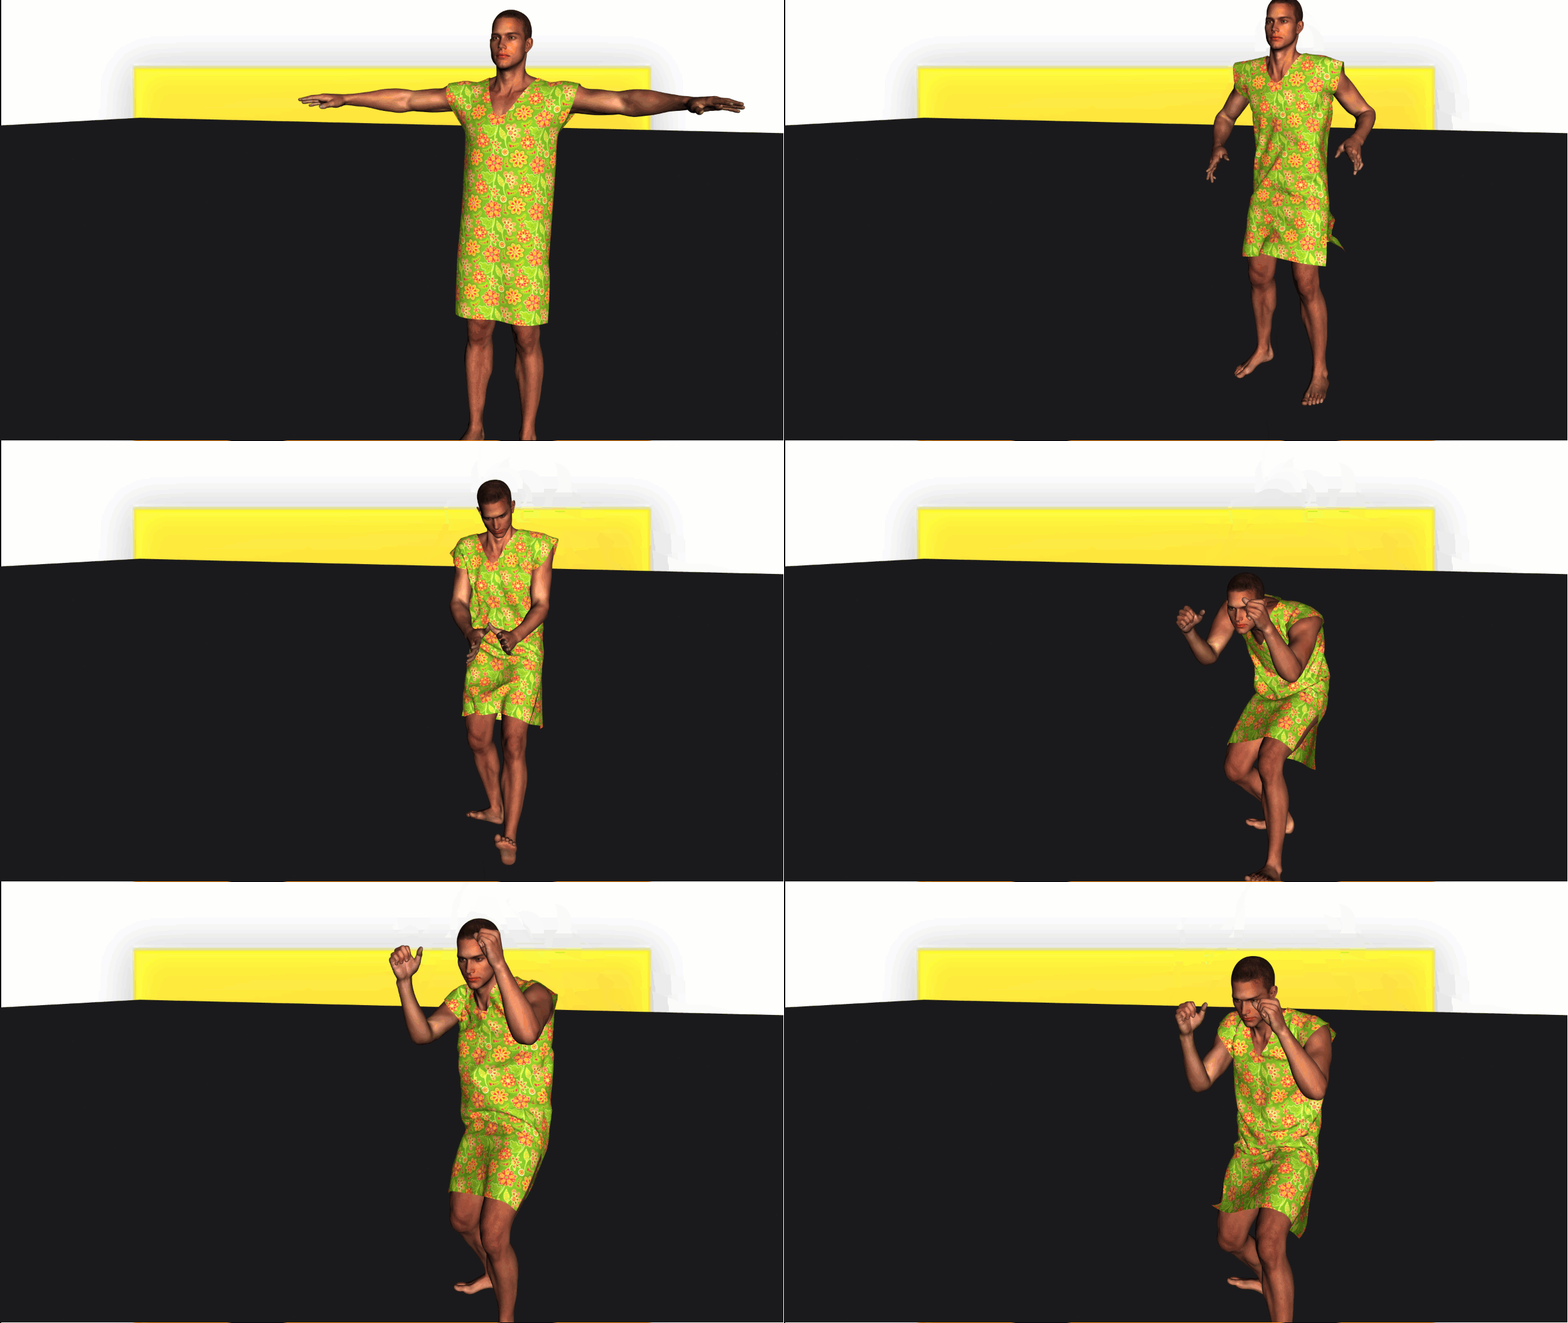
I’ve explained how to create the actual animation and how to import it into Marvelous Designer in my previous article.
Everywhere I wander,
you have wandered there before.
If I have a query now,
I don’t Google anymore!
🙂
Thank you again, just one thing I have forgot completely and I know I got the answer from here, just can’t spot it:
The view port in Daz, how do I resize that so I’m not rendering wasted space?
And if you could tell me how I render the back ground first, keep that render it in my view port for me to then add an animated character … I would be over the moon!
I can’t figure it out as when i click ‘save last render’ it is then unusable, what am i forgetting to do first maybe?
Tia! What a wonderful testimonial! May I use it? I always wanted a testimonial collection, and this is one of the nicest things anyone’s every said about me 🙂 And how is Wednesbury these days?
The viewport and previewing what you’ll render isn’t intuitive at all. It makes sense once you know it though. Here’s how it works: take a look at the little square at the top right hand corner of your viewport. There’s an option that says “Show Aspect Frame”. Select it to see the aspect ratio that will be rendered. Parts that will not be rendered are greyed out.
To modify how large your render will be, and what that aspect ratio is going to be, head over to your Render Settings. Under General you’ll find both pixels size and aspect ratio settings. Pick from several exciting presets (such as Widescreen 16:9 or Square) and you’ll see the Aspect Frame change in the viewport. Now you can frame and see exactly what will be rendered.
As for the background, that’s a little trickier. It depends on your workflow. To speed up renders, the pros don’t place the final figure into a scene – it takes too long to render both intricate background geometry and a detailed foreground figure – especially when the background is to be blurred a little bit. The easiest way to render is twice: once just for the background, and once just for the character. Then you can combine those two images in Photoshop & Co.
But DAZ Studio also has an option to replace the (usually transparent) background with an image. That can be good for preview purposes, or if you don’t have an image editing app. Say you had a character and otherwise nothing else in your scene, when you save the render as a PNG or PSD file, the background is transparent (not when you save it as a JPG though). To replace this transparent area with an image instead, open the Environment tab (under Window – Panes (Tabs) – Environment) and select the white square on the left, next to the Background section.
Note that the image must match the aspect ration of your rendering camera, otherwise it will be skewed. You could setup your full scene, with background set and character, then make the character invisible and render just the background. Now make all background elements invisible and replace the background image with that render. Then make the character visible again and render again.
To make that invisibilisation a little easier you can always group elements together so that you only have a single eye icon for both foreground and background elements. I’ve explained how to do that here: http://www.versluis.com/2014/11/how-to-group-objects-in-daz-studio/
Tia! What a wonderful testimonial! May I use it?
It’s yours, so you certainly can use it!
And wow to this massive response ….. I can’t wait to read it all and I bet the answer for changing the size of view port will come flooding back as i read.
Thank you so much for spending all that time to answer my questions, I haven’t read it all yet but I know your knack of putting things across in an ‘easy to understand’ way, will have me doing everything perfect in no time.
You are a star for what you do here, you really are!
Oh and Wednesbury (last time I was there 3 weeks ago) is still the same little town full of bostin people.
Although I now live in North Wales, (right next to the beach … we only have canal water in Wednesbury) … I will always be a Wednesbury Wench at heart lol
North Wales – it’s so lovely! Iv’e only been a couple of times, but I have very fond memories of it. Next time you’re looking out to the Atlantic Ocean, wave west – I’ll wave back at you from the shores of Miami Beach 🙂
Looks like the original script by Marcus Wilm is no longer hosted on ShareCG. However, he mentions in a forum post that there’s a better script with more options by a different author, and it appears to do the same thing:
https://sites.google.com/site/mcasualsdazscripts2/mcjobjstomorphingprop