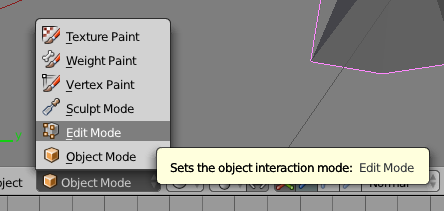
To edit a vertex object in Blender, we must first switch into Edit Mode. By default a scene is in Object Mode. Select an object by right-clicking it, then switch into Edit Mode by using the drop-down (or drop-up) menu.

The entire object may be selected, which is not exactly what we want. Hit A to deselect everything.
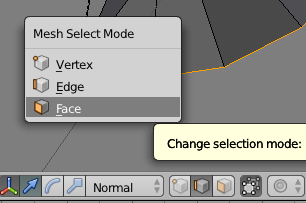
We have to manually select either vertices, edges or faces in Blender. There’s no auto-selection mode like in Hexagon. This is done either by using the three icons at the bottom, or by selecting CTRL+TAB which brings up a context menu.

Then right-click to make a selection. Hold SHIFT to select multiple vertices, edges or faces.
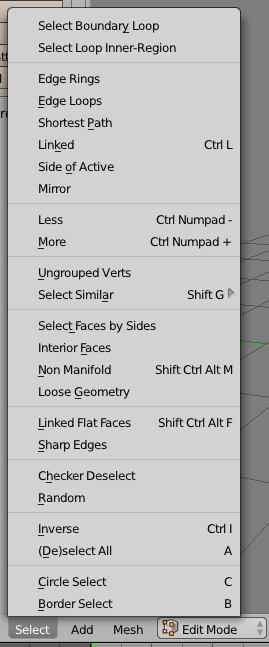
 Several handy options are hiding in the Select Menu at the bottom, many of which can be accessed by shortcuts. Here are some of the more valuable ones:
Hold down ALT and select an item to loop the selection where possible. You can select multiple loops by repeating the selection while holding SHIFT.
You can grow and shrink the selection by using CTRL+ and CTRL- respectively.
You can create rectangular by clicking B, followed by drawing our a rectangle over a range of items.
Likewise, you can hold C to bring up a circle. Swipe two fingers up or down to change the size of the circle, then click to select any items inside the circle.
These selections work on any items than are visible, which means only those facing the camera. To include hidden vertices, edges and faces, select the “x-ray” button at the bottom menu, right next to the vertex/edge/face selector. The option is called “Limit selection to visible”.
It’s difficult to see when it’s active: if you can see a wireframe on your object, showing hidden faces, then your selection will include hidden faces.
