If you’ve used grouping or parenting in other applications, it may throw you off guard how Blender thinks about those things. A little explanation is in order to bring clarity to our cluttered 3D minds.
Usually we can group objects together so that when we select one object, all others in the group are selected at the same time. In other applications, grouping and parenting are the same thing, but not in Blender. Groups are in itself only of limited use, while parenting is what other apps call grouping (from what I understand).
Grouping
To group several objects together, select them all by holding SHIFT and right-clicking each object, then select Object – Group – Create New Group.

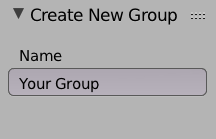
On the right hand side you can name your new group. Note that if you miss this opportunity, there doesn’t seem a way to do this later: I haven’t managed to find a way to even display groups in the current scene.

The outline of all your selected objects will turn green, and any transform action will affect all selected objects at the same time.
In the scene hierarchy however, neither the group is displayed, nor are any of your objects parented. In fact, the group itself doesn’t even show up. It’s as if nothing has been grouped at all.
We can however instantiate a new group in another scene, in which our group will behave like a cohesive object. To do so, select Add – Group Instance and select your (hopefully named) group. This will insert all your objects (and a null object) together as one into your current scene. It will even show up in your scene hierarchy now.

Parenting
Parenting is what other apps call grouping: you move the parent and all children move, but you can move a child individually without the parent moving. Besides it tidies up the scene hierarchy via collapsable little icons.
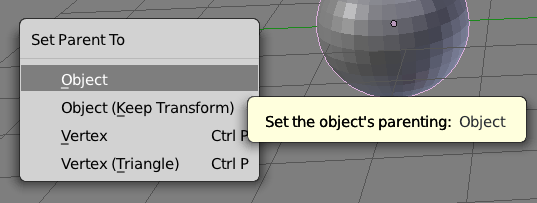
To parent objects in Blender, select all objects, making sure that the last object you select will become the parent. If you’ve made a mistake in the selection order, hit A to de-select everything and start again. Click Object – Parent – Object, or use the keyboard shortcut CTLR+P.

When you do, a small pop-up window appears. Select Object again and you’ve built a relationship in the scene hierarchy.

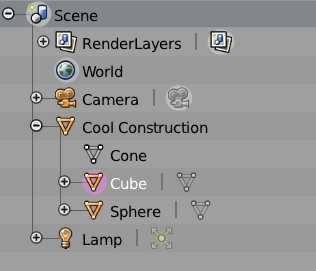
The object selected last will become the parent. Feel free to rename it for the whole group to make more sense. Now the familiar plus/minus icons let you collapse large scenes into something more manageable.

Consider adding a null-object to the scene and select it last to make it the parent – this assures that you can still move the last object independently from all the others. You can do this under Add – Empty.
Unparenting
If you no longer want an object to be part of the parent group, select it and click Object – Parent – Clear Parent. This will return the object(s) back to the scene root. Alternatively, use keyboard shortcut ALT-P.
“Note that if you miss this opportunity, there doesn’t seem a way to do this later: I haven’t managed to find a way to even display groups in the current scene.”
To view and rename your group after creation, go to Outliner and choose Groups from the drop down filter that by default says All Scenes.
Your groups will show up there and you can rename by double clicking on them.
“If you’ve made a mistake in the selection order, hit A to de-select everything and start again.”
You don’t have to deselect everything; you can just hold shift to deselect anything that shouldn’t be a child. To select a new active object to be the parent, just hold shift and right click on it.