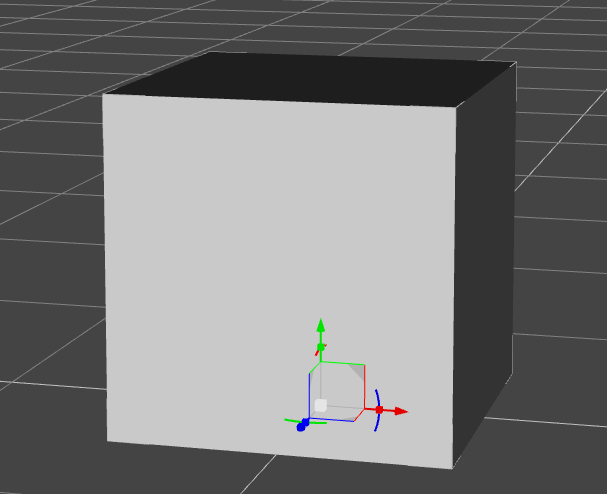
The pivot point is the location at which the universal manipulator gizmo is shown on a 3D object. From this point you can usually move the object, or rotate it around this very point. Blender calls this the “origin point”, while Carrara calls it the “hot point”. I’m not sure if DAZ Studio refers to it as anything in particular.
The location of the pivot point is of strategic importance, and it may not always be where you want it to be. New primitives and figures usually have it at the centre bottom, which works well for positioning the whole figure.
It can however be undesirable when you’re trying to rotate an object (like the cube below) around its centre. We’d need the pivot point to be at a different position to pull this off.

But how do we change its location in DAZ Studio? Let’s find out.
We need to use a magical tool for this quest, known only as the Joint Editor. It’s a powerful thing, not for the faint hearted, and usually only needed when it comes to rigging objects. The casual DAZ Studio user would ordinarily not have to touch it.
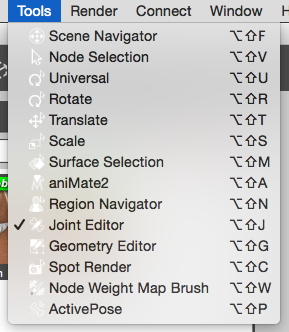
Switch to the Joint Editor by heading over to Tools – Joint Editor.

Alternatively you can use the little “pencil and bone” icon if you have it (it depends on your workspace).
![]()
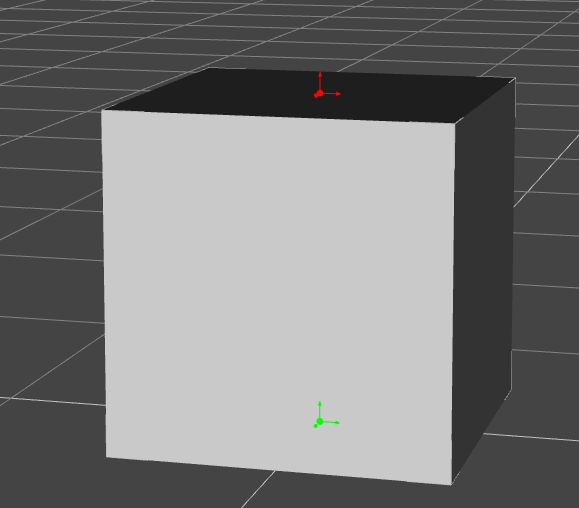
As soon as you switch to the Joint Editor, you’ll see the universal gizmo in your scene change into two smaller gizmos: a red one and a green one. Notice that the latter is in the position of the previous universal gizmo.

To move the pivot point, drag the green gizmo to a position of your choice. For exact positioning, switch the viewport to another camera, or use multiple viewports. For rigged figures, make sure you select the main figure and not a sub-part of it (like the pelvis or an arm).
Don’t worry about the red gizmo: moving it won’t do anything for our purposes. In rigging, a bone would be displayed between the green and the red gizmo, and dragging them apart changes the size of the bone. Just thought I’d mention it, because I know you’re curious 😉
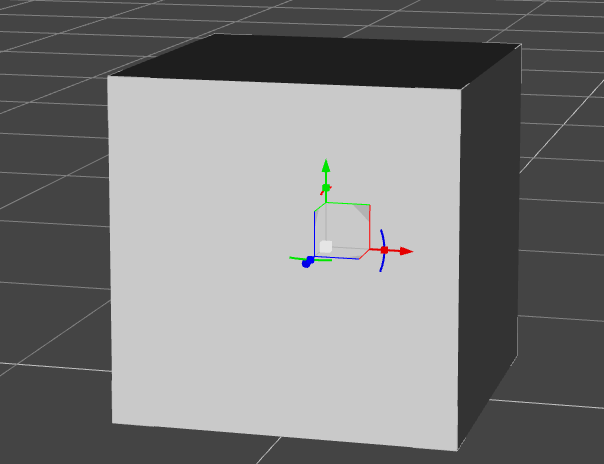
With the green gizmo in a new place, switch back to the universal manipulator to see your handy work (under Tools – Universal, or click the little “four-way arrow and circle” icon). Lo and behold: the pivot point is now in a new position.

Thanks to Szark in the DAZ 3D forums for this tip.
I tried this exactly. I moved the green gizmo expecting it to leave the object where it was, but instead the object moved as well, staying in exactly the same relative location. So the green gizmo basically did nothing. There should be an easier way!!!!
This worked to perfection, thank you for your help
Great, glad to hear it!
Moving the green gizmo also moves the object. You then have to move the object back in its exact precedent location (which is basically impossible without a vertex snap). A great potential in a shitty UI : DAZ.
Can’t edit my post so I’ll have to write a new one. Instead of moving the gizmo which is not really a solution in DAZ, think as you’d have done it in 3DS Max (another 3D app with a terrible gizmo) : Create a Null object. Place it (its gizmo) and orientate it the way you want. Then parent your object to the null object. And there is your new pivot.
That’s another nice workaround, thanks for sharing!
i did exactly what jay wrote and it worked perfectly.the gizmo’s people refer to are also known as the Cartesian coordinate system.