When texturing an existing model, I find it helpful to start from scratch and apply a simple basic material to an object. The same is true if I’ve been modifying something so much that I forgot where things went awry, and a “reset surfaces” button would be handy.
The good news is that there is something like that built right into DAZ Studio. Here’s how to use it.
First, select your object and all surfaces you’d like to reset. Do this in the Surfaces Tab, or use the Surface Selection Tool.
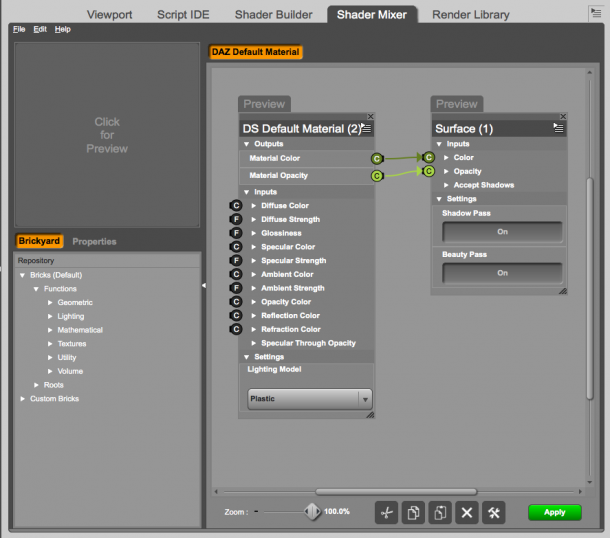
Next, head over and open the scary Shader Mixer. It’s actually less scary than it looks. The tab is hiding under Window – Panes – Shader Mixer. You’ll see something like this:

This tab is very similar to the Advanced Material room in Poser. The DAZ Default Material is a light grey and is always there as a sample as soon as you open the Shader Mixer. The “bricks” (or nodes) in the middle of the screen are a different representation of all the options in the Surfaces Tab.
To apply this default material, simply click the green Apply button at the bottom right. Now your object will turn grey, and all those nasty dials you’ve been playing with are reset: all image maps and exotic options are removed.
Wait! Where are the Bump and Opacity channels gone? And all the other exotic options I remember?
They are not part of the basic shader, and there’s no easy way to enable those. Here’s a workaround to bring them back:
Create a new primitive and head over to the Surfaces Tab and select everything. Notice that all those missing channels are available here. Don’t ask me why. Now apply a texture to the channels you’d like to use (any image will do). Any channels without a map will not be imported in the next step.
In the Shader Mixer tab, head over to File – Import from scene. This will bring in the shader and create a node for every texture you’ve applied. Don’t worry if the visual representation doesn’t make sense.
Now select the object and surfaces on which you want those channels (i.e. your original object) and hit Apply at the bottom right. Lo and behold: your object will now have those missing channels, including the image you’ve applied.