Smart Objects are a great way to employ non-destructive editing in Photoshop. The idea is that Photoshop “remembers” what was applied to a layer rather than apply an effect.
Take a background image with a blur effect applied for example. You could simply select the layer, head over to Filters – Blur – Gaussian Blur and apply the effect. However if you decide you needed a little more (or less) blur on your image, then you’re stuck – unless you’ve made a copy of your original image first.
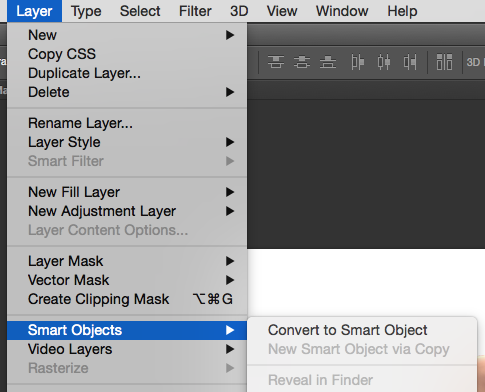
This is where Smart Objects come in handy: before you do anything destructive with a layer, head over to Layer – Smart Objects – Convert to Smart Object.

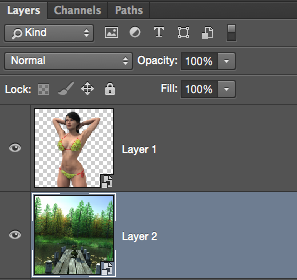
Notice that little extra icon at the bottom right corner of your layer thumbnail. This shows you that a layer is indeed a Smart Object.

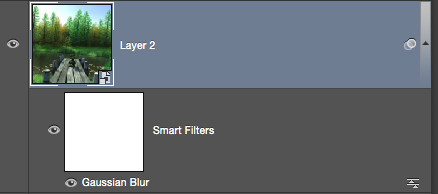
Now apply a filter, just like you always do: head over to Filter – Blur – Gaussian Blur (for example). And there we have it: your layer isn’t just blurred, it now gets another editable tab applied so you can modify the value of your filter later. Simply double-click on the effect and you get the filter settings dialogue again.

Smart Objects work for other image editing options as well, for example transformations, scaling, distortions, warps and all the other good tuff.
If you ever want to get rid of a Smart Object and apply the effect to the layer, head over to Layer – Smart Objects – Rasterize. It’s like applying the operation directly to the layer.
There’s a ton of other stuff you can do with Smart Objects. This Adobe article explains more: https://helpx.adobe.com/photoshop/using/create-smart-objects.html