Wardrobe Wizard is a Python script that has been included with Poser since version 8. It allows us to convert clothing that was made for one particular figure and use it on another using a set of intricate calculations.
By default, Wardrobe Wizard will allow conversions between most Poser characters (Rex, Roxy, Simon, Sydney, etc) – but there are add-ons available that allow conversions to and from Genesis, Dawn, Victoria 4 and many others.
The script was not created by SmithMicro, but instead by PhilC who kindly sells these add-ons on his website http://philc.net (the link is also available from within Poser).
Let’s see how Wardrobe Wizard works in Poser Pro 2014.
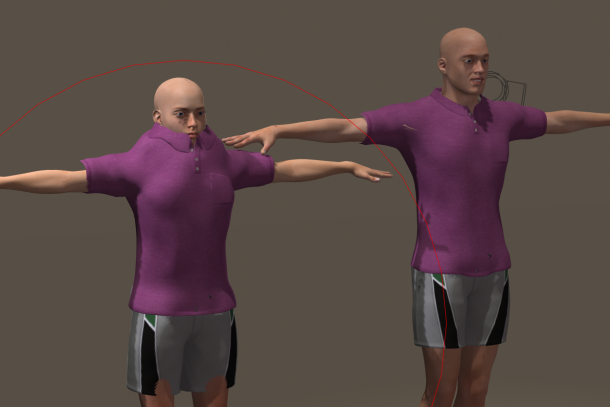
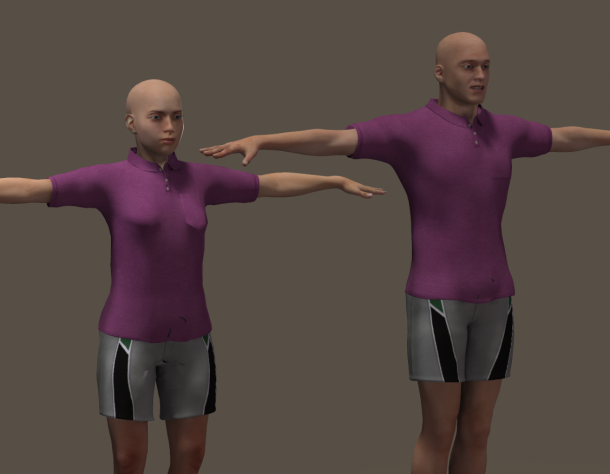
For this example I’m using Rex’s Polo Shirt and Shorts. The items fit Rex nicely (right), but for Roxy they’re just a little bit too big (left). Just like in real like I guess 🙂
Starting Wardrobe Wizard
Be warned: this is not a one-click solution, but rather an exercise in patience, involving a great many clicks. Don’t be put off by this though, I’ll explain how to do it step by step.
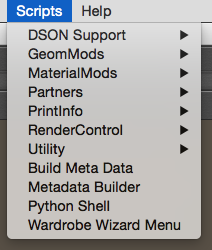
First, bring up the wizard by heading over to Scripts – Wardrobe Wizard.
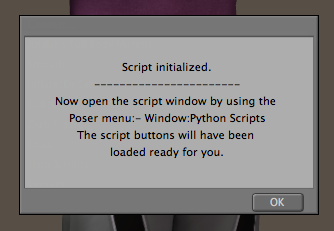
This will bring up a modal window telling us that we need to open another window manually. You can find it under Window – Python Scripts.
Said window is a palette that has all the Wardrobe Wizard options on it. Feel free to dock it or leave it floating around.
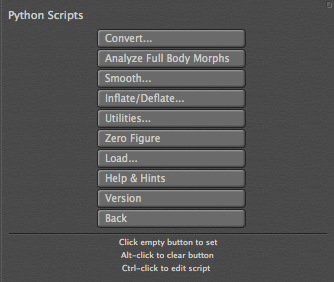
These options are all described in the Poser manual in greater detail, as well as on PhilC’s website. While you can do a lot with this script, I’ll focus on the basic usage here.
Hit Convert… and a new window appears.
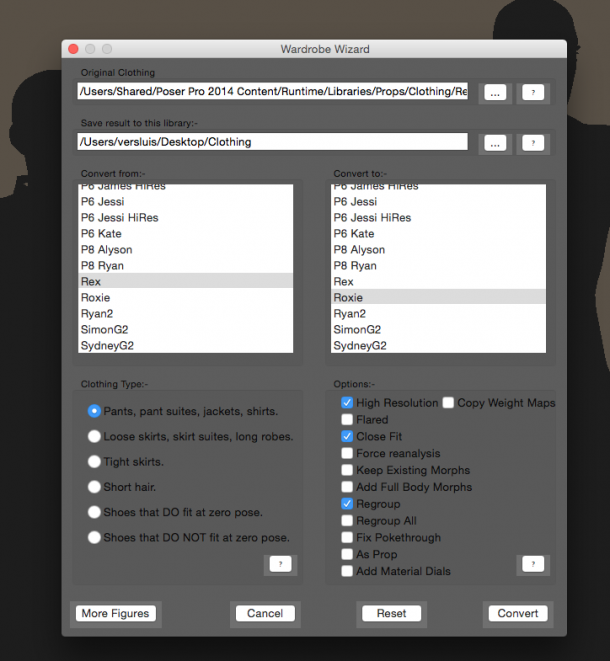
Converting Clothing
The Wizard does not require the items you’d like to convert to be loaded in the current scene. Instead you must navigate to them using the Original Clothing option at the very top. This is probably the most excruciating step, because how would we know where to find the item that Poser shows me in its library?
Well Poser has a hidden “show full path” option, although I must admit that it’s a little difficult to find. At the bottom of your library, click on the grey ribbon like handle and navigate to Display. Check the option Extended Details Panel to show something like this:
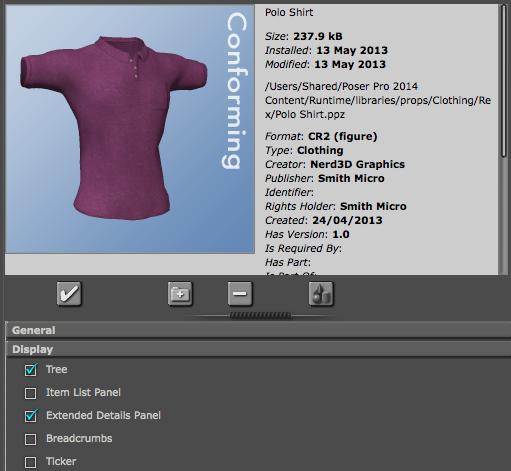
See the entry just underneath the date? That’s the full path to this item of clothing. Select another one and see the values change. Make a mental note of the location and navigate there in the Wardrobe Wizard.
Note that to show the current library item’s details, the Wardrobe Wizard window must be closed. Yes I know… there could be a MUCH more elegant way to do all this.
Anyway, navigate to one (or multiple) items of clothing manually. Note that for each item of clothing you’ll find FOUR files:
- a PNG thumbnail
- a PMD file
- an XMP file
- and a PPZ file
You may find other extensions, depending on the type and age of the clothing item, and if the item is compressed or not. This article sheds some light on the subject, although it doesn’t adequately illuminate it. My item is a compressed prop, so I’ll choose the PPZ file. The wizard will tell you if you’ve mis-picked a file.
Under “save result to this library”, navigate to a runtime folder of your choice. Your default runtime is picked, but any other one will work fine too. It can’t be an empty folder though, otherwise the wizard will complain. I’ve described how to create a Poser runtime folder manually in this article.
Now pick which source figure the item was made for, and select a destination figure. You can buy support for other figures by clicking on the More Figures button (opens a browser window).
In the bottom part of the wizard window you can select what type of clothing you’re converting. Select the little question mark icons for detailed explanations of the options.
With all that selected, hit the Convert button at the bottom and the script goes to work. You’ll be informed of the progress with a Python console output. Depending on the complexity of the item it can take a moment or two.
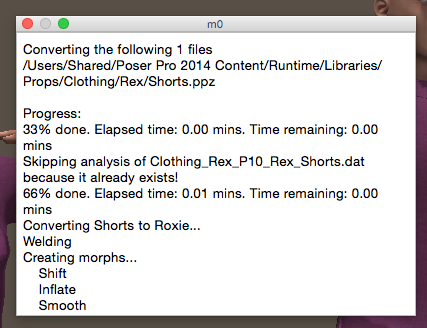
Using your new clothes
When the wizard has finished, the items in your current scene are unchanged. Navigate to your destination runtime and open Figures. By default, the wizard will convert items to figures, unless you specify otherwise. Search for a folder beginning with WW, followed by the name of your destination figure (WW Roxy in my case).
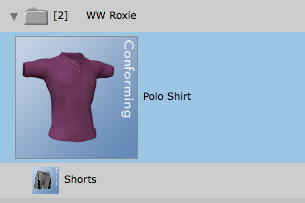
Now drag the item onto your figure and – with a bit of luck – it should fit much better than before.
While this isn’t a perfect solution (nor a perfect usage example mind you), you get a lot more mileage out of your old clothing cupboard using Wardrobe Wizard. Yes it’s clunky, yes it’s cumbersome and complex, but the script does a lot under the hood, including adjustments to the rigging and material groups.
An alternative to Wardrobe Wizard is the Poser Pro Fitting Room which works with physics and collision detection to fit clothing on characters. We’ll discuss how it works in another article.