When you’re rendering a multi-camera animation, chances are you want to change shots from one camera to another. This means that you have to render your sequence from all camera angles and then employ an editing application to stitch your shots together.
There are several drawbacks to this approach: for one, a lot of render waste will accumulate for the images you don’t want to include in the final animation. Another is the time it takes to render an animation several times – as if one pass doesn’t take long enough already.
Thankfully there’s a free script that can help us render much more efficiently, and create the whole sequence in one pass: it’s called CamSeq by the amazing mCasual / Jaques (thanks, Jaques!)
Here’s how to use the script in DAZ Studio 4.8, step by step.
Installation
Download the zip file at the bottom of this page. It’s the tiny blue arrow on the right. UnZIP it and have a look in a folder called scripts – mcasual. You’ll find several files here, but we only need two of them: camseqDS3DS4.dsa and a corresponding PNG file (it’s the logo).
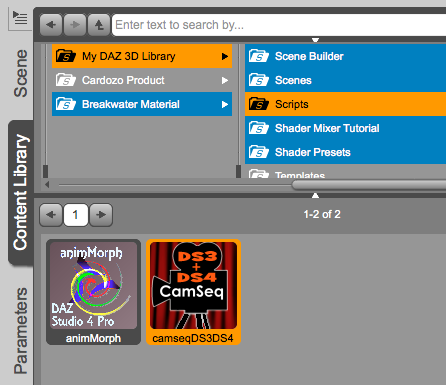
Copy those and paste them into your main DAZ3D Library, into a folder called Scripts. Now you can access the script by navigating to it in your Content Library.

Prep Work
At this point we’ll assume you have several cameras in your scene, each of which will provide a vital part of your final animation. Make a note at which frame your cameras change shots, as this information is needed by the script.
Before we launch it, create a new camera and call it Camera Main (exactly like that, do not deviate from this precise capitalisation). This will be your render camera. Apply the default settings when you create it, all framing and movement information will be overwritten in a moment.
Switch to the new Camera Main and check your render settings at this point:
- have you got the right dimensions?
- have you got the right render engine? (Open GL is good for quick previews)
- have you selected the right output directory and file name?
and so forth… we both know the drill, and there’s always something we forget. That’s what makes us human.
Using the script
Navigate to your Scripts folder and double-click the script. A friendly dialogue window opens which explains more or less what I’m explaining here.

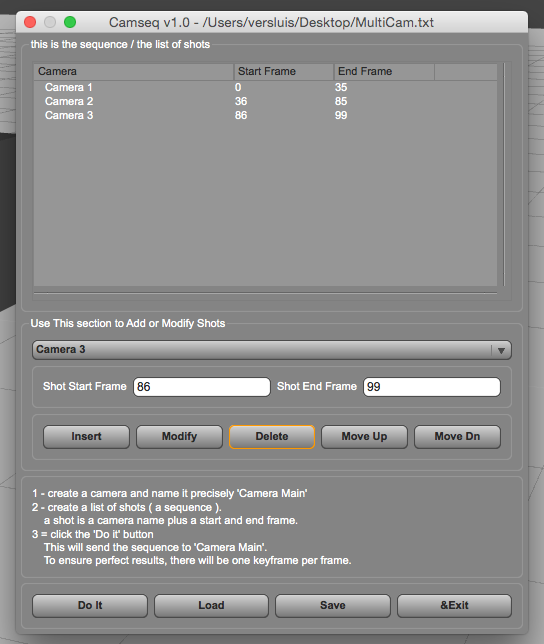
Now it’s time to make a shot list: enter which camera will shoot which frames, then select Insert to add your shot to the list at the top. You can move and modify the shots as you see fit. Make sure you don’t overlap frames, otherwise you’ll get nasty stuttering at your edit points.
It’s a good idea to save your shot list using the Save Button at the bottom before you start rendering, in case you want to make any changes later. The script will save a simple text file for your shot list.
As soon as you hit the Do It Button at the bottom left, the script will create a keyframe for each frame of the new Camera Main, transferring the values from your existing cameras. This is an ingeniously simple approach in my opinion! Close the window by hitting Exit.
With your Camera Main displayed, move the timeline slider and see your camera change shots. Render it out and see your animation after a single render pass. Happiness!
Thanks to Robert Schneeweiss for bringing this script to my attention 😉
Kindly make more daz tutorials 🙂 I’m learning stuff from you. Can you make daz tutorials more about the blurring of images again? Tried it a while ago and it didn’t really blur the background? Was it because when I rendered I chose the camera and not the perspective view? Hope you do videos as well on YouTube since there aren’t a lot of tutorials about daz on YouTube that at least I can easily understand as a new daz 3D studio user. Thanks for the tutorials again 🙂
Hi Branson, that’s a great idea – I’ll give it some thought. I totally agree, there are a ton of Blender videos, but not many that explain DAZ Studio. Here’s my YouTube channel. Perhaps I’ll start by making a screencast about depth of field 🙂
About that: depth of field (or blurry background) only happens when you render a camera, not when you render the perspective view. The camera must have depth of field enabled for the effect to work. Here’s an article that explains it for 3Delight: http://www.versluis.com/2015/04/how-to-render-with-depth-of-field-in-daz-studio/
Hope this helps!