I have previously shown you how to add thickness to an object using the ZBrush Move Tool. While that method may have had its uses in the past, it is hugely cumbersome and can’t really be used on a complex object.
So today I’ve learnt how to achieve the same thing using something called Panel Loops. It a nutshell, with this feature ZBrush splits the whole model into separate little objects, adds thickness to them and merges if all back together again. It even adds Polygroups for all those little bits too.
Panel Loops can be used to create the backside of an otherwise single sided object (for example, a dress exported from Marvelous Designer).
Let me show you how to use it briefly.
We’ll start again by using a 2D plane object, perhaps the Plane3D object in ZBRush. Drag it out on a new canvas, hit Edit Mode, turn the object into a PolyMesh3D and spin it around. Notice that it has no thickness, and the backside isn’t visible. Let’s change that.
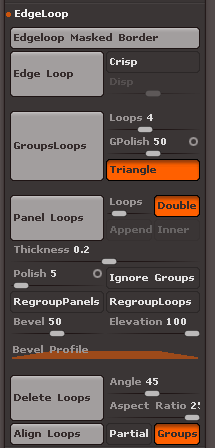
In the Tool Menu, under Geometry, find a collapsed section called Edge Loops. Marvel at the plethora of scary options and ignore most of them. Cast your eye at the big grey button called Panel Loops.

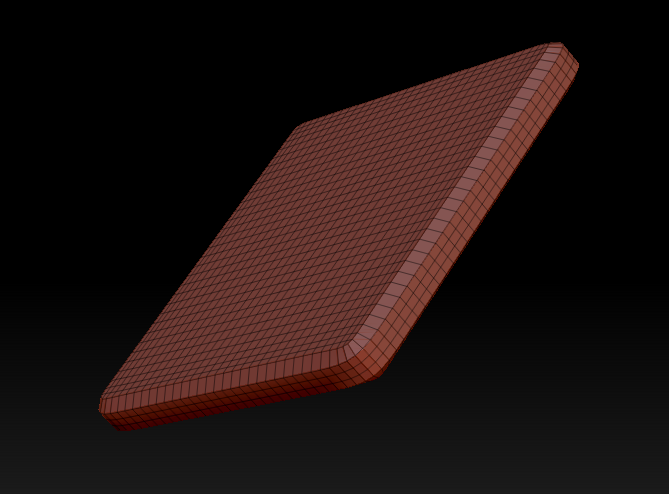
Just underneath that big button is a Thickness slider, set to 0.01 by default. Play with the value and hit the Panel Loops button to see what happens: your flat object is extended into something like a flat cube. Hurra: our 2D plane now has thickness and a backside (thanks to the Double option).
The only other options I understand in this menu are Bevel (how much and what profile will be applied at the outsides of your thickened object) and Ignore Groups (if your object has Polygroups, those would be treated as separate objects, or ignored otherwise).
For the other scary options, check out the ZBrush Manual on this topic. Thanks to FreemandBG on YouTube for this tip (I hope your cough is getting better).