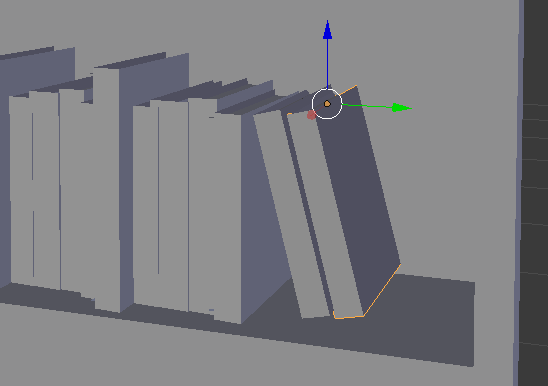
Every 3D object has a point around which it rotates or scales from. It’s usually the point at which the 3D manipulator gizmo shows up. In Blender this point is called the Origin.
In my screenshot, that point is at the top of the selected book. But perhaps I’d like to move it to the bottom so I can position it better. Let’s see how to do this. We’ll use the mysterious 3D Cursor to accomplish this tricky mission.
First, with the object selected, let’s enter Edit Mode. Select the part of the object at which you’d like to place the origin point. I’ll use the bottom face, so that my origin will be at the bottom middle of the book. You can select an edge or vertex as well, whatever is necessary.
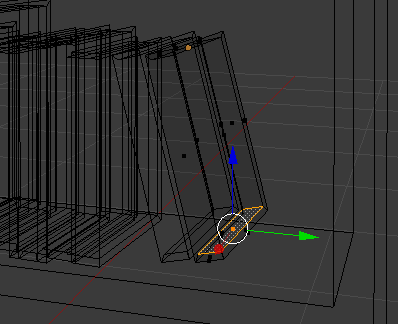
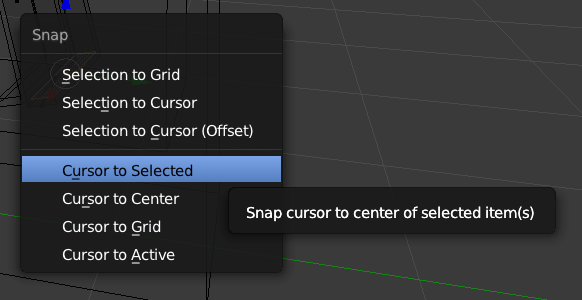
Once selected, head over to Mesh – Snap – Cursor to Selected, or hit SHIFT + S to bring up the Snap Menu. This will move the 3D cursor to our selection.
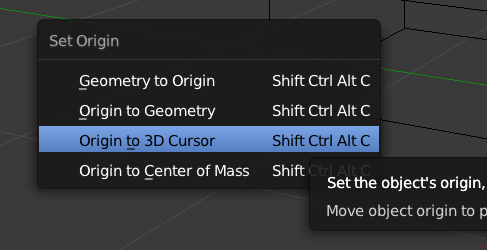
Switch back to Object Mode and see the cursor (red/white circle thing) where your future origin is going to be, as well as the current origin as shown by the gizmo. Now hit CTRL + ALT + SHIFT + C to bring up the origin menu. This menu is also available from the Tools section on the left.
Choose Origin to 3D Cursor and see your gizmo change places.
Mission accomplished!
Quick Pivoting
If you don’t want to change the origin of your object and rather like to quickly pivot around something else, then you’ll be pleased to hear about the Pivot Menu. This can come in handy when you’re modelling and are concerned with a small part of your object, rather than changing the origin of the whole mesh.
To use this feature, select something (either the whole object, or part of it in Edit Mode), then try and find the following Pivot Menu (to the left of the manipulator selector, at the bottom part of your default layout).
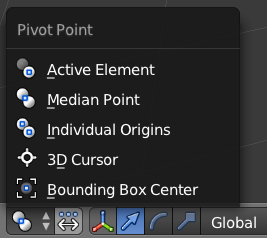
Here you can switch to a different pivot point temporarily. For example, to rotate a polygon around an axis (Active Element) rather than its center (Median Point).