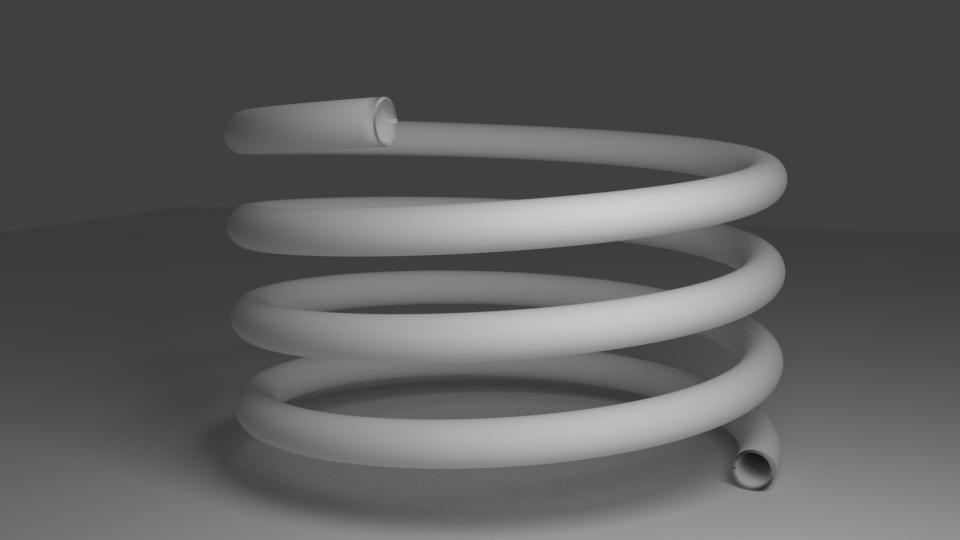
The Screw Modifier in Blender is very straightforward to use – if you know how. I tried to figure it out by myself which proved impossible. I guess unintuitive is the word I’m looking for. Reading the manual gives us an explanation like this:
The profile should be properly aligned to the cardinal direction of the object rather than to the screw axis.
Yes… this means what exactly? Thick people shouldn’t use this tool? Thankfully it’s far simpler than it sounds – let me show you how.
Sometimes I find it useful to find out how something works before attempting to create complex projects with it. So with the screw modifier, you need a curve object as a template to begin with, something like a circle (not a mesh).
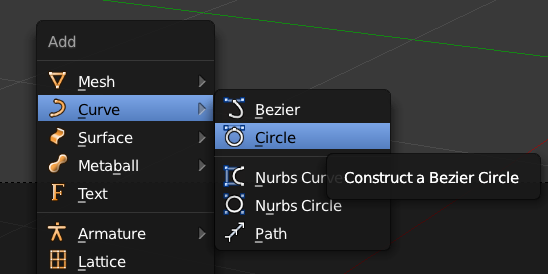
Let’s create one with Add – Curve – Circle. Feel free to adjust its size and rotation if you like.
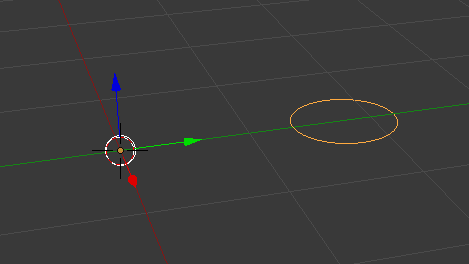
The Screw Modifier works around the origin of the current object, which by default is in the centre of our circle. That’s not going to produce any meaningful results, so let’s change that: move the circle slightly over to the right, then select Set Origin and choose 3D Cursor (assuming that the 3D cursor is still in the middle of your viewport). You’ll have something like this:
With the circle selected, head over to the Properties Palette and find the little wrench icon. Add the Screw Modifier to our object. Nothing much changes in the scene for now until we start playing with the options.
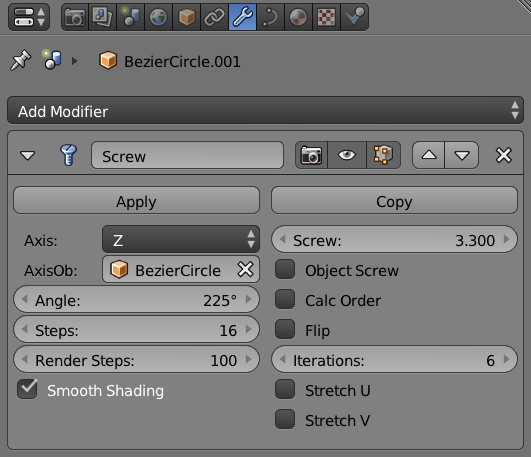
The first thing we need to do is to select the axis around which we’d like to screw with our object. Pick each one under Axis to see the results. I’ll pick X to create something like a donut. With AxisOb, we could select another object in our scene whose axis would then be used instead of the current object’s.
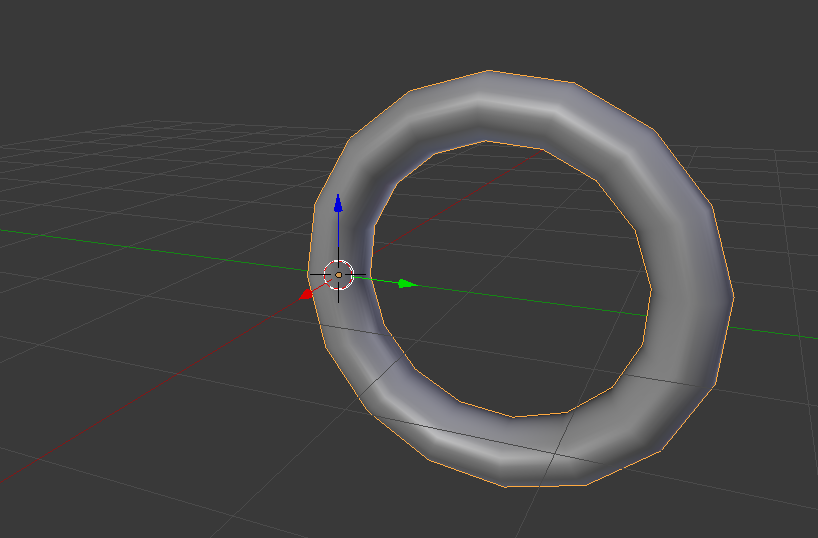
Adjust the Screw value and our circle comes apart, letting us select how much further each screw iteration will go. Angle lets us choose how far around a screw iteration will loop. The default here is 360, which means one whole revolution.
Iterations lets us choose how many times we’d like for the whole process to happen. The screenshot below shows 2 iterations and a screw value of 6. Play with the values to see what happens.
Steps and Render Steps lets us select how smooth the modifier will create the resulting geometry. In the screenshot above it’s set to the default 16, whereas below I’ve set it to 100 (equivalent to Render Steps). The difference is that Steps is what shows up in the viewport, and Render Steps is what is being used for rendering.
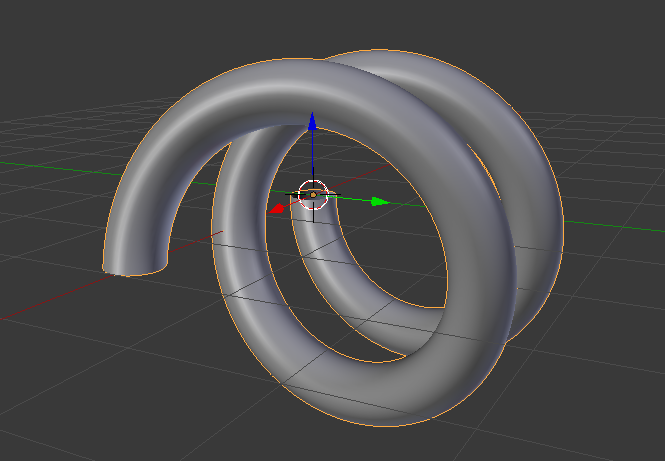
Apply the modifier to turn the screw into a fully fledged 3D mesh.
Apart from the Screw Modifier, Blender also has a Screw Tool that works with meshes. I haven’t managed to work that one out yet, but according to the manual you can make amazing things with it. Perhaps we’ll leave that for next time.
Vielen Dank für ihre Tutorials, ich habe sehr lange nach sowas gesucht.
Super, vielen Dank, Darky. Schön zu hören 🙂