Carrara’s Realistic Sky produces some pretty decent clouds. I’m particularly fond of the Cirrus clouds. The manual suggests that they can be animated too, but I didn’t really know how to do it. Thanks to a tip from Mark Bremmer I was put on the right track.
Here’s how to do it:
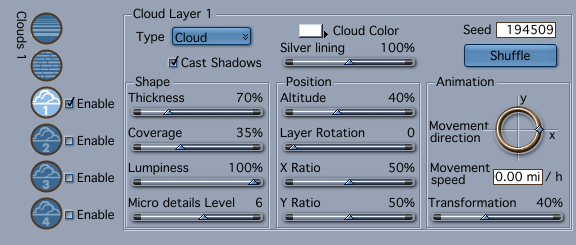
In the Scene tab, setup a realistic sky to your desire. Configure the clouds as you like on one or more of those cloud layers at the bottom. Pay close attention to the little Animation box and give your clouds a particular direction and speed.

The default is about 3mph, but at that speed cloud movement is hardly noticeable. The maximum we can set here is something like 153mph. Let’s use that. The transformation slider lets us choose how much the clouds will change their appearances. Click OK to leave the sky editor.
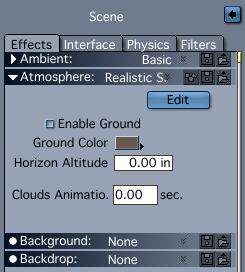
Still in the scene tab, notice a box called Cloud Animation. It’s set to 0 seconds by default. Leave it like that and set your first keyframe on the timeline.

Now move your timeline forward to the end position of your animation, say to 10 seconds. Add the same value into the Clouds Animation box and set another keyframe. That’s more or less it. Move the playhead and see the Clouds Animation value update – that’s an indication that Carrara will now animate your clouds.
Note that even with 150mph, the movement is extremely subtle. In the video above I had to speed up my animation by 500% to get this result.