In other 3D applications, it is common to “look through” a camera to position and manipulate it with the usual viewport controls, and then render the result. In Blender things are a little different (of course).
We can manipulate the viewport, but we cannot render it. We can see it rendered as a preview, by switching the Viewport Shading to Rendered, but we cannot render the image out at high resolution until we position an active camera.
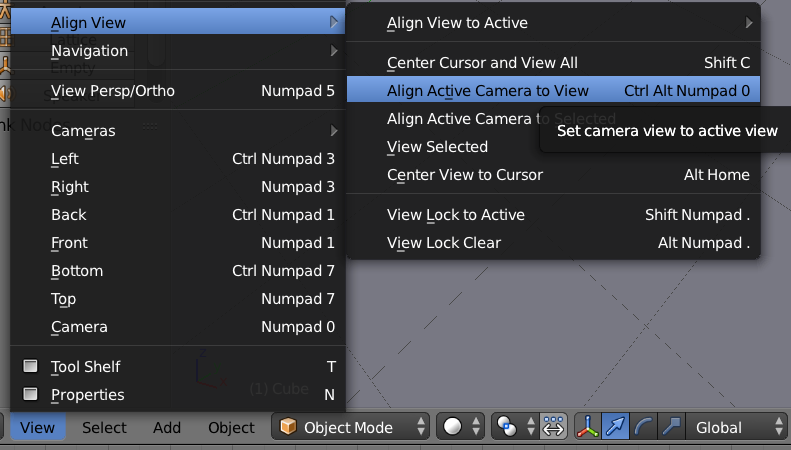
However, by default the active camera does not move with our viewpoint controls until we position. This is done by heading over to View – Align View – Align Active Camera to View (or hitting CTRL + ALT + Numpad 0).

While this approach works, every time we move the viewport to a new position, we have to reposition the camera again using the above menu. Besides, the camera never sees exactly what we see in the viewport: it’s always zoomed in. This may drive ordinary people just a tad mental. Trust me, I feel your pain.
Thankfully, there is an easy way to make the active camera follow our viewport. And here’s how to do it.
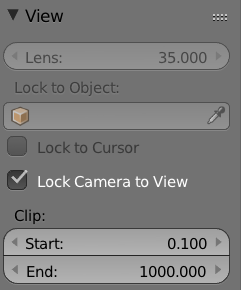
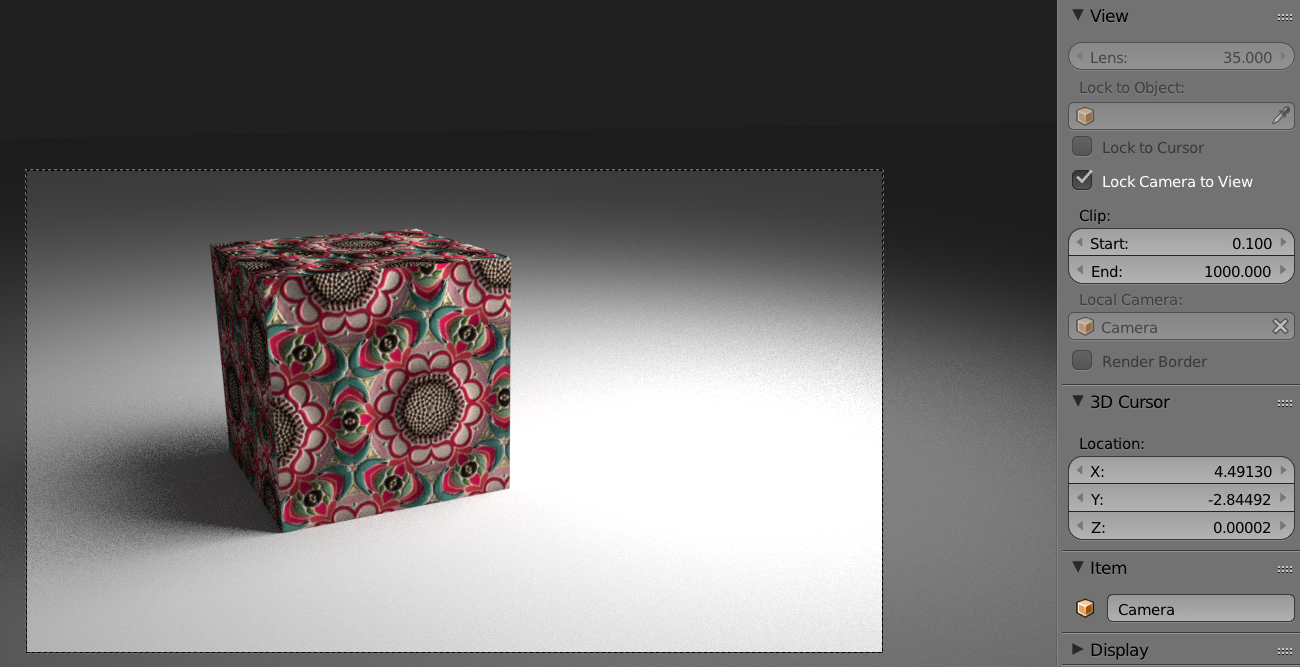
Open the Properties panel in the viewport – either by heading over to View – Properties or by pressing N. This will open a palette on the right hand side of the viewport. In here, find the View section and tick the box that reads “Lock Camera to View”. This will only work after using the above “Align Active Camera to View” option though.

Notice a red dotted outline around the viewport now, indicating that the active camera is indeed following all our movements. To switch this feature off again, simply untick that box and your camera stays put, leaving the viewport to become what other apps may call the Director’s or Perspective View.

Wow…thanks for this! I’ve been struggling with this for days. I’m a Max guy and it has been quite frustrating.
I hear you, Jeff! I’m using many of the “hobbyist” 3D apps and none of them work like Blender – especially when it comes to setting up the camera. Great to hear this little post has helped you!