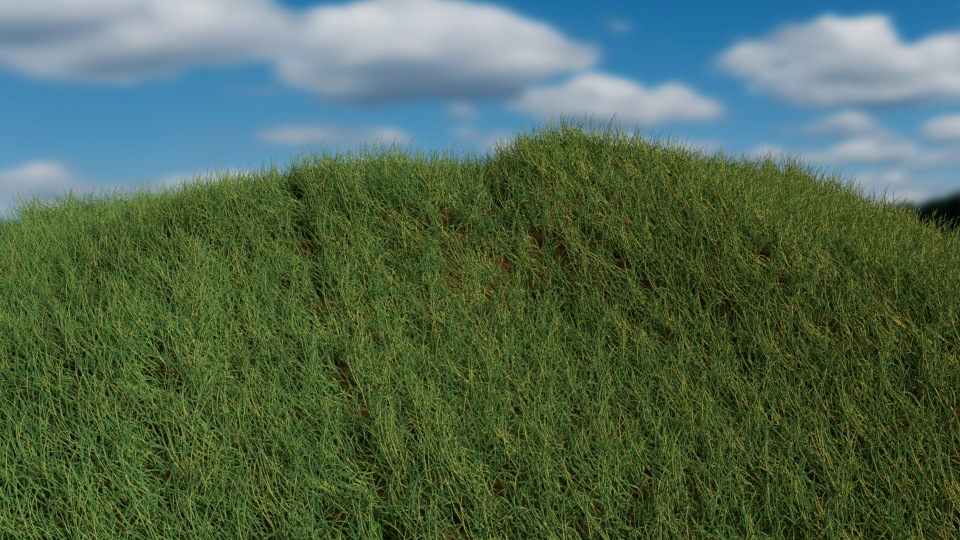
I have previously grown some grass on a terrain in Carrara, and thought I’d try the same in Blender. I didn’t know much about how to do this, but the approach is very similar in Blender.
Like with my Carrara approach, I’ve modelled a few grass stalks from a cylinder first. Those are then replicated over a larger terrain. Neither a replicator nor a terrain generator exists in Blender, so here’s how I did it.
The Grass
First, the grass. It’s a thin cylinder with several edge loops inserted. In Edit Mode, I’ve simply rotated those loops to create a single stalk. I then duplicated each stalk in Object Mode and rotated and scaled it a little to create this clump.
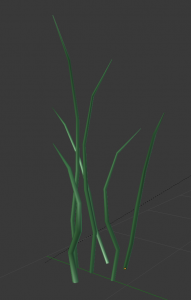
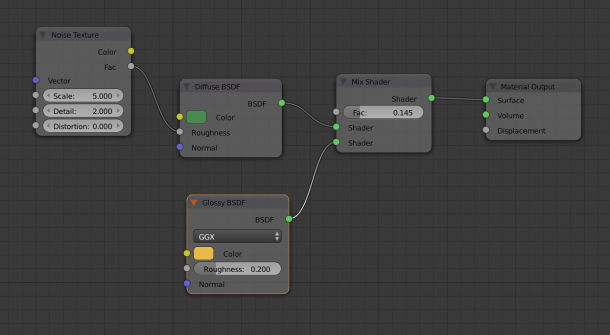
I’ve turned all stalks into one object using CTRL + J and created a material for the stalks next. It’s a mix of diffuse and glossy shader. I gave the diffuse the green and the glossy a bit of yellow so that there’s a bit of variation in the colours. I’ve also added a noise texture to the roughness to make the fluctuations a little more random. Here’s the cycles shader (click to enlarge):
The Landscape
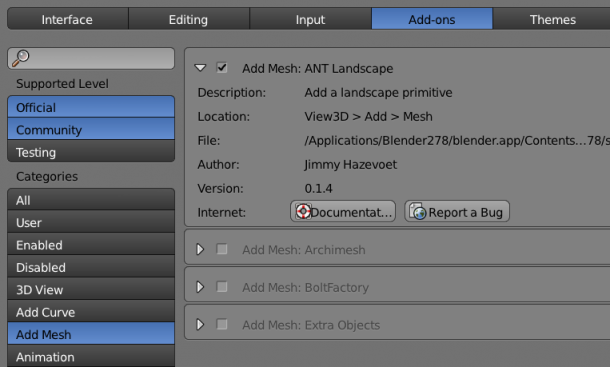
Blender has no terrain generator, but there is an add-on that can create a simple landscape called ANT Landscape by Jimmy Hazevoet. It ships with Blender and can be found under File – User Preferences – Add-ons – Add Mesh. Tick the box to enable it.
Now when we insert a mesh, it comes up with an option to insert a landscape. How cool is that? I’ve not managed to figure out how to change the default shape, so I’ve just scaled it a bit and made it slightly flatter (it’s a mountain by default). More stuff to explore.
The shader for the landscape is a default diffuse with a dark brown, representing “the earth”. Let’s keep it simple. Select the landscape to continue with our grass growing adventure.
The Particle Replicator
Replicating an object along another one can be done using the Particle Emitter in Blender. It’s that little sparkly icon in the Properties Palette. Click the plus sign to add one to the selected object (in our case, that’s the landscape).
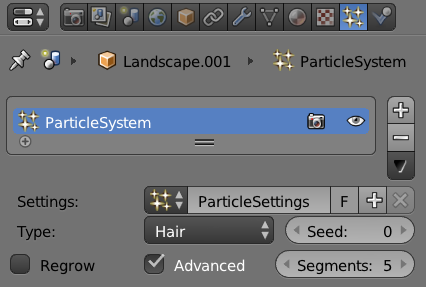
Make sure the replication type is set to Hair, and don’t be afraid when you see your landscape starting to grow really long hair. It’s all good. Also, tick the advanced check box so we can populate some necessary settings in a moment. All we need to tell the Particle Emitter is that we don’t really want it to generate strands, but instead use an object – in our case, the clump of grass we’ve modelled earlier.
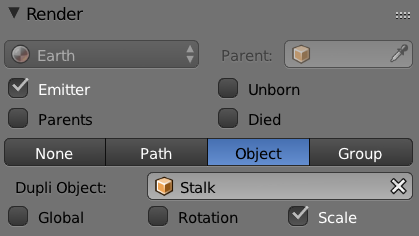
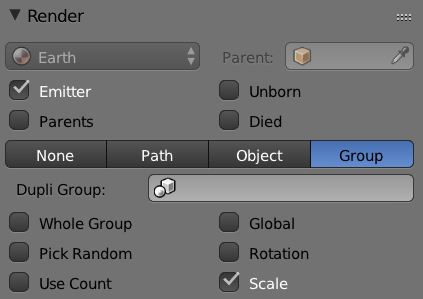
Head over to Render and select Object, then under Dupli Object, select your grass from the drop down menu (mine is appropriately named Stalk).
Now we have grass on the landscape, but it may not look as fantastic as we would like. Head over to the Rotation box next and select it (it’s only visible if you’ve selected Advanced at the top of the Particle Emitter). In here, set the Initial Orientation to something that brings our grass into a more appropriate order (i.e. growing upwards). Try out each setting and see what works best: on some objects, Normal will work well – on others, like our landscape, it does not).

Play with the two Random parameters and the Phase until you see a desired result. If it’s too messy, uncheck the Random tick box under Emission. This is also the place to increase the amount of grass we can grow along the landscape, should it look a little sparse.
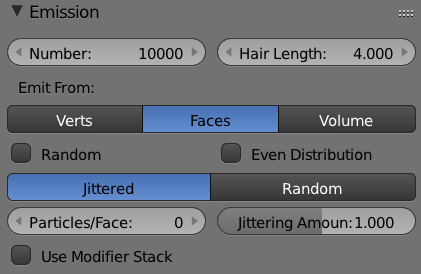
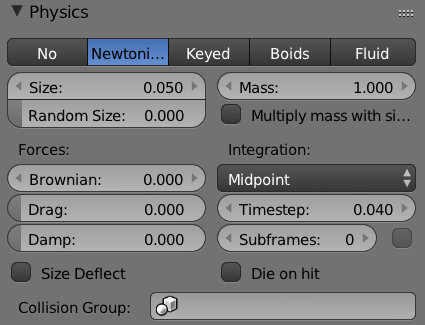
To change the size of our grass clumps, head over to the Physics box. For some reason, the size of the replicated object is not the same as the one we’ve modelled, so here’s a way to change it (under Size). This is also the place to add some random sizing on the grass.
Replicating more than one object
In my case, all the grass stalks were a single object – but sometimes it’s useful to replicate more than one object. It’s easy to do too: group the desired objects in Object Mode using CTRL + G, then head back to the Render box in the Particle Emitter, and instead of Object, choose Group. Select your group under Dupli Group.
Now all objects in the group are replicated.
Replicating using Density or Distribution Maps
Carrara has a Distribution Shader that can replicate objects more or less dense across an object. In Blender’s Particle Emitter, the same effect can be achieved using Weight Painting directly on our landscape.
To do this, select the landscape and switch from Object Mode to Weight Paint mode. It’ll turn the landscape blue and your cursor into a brush icon. Hit T to open the tools panel on the right and investigate the options. Paint onto the landscape and see it’s colour change: blue means no objects will be replicated, and red means the highest density will be replicated here. Green and yellow are in-between values.
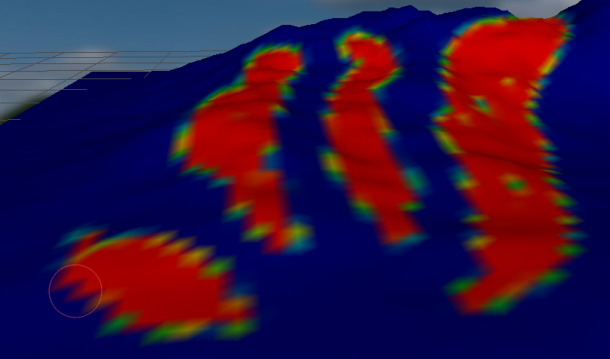
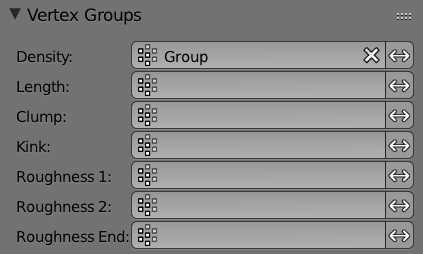
When you’re done painting, switch back into Object Mode. All that’s left to do is to tell the Particle Emitter to look at our painting so that it can take our density map into account. That’s done in the Vertex Groups box: under Density, select our group and see the results happen in the viewport (I have no idea where or how to name the Group into something more sensible – sorry).
And that’s it – render and enjoy. I didn’t know that the Particle Emitter was so versatile. If you like the ANT Landsdape add-on, but think your landscape could benefit from some trees, check out the Sapling Tree Gen add-on (it also ships with Blender and makes trees).
1 thought on “How to grow grass on a landscape in Blender”