Up until now I had always used Premiere Pro to assemble image sequences of a rendered animation.
I’m still using Premiere Pro CS 5.5 and I’m not currently subscribing to the whole Creative Cloud package. As such, my version of Premiere is stuck somewhere in the past, when 4K was barely an idea, and 1080p was the highest result you would ever need.
The trouble is, I was working on an animation whose resolution was larger than 1920×1080. While Premiere Pro CS 5.5 can handle this and higher resolutions for editing, there doesn’t seem a way to export it at anything above 1920×1080.
My editing needs were moderate at best: assemble 250 frames, repeat those several times, and add a fade to black either end. Which application would be capable of doing this swiftly and efficiently, I wondered?
Photoshop CC can do it! Would you believe it? Here’s how.
Importing your Image Sequence
It’s as easy as selecting File – Open, then selecting the first image of your sequence. I believe any image in the sequence will do. Make sure to expand the Options box and select Image Sequence. Make sure to select a single frame only. The sequence must be sequentially numbered for Photoshop to understand it as such.
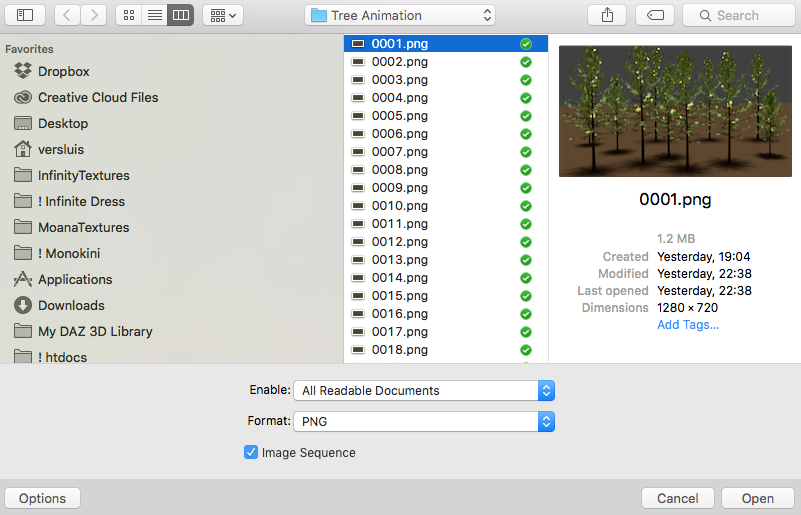
You’ll be asked to set the frame rate of your project. Now Photoshop will go ahead and assemble your sequence as a Video Layer. You’ll see a new Video Group in your document.
Basic Video Editing in Photoshop
At the bottom of the screen you’ll see a (possibly collapsed) Timeline Tab. Double-click it to open it, and you’ll see something like this:
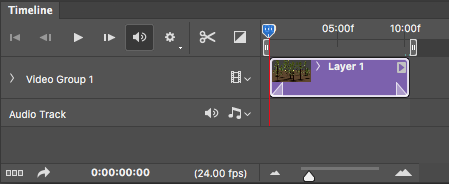
Doesn’t look all that different from your average video editing software. Let’s duplicate our image sequence a few times. This is done by duplicating the actual video layer in our Layers Palette, because we don’t have “video clips” as such that we could drag into our timeline.
Either right-click on the layer and select Duplicate Layer (or choose the same option from the Layers menu), or simply drag the layer to an empty space while holding down the ALT key in the Layers Palette. Make sure that the layer stays in the same Video Group so the sequence is repeated on the same video track.
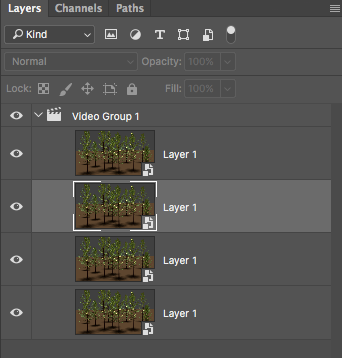
You’ll end up with a timeline like this:

Should the copied clip end up underneath the current one, or not in the place you had expected it, simply drag it behind the first clip in the timeline.
Adding Fade-in and Fade-out
In the timeline, click on the little square black/white icon and it will show a menu of the available transitions. There aren’t many, but they do what we need. I’ll choose the “Fade with Black”.
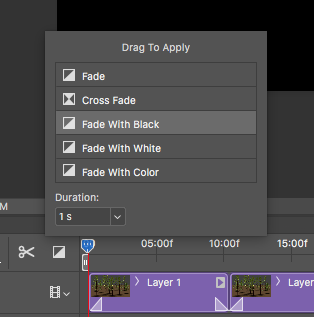
Once selected, drag that icon over the top of your first clip, much like we’d slide a transition onto the timeline in Premiere Pro. Do the same for the end of the last clip in the sequence, and you’ve built yourself a fade-in and a fade-out.
Nicely done, Photoshop!
Changing the video dimensions
Just in case you need it: To change the dimensions or aspect ratio of your video, we need to change the image size like we would normally would in Photoshop. Edit – Image Size and Edit – Canvas Size will do the trick. If all your renders are already in the correct aspect ratio and size, this step isn’t necessary – but for lower or higher resolution outputs, this is the way to go.
While we’re here, now’s the time to add anything like titles or watermarks to the video before we head to the final step.
Exporting our Image Sequence as a video file
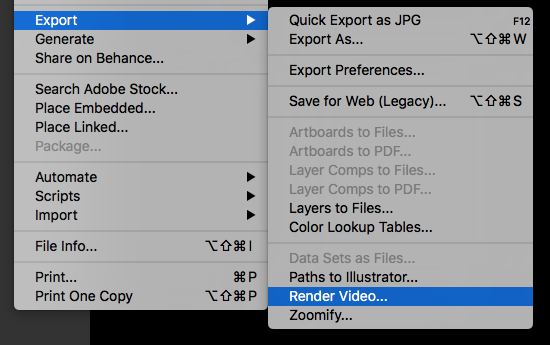
File – Export – Render Video will do the trick.
This will bring up a dialogue for setting the codec and file name, as well as a few other goodies such as pixel aspect ratio (leave them at 1.0 to avoid trouble, or change this setting if you know what you’re doing).
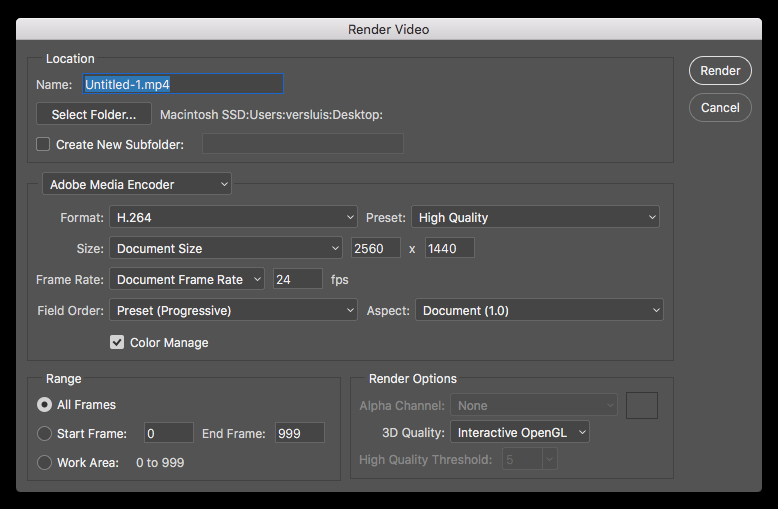
Hit Render and Photoshop will compile a nice video for us. Who would have thought it had this hidden capability?
Thank you, Adobe!
1 thought on “How to render an image sequence as video in Photoshop”