The NVIDIA Iray render engine can be a bit of a mysterious box sometimes. Especially when it comes to lighting. But it doesn’t have to be. Let’s see how we can add a standard spotlight to our scene and set it up so we can use it properly with Iray.
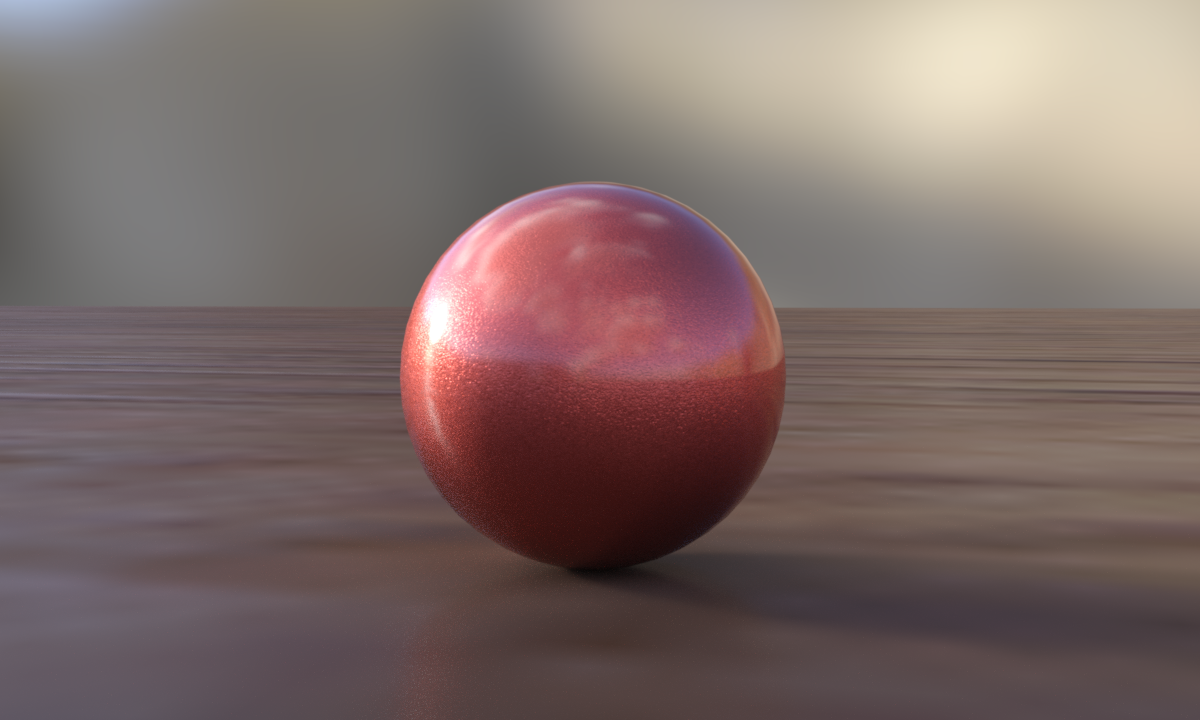
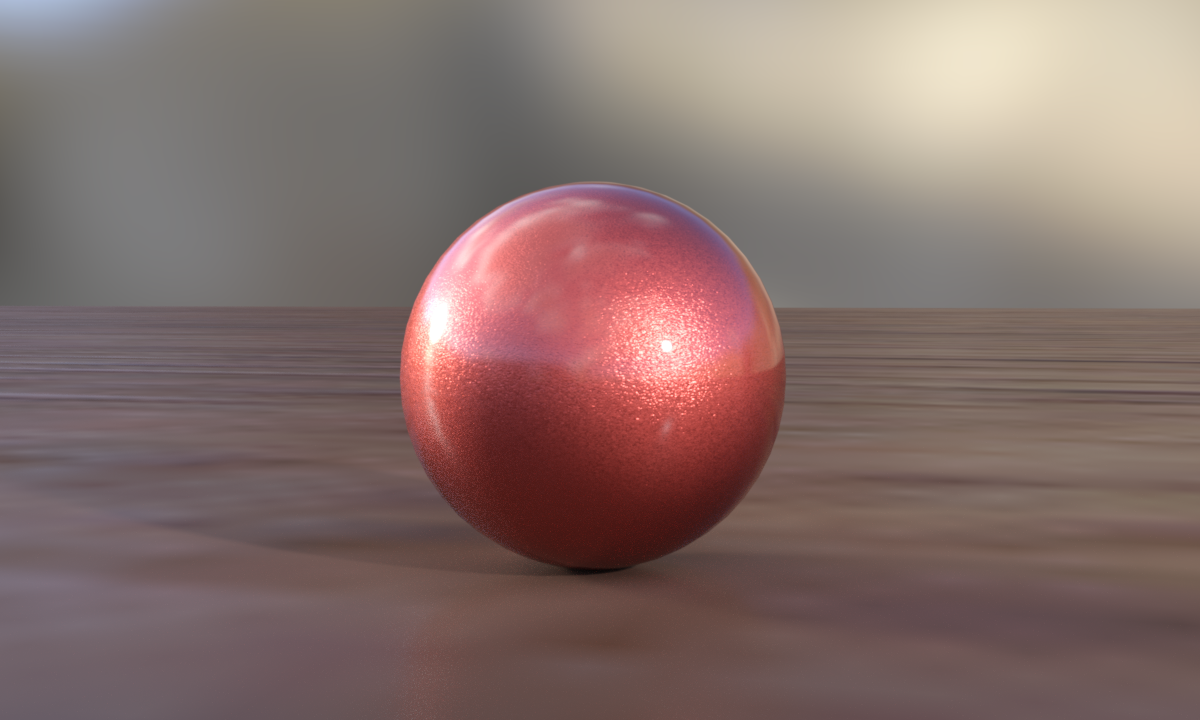
Let’s take this simple scene as as demo and a staring point. It’s a there and a plane, both of which have Iray shaders applied (it’s Walnut on the floor, and orange car paint on the sphere).
Iray Default Light (IBL)
The default lighting for a new DAZ Studio Iray scene comes with a small HDRI image applied by default, and when we render our scene, we can see the effects of that light source.
Notice that there’s a small specular highlight on the sphere, on the left hand side (a small shots spot). This is the sun’s hotspot from the HDRI image map. As you turn the camera around, the hotspot moves. Alternatively you can move the Iray Dome to move that hotspot (under Render Settings – Environment – Dome – Dome Rotation).
Not every HDRI image has a sun though, and depending on which map you use, you may not even see such a hotspot in your renders.
Adding a Spotlight
The left hand side of our sphere is a little darker, and if this was a character’s face, we may want to brighten it up a bit. In 3Delight we’d just add a standard spotlight, tweak the intensity and shadows until we’re happy, and then we’re done with it. With Iray we’ll do the same thing – but the settings are just a little different.
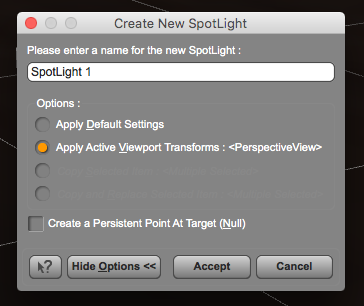
Let’s add a spotlight by heading over to Create – New Spotlight. I find it easiest to switch to my Perspective View beforehand and frame my sphere as if I was looking through the light (maybe from the top left somewhere). When I now create a spotlight, I have the option to “Apply Active Viewport Transforms”. This will save me moving the spotlight into position later.
NOTE: You MUST create your new spotlight with Render Settings set to Iray. If they’re set to 3Delight, and you switch Render Settings to Iray later, you will not see the following options in your lights.
Although we see something of a change in our viewport, our spotlight seems to have no effect on the render. And even though the Intensity Slider seems to brighten up our preview (in Texture Shaded mode), this change is not reflected in our render either. What’s happening?
It’s because these lights were designed with 3Delight in mind, and we’ll have to do some work in order to make them work handsomely in Iray. It’s not difficult, it’s just knowing what to do.
Let’s select the spotlight and make the following changes:
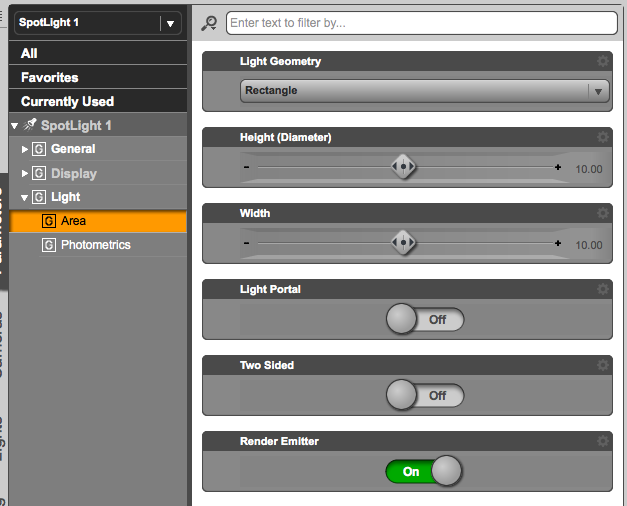
- Under Light – Area, change the Light Geometry from Point to Rectangle. This will create something like a soft box. You can also choose Disc for a round soft box.
- Change the height and width parameters here from the default 10 to 100 each. This will create softer shadows from our soft box light. For harder shadows, tweak your way back down to 10 and see how it affects the light.
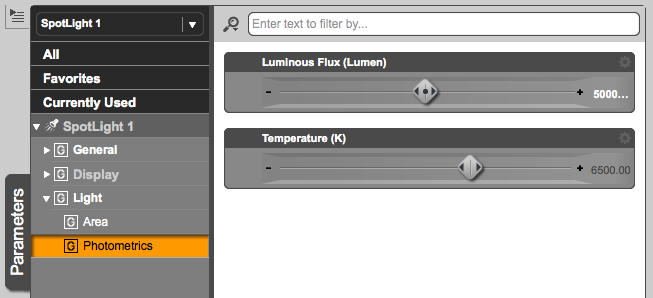
- Under Light – Photometrics, change the Luminous Flux value from 1500 Lumen to 50000 Lumen.
- Leave the Light Temperature alone, unless you know what you’re doing. The default is 6500 K (as in Kelvin). Higher values will create bluer light, while lower values will create warmer light.
Here’s a render with those settings applied:
We now have a second hotspot on our sphere on the right, and it’s undoubtedly coming from our home made soft box. We can even see the square outline if we look closely.
And what’s even better: the standard Intensity Slider is now working as it should: crank it up from anywhere between 0% and 200% and see what happens. In fact, the Intensity Slider and the Luminous Flux value do the same thing: setting the slider to 200% is the same as leaving it at 100%, and using 200.000 Lumen instead (that’s 50.000 times four – light works like sound, to the power of two).
You can add as many spotlights as you like, and use them just like in a 3-point or 5-point lighting setup.
Adjusting the direction of the spotlight
To adjust the position the light, switch the viewport from Perspective View (or your Camera) to the spotlight. The view will look a little skewed, and rotating the scene is a little awkward at times, but it allows us to position the light very accurately. It’s like positioning a camera.
Character Lighting
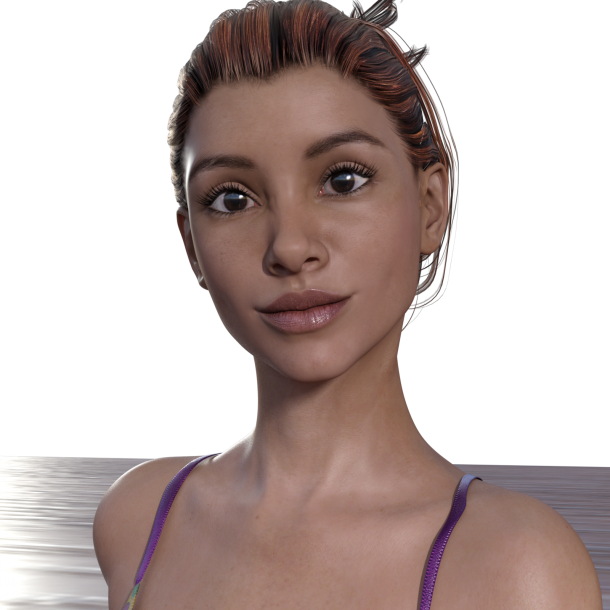
We can apply the same principles to characters. In this portrait, I’ve positioned the Iray Dome’s HDRI sun somewhere behind the subject, so it doubles as a rim light. Then I’ve used a single spotlight from the right to brighten the face, just as described above.
If you look closely, you can even see the soft box reflection in her eyes.
Thank you very much! Now I am finally able to use Iray, after months of frustration. 🙂