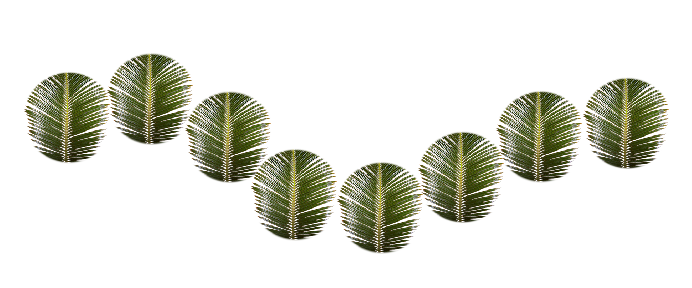
 Sometimes we want to reproduce an image using a brush stroke. It’s a handy way to replicate a 2D object along a path for example. Using the standard brush for this though, we’ll find that we can only reproduce a single colour image. But what if we want to reproduce all colours in our image?
Enter the Mixer Brush Tool. Here’s how to sample an image and draw with it in Photoshop.
First, open your image (obviously). It’s fine if this is in another document than the one you’re currently working in. Next, select the Mixer Brush Tool. It’s hiding as an option underneath the standard brush icon, just hold it down to reveal the options.

Once selected, check the top of your screen for some Mixer Brush options. Select Dry Have Load and a Mechanical Pencil preset (the size doesn’t matter much, we’ll adjust it in a moment).
Hover over the image you’d like to sample and adjust the brush size to fit your image, or slightly larger so there’s no clipping. You can do this with the square bracket keys.
Now click ALT, see the cursor change, and left-click to sample the image. You’re done with part 1.
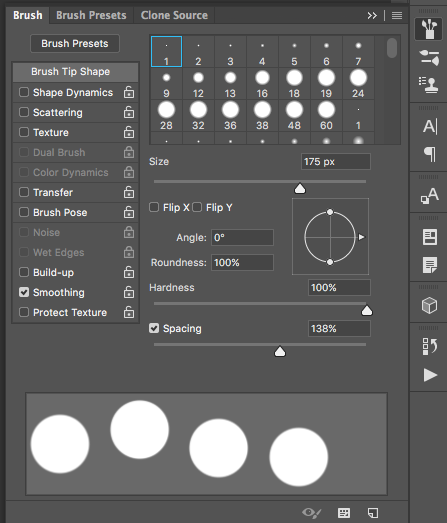
To draw with your brush we may need to adjust the brush settings a little bit. Try a stroke and see what happens. You may find that the object is smeared into a line, rather than printed several times in a row. No problem! Find the Brush Settings icon and take a look at the Spacing option at the bottom. Increase it to 100% or beyond so you draw with your image more spaced out on the canvas.

Don’t worry if all you see are circles in your preview, just imagine that to be your image to see what a stroke would look like. Feel free to play with the other values in this panel, such as Shape Dynamics and Scattering.
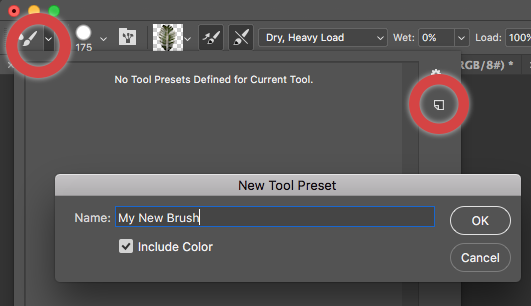
When you’re happy with your brush, you may want to save it for later use. See that little icon on the top left of the Mixer Brush options? Click it and give your brush a name. You can now select it from the Mixer Brush tool presets anytime you like.
