Even my ageing version of Premiere Pro CS 5.5 has multi-camera editing capabilities built in. And even my ageing Mac Mini from 2012 can cope with full HD clips during those edits.
It’s a slightly mysterious process, and until very recently I didn’t quite know how to do it, so there are my notes. This workflow is also helpful if you a have single camera feed and want to switch live (vision mixer style) to zoomed-in versions of the same footage.
In short, we need to
- drag all camera clips into a timeline (all on top of each other)
- sync all clips in this timeline (select them all, then right-click and choose “synchronize”)
- create a new sequence from that sequence
- enable multi camera on that clip
- open the multi camera monitor, press play and switch live between cameras, creating edits on the fly
Jonathan Lang explains it here:
Step by Step Instructions
After importing your various clips, drag them all into a new sequence of your choice. They need to be on top of each other. This allows us to sync them up properly. See this sequence as a multi-camera feed. Add the desired audio track to it too, and sync that one up as well.
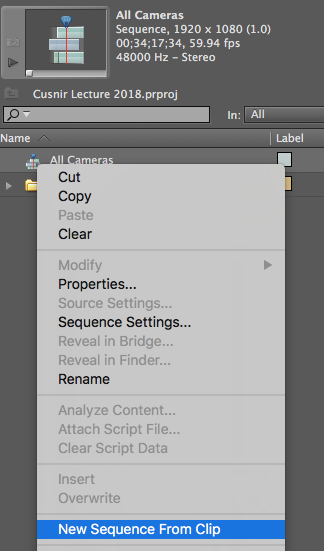
I’ll call this sequence “Multi Cam” so that I know what it is. With this sequence selected in the Project Navigator window, right-click on it and select New Sequence From Clip. This will create a new (virtual) sequence, albeit with only one video and one audio track.
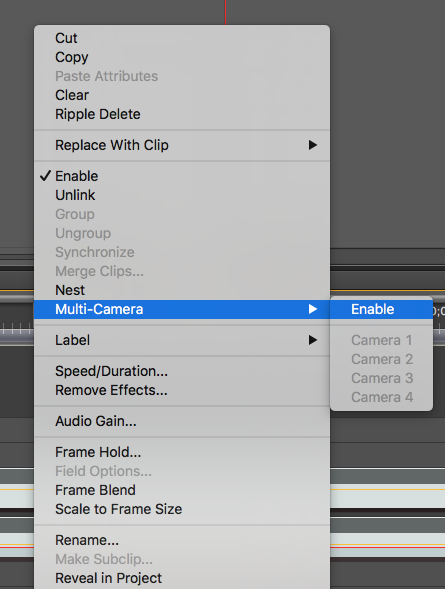
Let’s call this one “Edit” so that we know what this is going to be in a moment. The sequence will automatically open on the timeline. With it selected, in the timeline, right-click on it and choose Multi-Camera Enable.
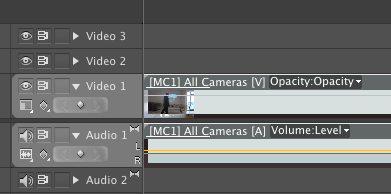
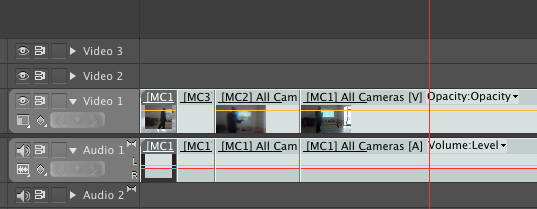
Notice that the title of your sequence changes slightly in the timeline, being prefaced now with [MC1] to indicate this as a multi-camera sequence. Keep this prefix in mind while we keep working on setting up the rest.
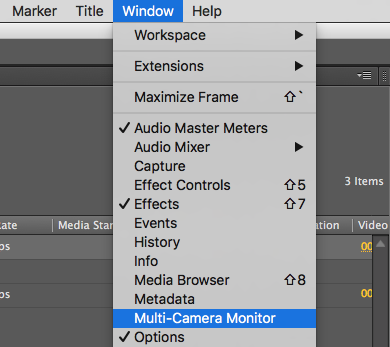
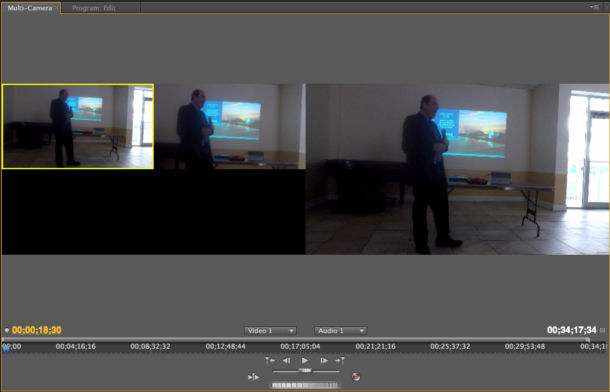
When we hit play now, nothing much seems to happen – that’s because we need to open a special window to make live switching between our cameras possible. Head over to Window and enable the Multi Camera Monitor. Dock it somewhere sensible, I’m adding mine to the same position where I normally see my Programme Monitor (top right).
I’m doing that because the Multi Camera Monitor combines a preview of up to four cameras (in my version at least) with a “live” view of which camera we’ve selected on the left. Hence, I can safe some CPU resources by not displaying both the Programme View and the Multi Camera View at the same time.
I only have two cameras in my project, but there’s room for two more at the bottom (where sadly only black is showing the screenshot). Notice the yellow rim around Camera 1. That’s the currently selected “live” camera, which is also shown on the right hand side in the larger view.
Now comes the fun part: with your number keys on the keyboard (1-4) you can switch between each of your cameras. The yellow rim changes accordingly. You can do this both in playback mode, as well as when the playhead is standing still. Try it out!
Notice that when you switch, an edit appears in our multi-camera sequence. The camera we’re changing to is displayed live (let’s say it’s Camera 2), and the part after our edit is now prefixed with [MC2]. That’s how Premiere keeps track of which camera needs to be displayed where.
To be able to switch between cameras, the focus needs to be on the multi-camera monitor. That means it needs to be the active element in your UI, or in other words “click into that window to make it responsive”. You can tell by the orange outline around that window.
Now all we need to do is press SPACE (or hit the Play button), watch our footage, and switch cameras as desired while we watch – as if we’re watching a multi-camera event live in a studio. Premiere will mark our edits on the fly.
When you’re done, or if you’ve made a mistake, just stop and park the playhead before and edit and hit play again, switching to the appropriate camera. All offline editing tools are also available, for example the Rolling Edit tool (it’s the one that moves the current edit point without adding or removing footage).
How about single camera shoots?
If you have a hi-res wide shot of an event and would like to make it more interesting by splitting it up with zoomed-in versions, duplicate your footage on the initial sequence (our All Cameras sequence). Make sure they’re in sync.
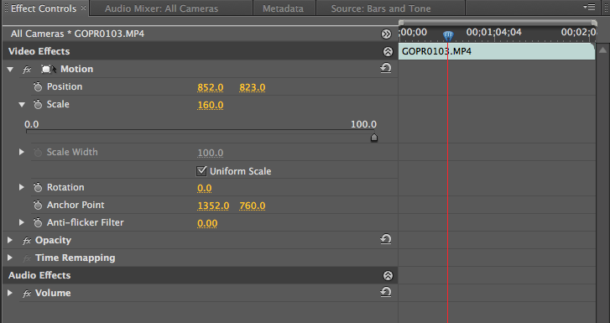
Select the second video track, then use the Effect Controls window to zoom in and position your footage correctly. Do this as many times as you need to, creating other variations on different video tracks. For example, one camera can focus on the guy on the left, and the other camera can focus on the guy on the right. That makes three video sources to switch to (the third being the wide shot with both people in it, or a slide projector, or both).
Keyframe tools are also available, should you wish to do any animations.
What about Audio?
From what I understand, all audio from first sequence (we called it All Cameras) is mixed together and is played when the Multi-Cam sequence. That may or may not be what we want. In my projects I usually have one master audio file, which can be added as a separate audio track to the Multi-Cam sequence (the one we’re currently live editing). A simple copy and paste from the All Cameras sequence will do the trick, in which it is easier to sync it up.
I’m not sure if there is a way to live-edit audio alongside the video. If there is a way, please let me know below (or in case I find out, I’ll amend this article).
Hope this helps create some beautiful multi camera sequences!
