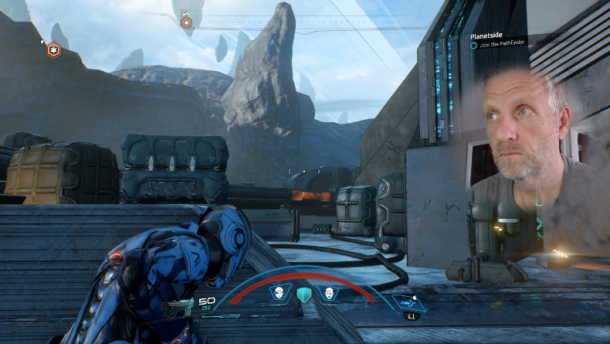
I like the way my PlayStation 4 adds a soft round cutout mask to the PlayStation Camera Feed when streaming gameplay. I wondered how I could best recreate this effect in OBS Studio for a consistent experience, no matter which device I decide to stream from.

Here’s how I did it, with a little help from Photoshop – feel free to use the resulting asset without any need for further fiddling.
You can download the mask further down (anchor link).
We need to tackle two things for this effect: crop our (probably 16:9) web cam feed to a square, and then use a square transparent mask as an overlay. With a bit of thinking we can do both things at the same time, saving a bit of processing power while we’re at it.
In Photoshop
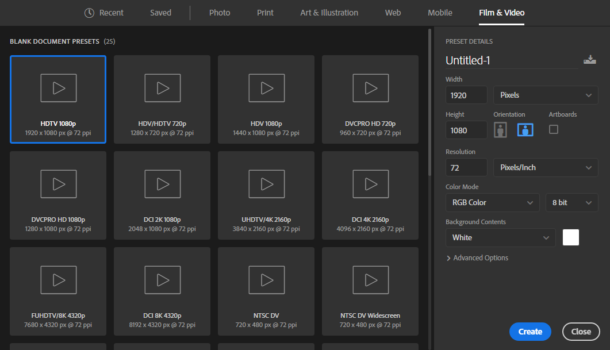
First we’ll create a 16:9 blank image in Photoshop. I’m doing this because my web cam delivers a 16:9 image. If yours is different, please create an image that would cover the whole aspect ratio of your webcam (4:3 is another popular option). I’m going to create mine in 1920×1080 pixels.

Now we can use the Elliptical Marquee Tool to draw out a round selection. If that icon shows a rectangle instead, simply hold down on that icon to bring up other options.

Next, let’s draw out a circle. We can hold down SHIFT while doing so to make sure the ellipse stays round, or alternatively draw an oval if you like. This will create a selection. Let’s feather it so that it’ll be soft on the outsides (under Select – Modify – Feather). A radius of about 50 pixels should suffice. The “perfect” value will depend both on your personal preference as well as your image size.

Now we’ll grab the Paint Bucket Tool, switch to a black foreground colour and fill the inside of our circle with black. Make sure you do this on another layer, NOT on the background. In fact, once done, click that little eye icon on the Background layer to switch it off. We’ll do that so that our image will contain transparency.
Here’s what the layer palette will look like if you’ve done it right:

The final step in our Photoshop adventure is to export the image as a PNG. The easiest way to do that is to use File – Export – Export As. Make sure to enable transparency with your PNG. The result will look something like this:
The Round Cutout Mask

Essentially a transparent rectangle with a fuzzy black (non-transparent) dot in the middle. That’s where my face will go. Feel free to use File – Save As to grab this mask and use it for your own project.
Let’s make good use of it in OBS Studio next.
In OBS Studio
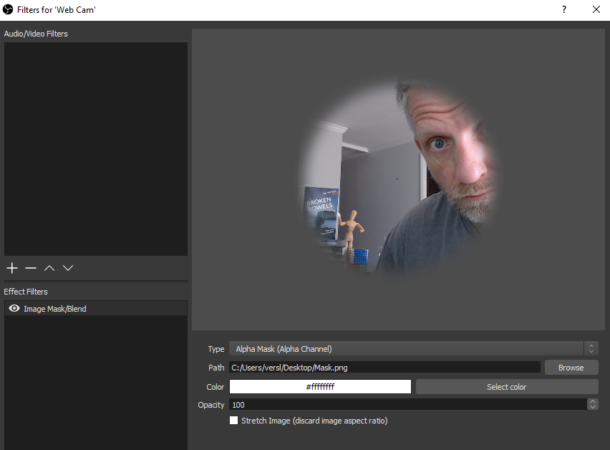
With the Web Cam Feed in place, right-click on it to apply a Filter.

We’ll choose the Image Mask/Blend Filter (under Effect Filters). Browse to your Mask Image, then set the Type to Alpha Mask (Alpha Channel). This will cut out your camera feed and leave a visible circle in the middle.
Feel free to drop down the opacity from 100 to perhaps 80 or less to make the web cam image blend into the footage you’re going to stream.

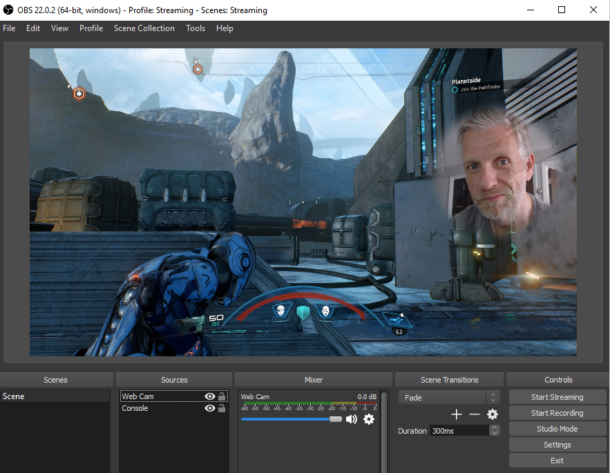
With all those settings in place we can adjust the size and position of our web cam to match whatever is going on in the game (or stream). Make it bigger, smaller, put it left, put it right, whatever feels right. Here’s what it looks like in action:

Extra Credit
There is a downside with this approach, namely that by applying the mask directly to your webcam source, it will remain there when used in other scenes. If you try to add the same web cam to a full-screen webcam scene, you’ll see that the soft circle is still in place. You may not want that.
An easy solution to this is to apply the mask to a scene, rather than a source. This gives the the added benefit that one mask image will fit any size webcam image, no matter if you’re off-centre, smaller, bigger or whatever. I have a video on my channel in which I’m explaining the process.
That’s it! If you have any questions, please let me know. Feel free to try out other shapes for the cutout: hearts, stars, rough circles, smudgy borders, anything really
Happy streaming 🙂
Tried this in GIMP on a Mac, didn’t work unfortunately. Article should have had the PNG available for download at the end!
The image IS available for download – it’s the actual picture that you see in the article. Right-click, then “save image as”. I thought I wouldn’t have to spell this out.
Some people can be such entitled buttheads that they can’t see the gift others lay right before their eyes. I saw it, I saw all the effort you put into help us understand how to do this. Thank you, I’ve been going crazy trying to figure this out till you came along! 🙂
It is available. Right click his image and save as.