Discovered in 2019

Where does the time go? It felt like only yesterday that I’ve started my “discoveries” category, and with it the idea that I’d like to paste useful links into a place that would make it easy for me to find them. Turns out I’ve been actioning such findings in different ways, and it also goes to show how little time I spend with important ventures like this.

So perhaps then, as another way of utilising this idea, I’ll have an annual post with important discoveries, or one whenever I feel like I’m running out of tabs in my various browsers. I might even add to this post once it’s published so I won’t clutter up my website with Discoveries alone.

Read more

How to delete multiple projects in iMovie

I edit most of my bike videos in iMovie on macOS. It’s quick and easy for what I need to do, and although it’s not a professional editing package, it’s very good for quick tasks. And it’s free if you own a Mac (or at least it once came free with it).

Over time I’ve amassed a huge library of videos that are still part of my library, and there comes a time at which even the biggest hard disk runs out of space. I already knew that I could delete a single project by selecting the project from the home page, then using the little disclosure menu on the bottom right and select Delete Project.

Read more

DAZ Studio 4.12 Beta – a Sneak Peek – 3D Shenanigans #25

On today’s stream I’ll take sneak-peek at the new features in the brand new beta version of DAZ Studio 4.12. It was released earlier this week, and it’s all about better animation tools: integrated features from GraphMate and KeyMate, and IK Chains inside a scene hierarchy. The highlights in this version are: overhaul of the …

Read more

Trying out Chocofur Asset Management for Blender 2.8 – 3D Shenanigans #24

In this episode I’ll try to install the Chocofur Asset Management add-on for Blender. It’s recently been updated to Blender 2.8, but right now not so easy to find on their website. Chocofur have lots of free assets to try out, perhaps we can work out how this works together. I was unable to get …

Read more

DAZ Studio 115: Parametric Light Objects in Iray

In this episode I’ll give you an introduction to the various parametric light objects we can create from the menu, how to use them and how to tweak their respective parameters as they apply to the Iray render engine. Here’s the link about Colour Temperature I’ve mentioned: https://en.wikipedia.org/wiki/Color_temperature Here’s the one about Luminous Flux: https://en.wikipedia.org/wiki/Luminous_flux …

Read more

Using Blender on a Laptop with a Trackpad

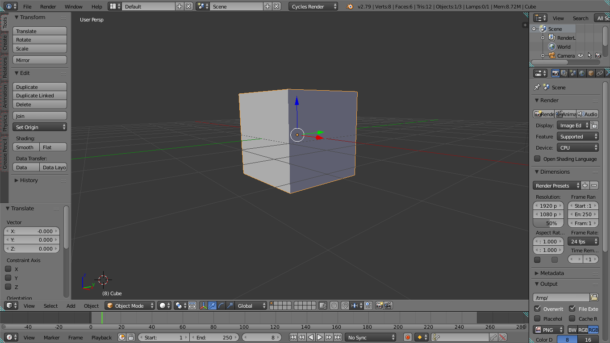
After futzing CentOS 7 on my old Samsung Q330 laptop, I thought it would be fun to see if the old hardware from 2010 would be capable of running Blender. After all, the team have recently added CentOS as a new pre-built package to the list of downloadable options, and for me that was the perfect opportunity to try it out.

Turns out my Q330 only runs OpenGL Version 2.1, which means it can’t run Blender 2.8+. However it’s still capable of running 2.79, and it made me smile to see it full screen.

Of course trying to move anything on the screen proved to be difficult, because I had never done that before with a standard trackpad. My Mac has one, and it behaves beautifully with gestures out of the box, but I guess Windows and Linux users don’t have that luxury, even if a trackpad is present.

How do we navigate 3D space in Blender then, if there’s no mouse nearby? Well I’ve just found out, and I’d love to share it with you. I’ve only been able to test this in Blender 2.79, but I’m assuming

Read more

Duplicating an object along a path in Blender 2.8

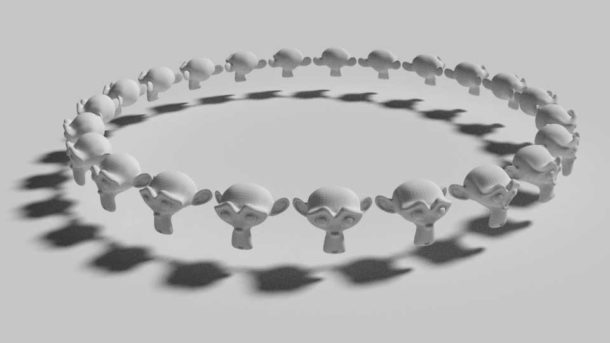
The other day I tried to create a simple necklace in Blender 2.8, only to find out that the way I’ve once learnt from Blender 2.79 and below using DupliFaces no longer works. This feature has been removed from Blender 2.8. Thankfully there’s an easier way to do this, using the Array and Curve Modifiers.

For this example I’ll create a circle for our path, and an object I want to duplicate on it. Perhaps a UV Sphere. Make sure to apply all transformations after any scaling operations with CTRL + A.

Read more

Editing DAZ clothing using a reference figure in ZBrush

Even though I own it, I know very little about ZBrush. It may forever remain a mystery for me – like driving a car or getting excited about Team Sports. It’s just… not for me. Be that as it may, I’ve often wondered how clothing manufacturers use a character as a reference to make or update clothing geometry in ZBrush. Perhaps a jacket that doesn’t quite fit, or some boots that need a quick adjustment.

The challenge here is that both the character and the clothing need to be imported into ZBrush, and we need to be able to adjust the clothing only, while seeing the character in the background as a reference so we can work around it.

While the art of sculpting in ZBrush entirely eludes me, I believe I have finally understood the overall workflow. Before I forget it again, I thought I’d share it with you and my future self. Let’s see how we can transfer a clothed Genesis 3 figure from DAZ Studio 4.11 into ZBrush 2019.1, make adjustments on an item, and then bring it all back with a few clicks.

Read more

Going Shopping in Ironman13’s Clothing Boutique – 3D Shenanigans #22

In this live stream we’ll take two Genesis characters shopping in Ironman13’s Styling Clothing Boutique. We’ll build the whole scene from start to finish, including lighting and depth of field. This will bring some of the techniques together that I’ve shared with you recently, including how to spin the sundial. PS: The stream dropped out …

Read more

How to bring back Selection Toggling in Blender 2.8

I’m so used to pressing A to select or de-select everything in Blender. It’s been so ingrained in my brain that I cannot easily get used to the new default behaviour in Blender 2.8. Thankfully there’s a simple tick box in the Preferences that will bring this option back, so there’s no need for my …

Read more

Building the “Fluffy Disco Kimokawaii” Animation in Carrara – 3D Shenanigans #21

In this episode I’ll explain how I’ve made the Fluffy Disco animation that I’ve posted last week. I’ll start by building the animation in DAZ Studio using aniBlocks, then import the file into Carrara and add the hair. Once applied, we’ll drape it and have Carrara simulate the strands as the figure dances. You can …

Read more

Upscaling while preserving details in Photoshop

I’ve received a great tip from Patrick Schoolderman a couple of weeks ago, about how to upscale images in Photoshop with a new algorithm that Adobe call Preserve Details 2.0. I wanted to make a quick note about how to do this and share it with you. The workflow is as simple as opening your …

Read more

An Overview of Strand Based Hair in DAZ Studio – 3D Shenanigans #20

On today’s live stream, I’m giving you an overview on how to get started with the new Strand Based Hair feature in DAZ Studio 4.11. It’s only been released to the public yesterday, and we have not many details on how to create handsome looking hair with this tool, but I’ll let you in on …

Read more

Building a Kitchen Comic Scene in DAZ Studio – 3D Shenanigans #18

In this live event I’ll show you how to build the above funny kitchen scene. It’s simple with several subtle nuances, such as lighting and expressions. I’ll explain how to add your characters, pose them, adjust the camera, and add appropriate (comical) expressions. Then we’ll adjust the lights of the set and add our own …

Read more

Animating sunlight (SS Time) in DAZ Studio

I’ve recently explained how to make use of the realistic sun disk in DAZ Studio. I’ve talked about how to make this thing visible and how to set it to mood/effect you want, and I’m pleased with the results. This workflow works great for still images, but for animations, it quickly becomes clear that the SS Time parameter under Render Settings – Environment cannot be keyframed.

Or can it? Looks like it can, thanks to a little helper tool called the Sun Dial. Let me show you how it works.

Read more

Urban Future Fly-Through Animation Workflow

I’ve rendered this quick trailer for my 3D Shenanigans Live Stream, using Stonemason’s Urban Future 6 set the other day. I did this really quick, and there are some rough edges to this animation. It only took 8 hours to render the full sequence plus a bit of post production in Premiere.

I thought I’d share my multi-machine workflow and pipeline with you, indulging some tips of what I might do different next time.

Read more

How to switch Photoshop from Timecode to Frames

The Photoshop Timeline is a mysterious tool. You can open it from Window – Timeline, or you can open an image sequence/video clip and it’ll dock itself at the bottom of the viewport. By default it displays a sequence in a timecode of sorts, but it’s not the SMPTE or EBU timecode we’ve come to know and love. Instead, it’s something along the lines of seconds and frames, in a format like 02:02f or in other words, something NOBODY in the world would ever use.

But hey, they’re Adobe, and by default they can do anything they want (while extorting money from casual users). I don’t use Photoshop for physical film or video editing, but it’s a nice tool to have when converting rendered image sequences into video clips. I’ve described how to do this here.

When I work this way, I’m more interested in the frame count rather than some made up timecode-thing. I’ve found out how to change this in Photoshop CC, and thought I’d share it with you.

Read more

FIXED: Creative Cloud reports “out of space” although there is enough

I’ve recently migrated my cloud files over to Adobe’s Creative Cloud. I’m currently getting 20GB of space without device limitations. I made the move because Dropbox recently introduced a limitation of the amount of “new devices” that can be linked with a free account, which meant I couldn’t link my new Z600 and Z800 workstations on my render farm.

All of a sudden I see this notice that some files could not be synced anymore, telling me I’d have to clear up some space in Creative Cloud. No problem I thought, several image sequences had been converted into videos so I deleted them. My Finder window reported a correct 9GB of used space, but the Creative Cloud app still reported in excess of 20GB. What was going on?

Turns out when you delete files from Creative Cloud, they go into an invisible Trash – not on your local computer, but – you’ve guessed it – “in the cloud”. That space counts towards your quota, and unless this is deleted, new files won’t sync across your devices.

That’s different from Dropbox, where deleted files could be accessed outside the storage quota for 30 days, before being deleted permanently. With Creative Cloud, we’ll have to do this manually (but of course, nobody tells you this)… now that I’ve found how how to do it, let me show you how.

Read more

Rendering with Blender from the Command Line

I wanted to put some of my (old) computers to good use by helping them render animations. Everyone is stronger when we work together as a team, no matter if we’re built on carbon or silicone. Sadly though, Blender doesn’t start its GUI via RDP, which means it’s not so easy to speak to the application – unless you employ clunky workarounds.

That’s where the command line interface comes in handy. We can issue a text command to Blender, telling it which file we’d like to render, where to render to, and which frames of an animation to render.

Before I forget how this works, I thought I’d best write it down.

Read more

Shattering my Logo in Blender – 3D Shenanigans #15

On this week’s live stream I’ll take my 3D Shenanigans Logo and shatter it into pieces, to build a creepy backwards animation using the Cell Fracture add-on in Blender 2.79. I’ll start by explaining how the tool works, then we’ll move on to building the logo from scratch, add materials, and then we’ll build something …

Read more

Creating Animated Fog with Carrara – 3D Shenanigans #14

In this live event I’ll create animated volumetric fog with the highly underrated Carrara. I’ll show you around the app and explain how the programme works, introduce you to some of its features, and then I’ll animate good looking fog. Once exported as a transparent image sequence, I’ll try to animate it live over my …

Read more

How to switch game modes in Subnautica

I’ve had a few computer glitches recently while experimenting with a new graphics card. Unfortunately this lead to some random crashes, which in turn damaged my Subnautica game files. Suddenly my save games didn’t tell me how long I had been playing, and what type of game I was playing anymore, and instead only showed …

Read more

Using Iray Canvases in DAZ Studio – 3D Shenanigans #13

In this live event I’ll tell you everything I know about Iray Canvases in DAZ Studio. It’s a huge topic, and admittedly I don’t know everything about this subject, but it will cover how to get started with multi pass rendering and the principles of creating separate images from your scene. About Depth Passes There’s …

Read more