If you’ve ever made a custom character from existing morphs in DAZ Studio, you may find it easier to combine all those adjustments into a single slider. This makes it easier to use the character in new scenes without having to set it up again, and can cut down on the amount of morph product you need to have installed. I’ve explained how to do this in these two videos:
There’s another version in which I’m showing how this can be done with Hexagon, saving you a few clicks. It’s personal preference really. In essence, you’ll end up with a single slider that dials up your character.
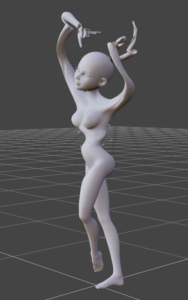
This works fine, but when you try to pose your desired character you’ll notice ugly deformations that can occur. Here’s one that didn’t work out so well 😁

What’s missing here is that the skeletal position has not been adjusted to the new shape of the character. Let me show you how to do this.
First, set your custom morph to 100% so that your new character is showing in the T or A Pose. Now switch to the Joint Editor Tool (under Tools – Joint Editor) and left click to select your character. Notice that the skeleton does not match the geometry. That’s exactly the trouble we’re about to fix. Right click anywhere on the character and choose Edit – Adjust Rigging To Shape.

This will bring up a somewhat scary dialogue that lets us select the exact joints we’d like to tweak. I’ll leave the defaults and hit accept.

DAZ Studio will think about this for a second. When it’s finished, you’ll see the bones jumping into a new position. This process will also adjust the weight maps so we don’t have random shapes anymore when dialling in poses later.
To lock this adjustment in on our morph, select the top node of your character in the Scene tab, then head over to your custom morph on the Parameters tab. Right-click on the slider and put it into Edit Mode (very important).

You’ll see the slider’s appearance change slightly. Right click again and see a variety of other options appear in the list. Choose ERC Freeze.

Another scary window pops up, showing the differences (deltas) of our adjustments. Thankfully all we need to do is hit accept and be done with it.

That’s it! Right click your morph slider again and disable edit mode, then try applying a pose. Everything should work as expected (without alien deformations).

Thanks to E. Christopher Clarke for bringing this to my attention.
Hello Jay
Thanks for the advice, I get so much more from your videos than I ever get from the DAZ forum. I’ve created a custom character, made separate morphs for the head and body, applied the ERC freeze. But now the figure will not go to the zero pose. I’ve tried applying manually, tried saving a new zero pose and applying, tried the dropdown in edit, but it will not work. It’s really frustrating. Any advice you could give would be appreciated
It’s tough for me to make recommendations without seeing your full workflow, but it sounds to me as if you made your custom character in a posed figure rather than in the base A-Pose. That’ll screw things up for sure. The head/body split can happen right at the very end even after ERC freezing, so it’s nothing to worry about during production and may have contributed to your problems.
Thanks for responding. In the interim, I did some experimenting/ sleuthing. I recreated the pose manually posing every component painstakingly, and saved under a new name. I loaded a new figure and tried the poses. It seems the original figure and the original pose are corrupt. The new poses and figures work with the new pose and zero correctly. They also work with the new character with the ERC freeze applied to the morph