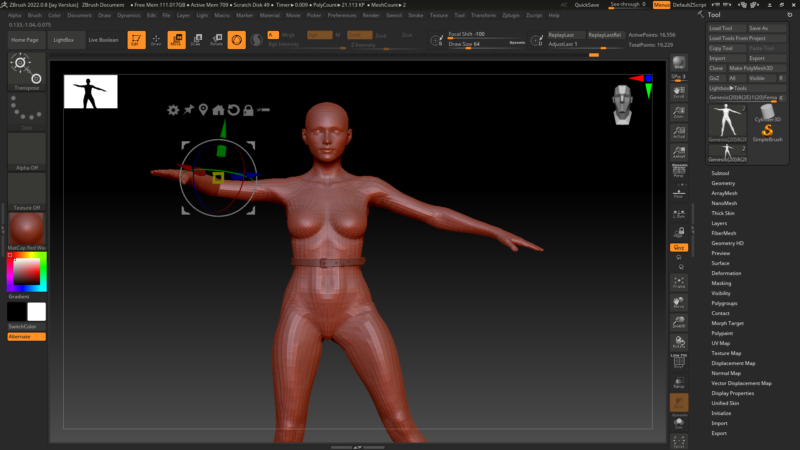
Transpose is an old-skool tool in ZBrush that can be used to pose characters and move parts of objects. It used to be insanely difficult to comprehend (like everything in ZBrush), but when used together with masking, what you can accomplish is quite remarkable. Blender has a similar tool called the Pose Brush, which is super intuitive to use. I wondered how such functionality would work in ZBrush and it took me a while to work it out. Here’s how to do it.
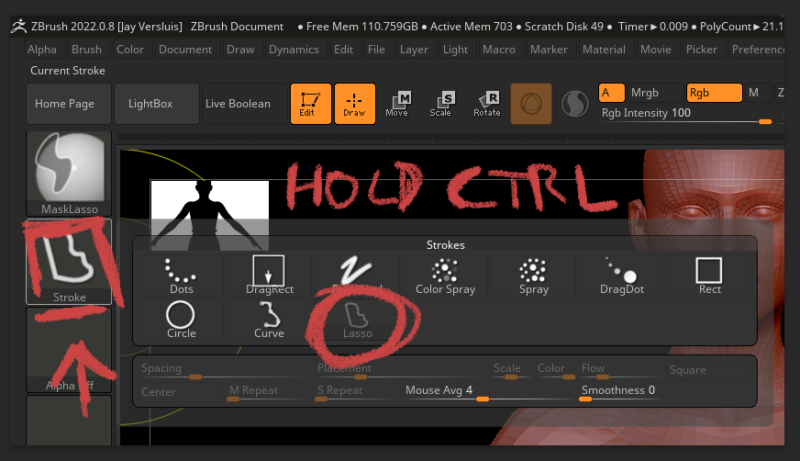
For this demo to make more sense, let’s talk about masking off the area we want to move first. Let’s use Genesis 8’s arm. We need to select it with the Masking Tool by holding down CTRL. By default we’re in draw rect mode, which isn’t useful here. Holding CTRL, click on the icon below the mask brush and select a different stroke like Lasso.

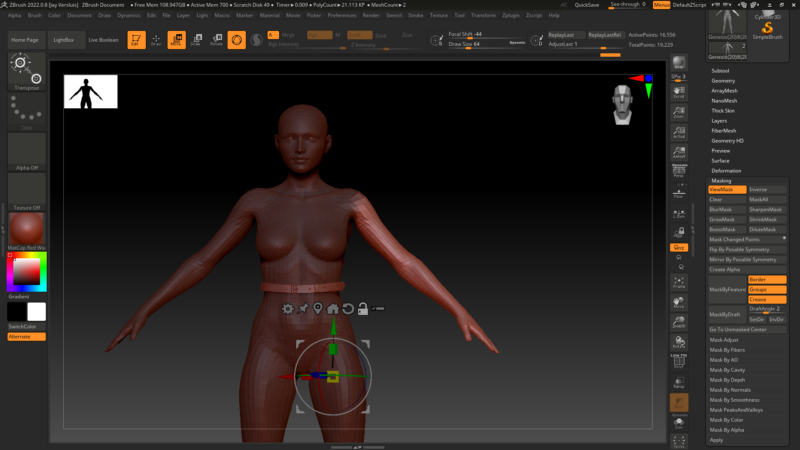
With the arm masked off, we need to invert our mask so it is movable (currently everything else is). CTRL left click on the canvas (not on the model) to make it happen. Your interface should look something like this:

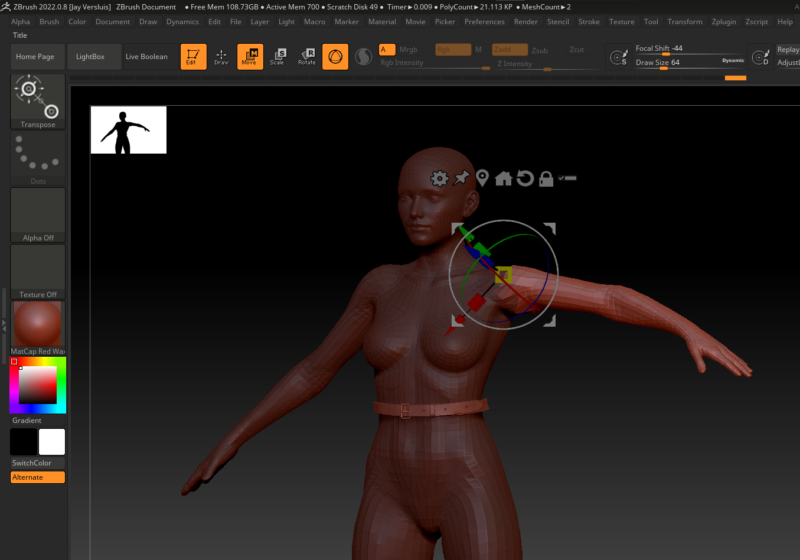
Switch into Move/Rotate/Scale mode either using the icon, or by pressing W, E or R. The mode no longer matters, but it once did. Notice the 3D Gizmo appear (if it doesn’t, press Y). The Gizmo is a relatively new addition to ZBrush, which makes using the Transpose Tool a lot easier. Our goal is to position it and use it as a pivot point for the next operation, namely rotating the arm. I’ll orient my model so that it snaps to the front view (right-click on the canvas and hold SHIFT), then ALT left click on the shoulder to position the gizmo.
Now I can use this thing to make a change to the unmasked part of my model. Neat, huh? Rotation alone will likely stretch some vertices, feel free to move them into a respectable position to make it look handsome.

Pretty much every tutorial I’ve seen tells us to left-click on the model to make the gizmo snap to the surface normal. That’s no longer the case in ZBrush 2022: we have to ALT left-click, otherwise it switches us back to the draw tool. In case you doubt your sanity, it’s not you – it’s ZBrush.
That’s it really, not as hard as it looks – but far from intuitive. Having said that, if you really want a challenge, disable the gizmo by pressing Y and take a look at the Action Line that appears. This used to be the only way to make such changes, and it still works, it just doesn’t make much sense unless you’re an old skool ZBrush user. The Action Line requires us to change between move/rotate/scale, hence all three icons are still in place, but if you use the newfangled 3D gizmo, it doesn’t matter which mode we select.
Happy ZBrushing!