I’ve previously talked about using Shot Tracks in the UE Sequencer. There’s a related feature called Takes that I’ve just found out about. It can make life easier as you try things out while you work with animations and adds an “alternate” shot that can be swapped out without destroying the original.
Each take is essentially a separate level sequence. By right-clicking on a shot, there’s an option to switch takes, duplicate and create new ones.
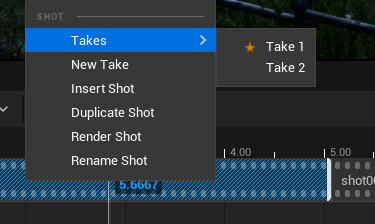
Takes only work inside shot tracks, but I’ll show you a way to use the same principle if you work with camera cut tracks instead. Let’s dive in!
Master Sequence consideration
Unreal Engine likes the idea of splitting things up into more parts than I’m used to, and once such concept is the Master Sequence. Rather than having a single timeline in which we animate multiple objects, we can group our animations together into Level Sequences. Each sequence can hold a single object (like a camera), or several (like a camera and a character).
In order for shots to work properly, we need to create a Master Sequence as the top level root, then compile our shots in it via a Shots Track. This may not be an appropriate workflow for your project though and it adds another level of complexity that may be overkill.
Master Sequences are just regular Level Sequences, although in UE4 they were a special object that’s been removed in UE 5, but the concept still works, and since 5.2 it’s called a “Level Sequence with Shots”, shots being essentially edits or cuts looking at an underlying Camera Cuts Track (yeah that’s not complicated at all).
For my demo I have two level sequences, each of which have a an animated camera. In the Master Sequence I have a single Shots Track that switches between them with a single cut.

Creating a New Take
Suppose I’m not happy with my first shot. Perhaps instead of a high angle I want to show the director a low angle shot of the same scene. He may change his mind later, so I don’t want to mess with my existing shot. I can right-click on my first shot and create a New Take.
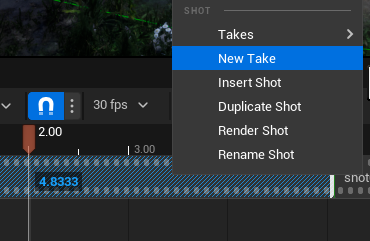
A content browser opens with a default name (like shot001_03). Leave the default name in place, especially the numbers at the end. We can rename it later, but without the numbers, UE doesn’t recognise them as takes.
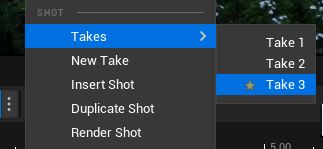
Now we have a duplicate of our existing shot, and a new level sequence to keep track of the changes. UE has switched to the new take by default (indicated by the star icon). It looks the same camera wise though, it being a duplicate and all. Double click on the shot to open the new take and make adjustments. When you’re done, click the breadcrumb on the right to switch back to the Master Sequence.
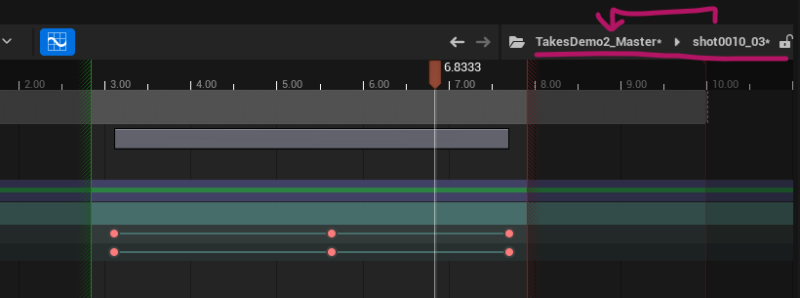
We now have an alternate take, based on a previous one! If you want to switch back to another take, just right-click again and pick another one. You can have as many takes as you like.
Renaming Shots (destroys Takes)
shot0010_03 isn’t a very descriptive name for my take, so I can right-click and choose Rename. This menu is a little fiddly, but will allow us to change the display name of my shots. It’s best to see this with either thumbnails disabled.

The caveat is that now all my takes are gone! No amount of renaming files will bring them back (as far as I know). If you want to use this feature, do so before creating any takes (and don’t rename your shots afterwards).
Alternate non-Shots Workflow
Let’s assume the whole shots thing is overkill and you’d rather work with a camera cuts track because the project is much simpler in nature. Here I have the same two camera animations as before, but they’re both part of a single level sequence.

If I wanted to create myself an alternate “take” for my camera 1, I can just duplicate it and rename it. I can then make a chance on the duplicate, then right-click on my camera cut and change it to the alternate.
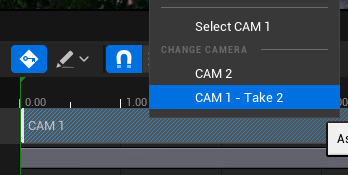

Way simpler, plus there are no renaming issues or limitations. I can see the appeal of both options. Shots provide greater flexibility for beefy productions, but the organisational overhead can be crazy.