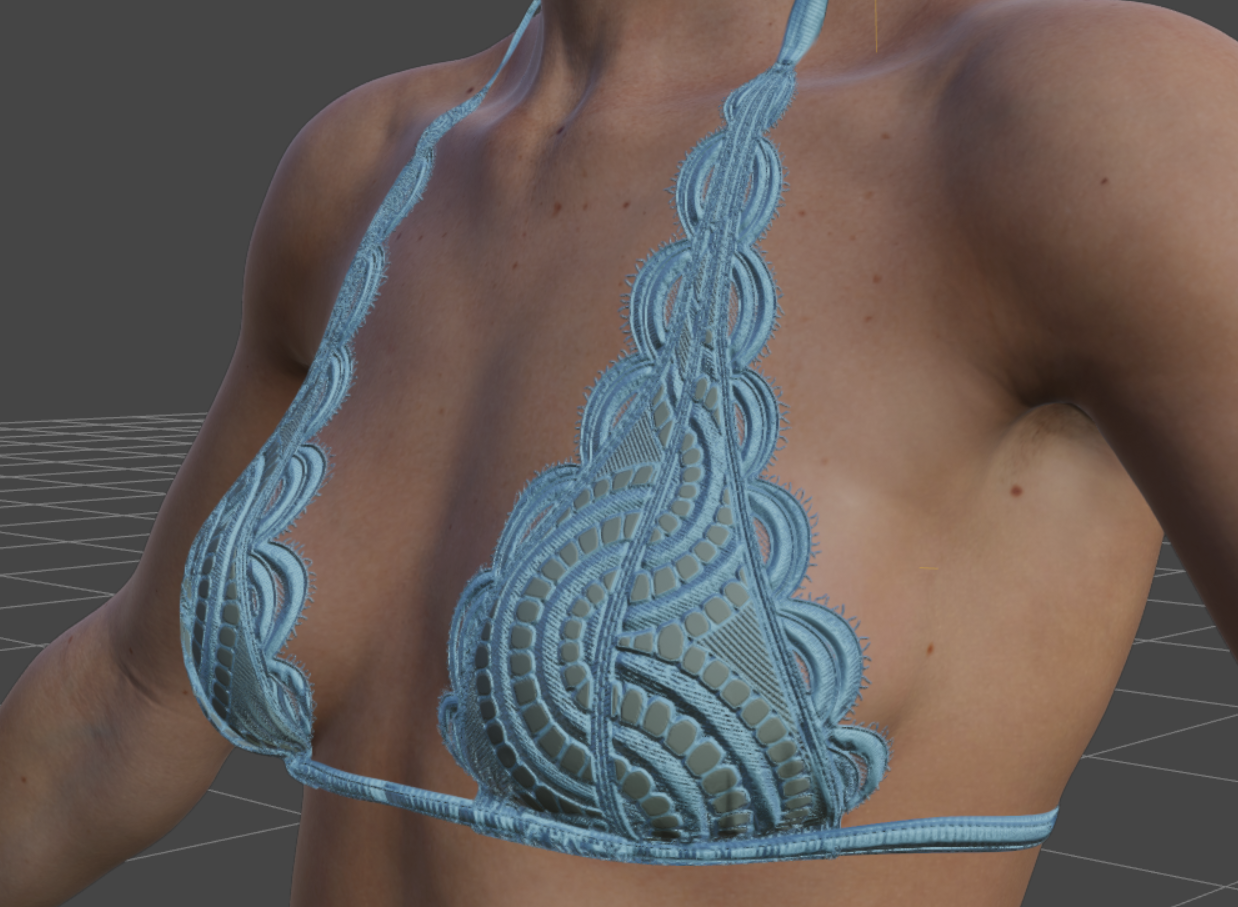
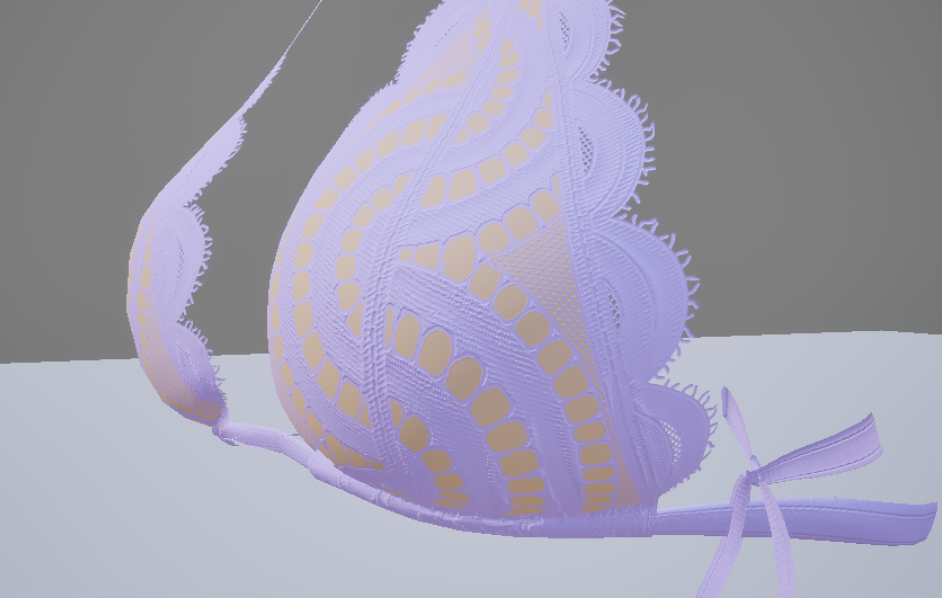
Some Daz outfits use both a bump and a normal map to create handsome looking details in Daz Studio. Sadly though, by default the current Daz to Unreal bridge only transfers one or the other, which means we’re not getting the same details showing up after the transfer in Unreal Engine. The G9 Summer Bikini is a good example of such an outfit. Here’s what it looks like in Daz Studio (with Filament):
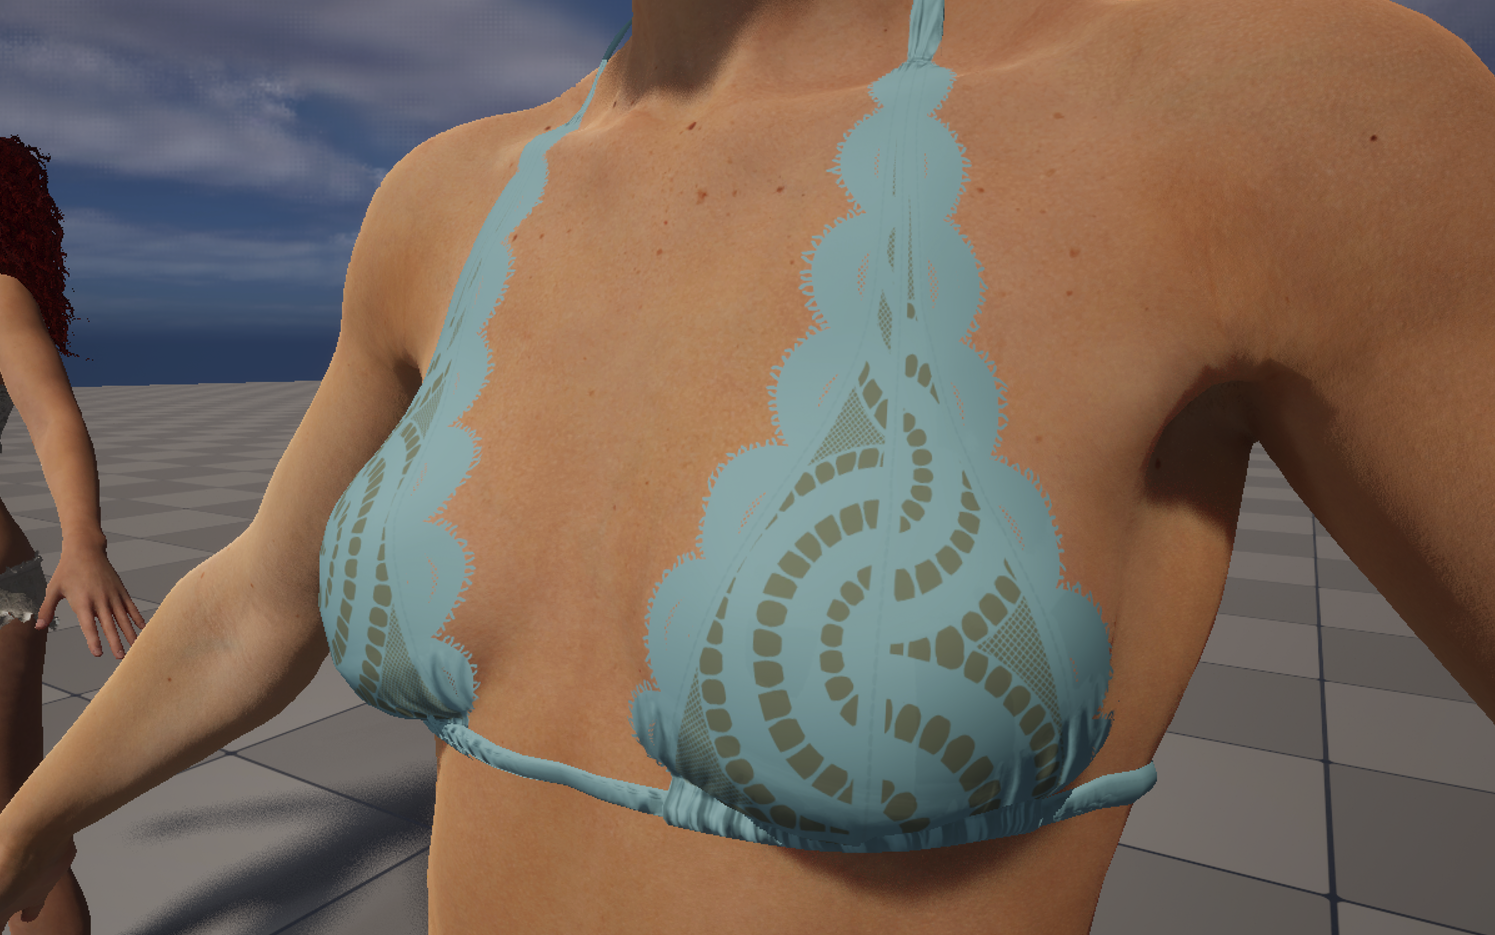
And here’s what it looks like after the transfer. The normal map is in charge or the crinkly bit at the bottom, which is displayed correctly, but the black and white bump map takes care of the pattern, which is absent in Unreal Engine:
The good news is we can fix this in two ways:
- either use an external solution like Substance Painter or Photoshop to combine the normals (that’s the best option, but requires external tools and knowledge on how to use them)
- or send the outfit twice, let the Daz to Unreal bridge generate a normal from the bump map and let UE mix them together
I’ll explain the latter solution here as it does not require additional tools, although it makes the workflow a little more involved. Fear not, it’s relatively easy.
Note that this approach requires the Daz to Unreal bridge provided by Daz via Install Manager, not the GitHub version from David as this functionality is not available in David’s version.
Prep Work in Daz Studio
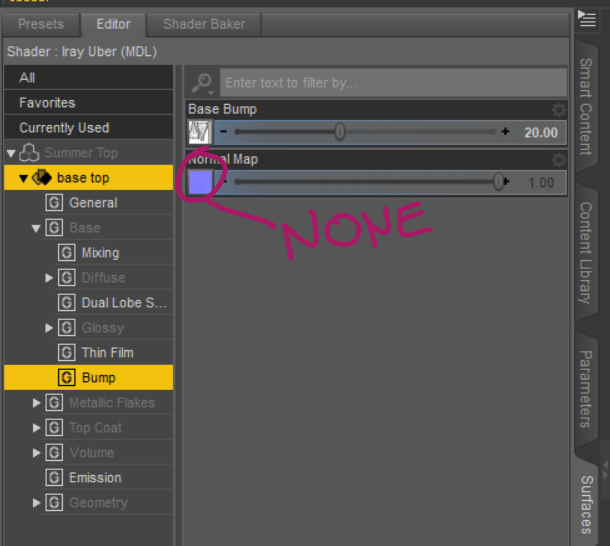
We need to transfer our object twice, once without and once with the included normal map. In my example, I’ll select my object and take a look at the surfaces tab. I can see my outfit has both bump and normal maps applied. Let’s click on the normal map and set it to “none” so that there’s nothing in that channel.
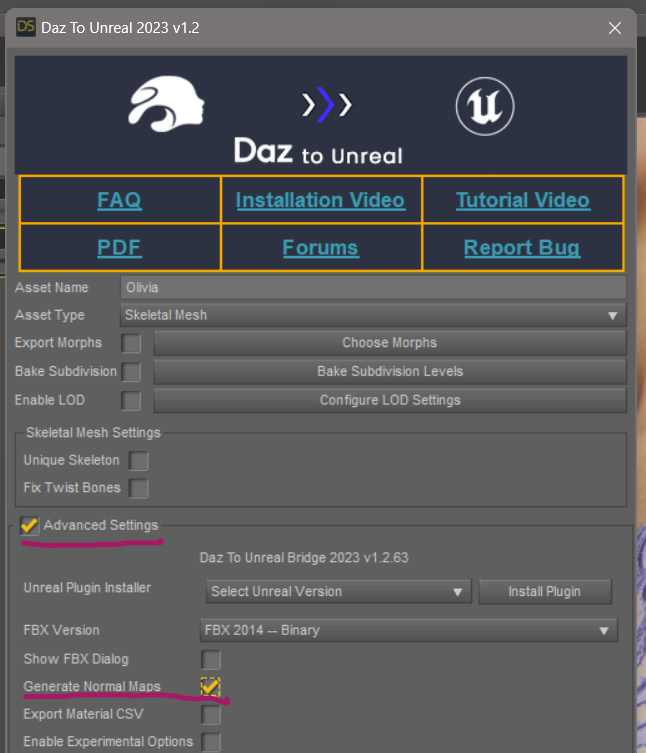
With just the bump remaining, send the object (or character with applied clothing) over via File – Send to – Daz to Unreal and open the Advanced Options in the dialogue. There’s a tick box called “Generate Normal Maps”, enable this and the bridge will generate a normal from them bump map during transfer and apply it as such in UE.
After the transfer, we see the pattern in UE but not the crinkly bit provided by the original normal map. We’ll see how to combine them in the next step.
Combining both Normal Maps in Unreal Engine
Back in Daz Studio, re-apply the normal map we’ve removed earlier so that the outfit is back to what it used to look like with combined bump and normal. Send your outfit/character combo over again, this time making sure the option “Generate Normal Maps” is disabled under Advanced Settings.
If you do this with a new name, your previous export won’t be overwritten and you can use the converted normal map directly in Unreal Engine. Alternatively you can copy it to a safe place, re-export with the same name as before, then import your generated normal again separately into UE. Regardless of how you do it, know that we’ll need both normal maps for our next step.
Once done, we’ll see the object with missing bump detail again. What we need to do is combine the current normal and the previous normal map. Best practice is to find your object’s base material (in my case it’s the BaseAlphaMaterial that comes with the Daz to Unreal bridge), make a copy of it to your own folder and open it.
Now add a node called BlendAngleCorrectedNormals in between the normal connection like this:
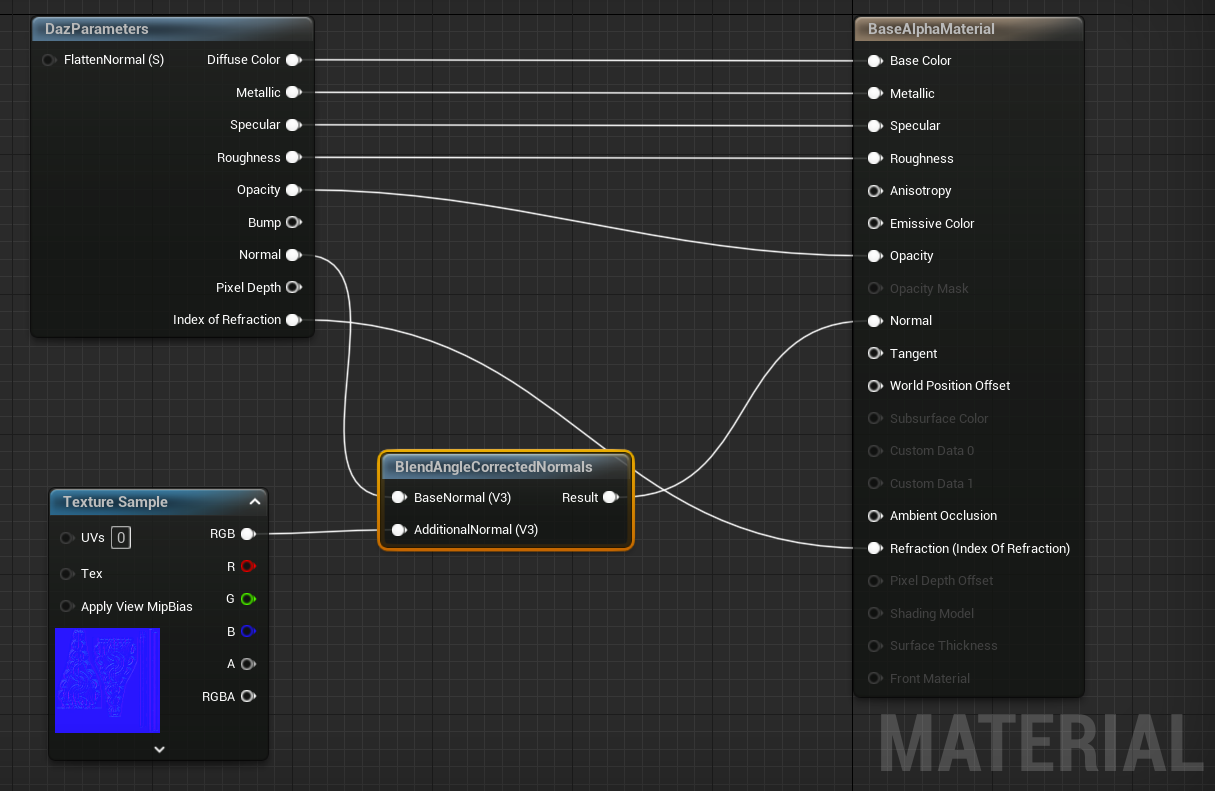
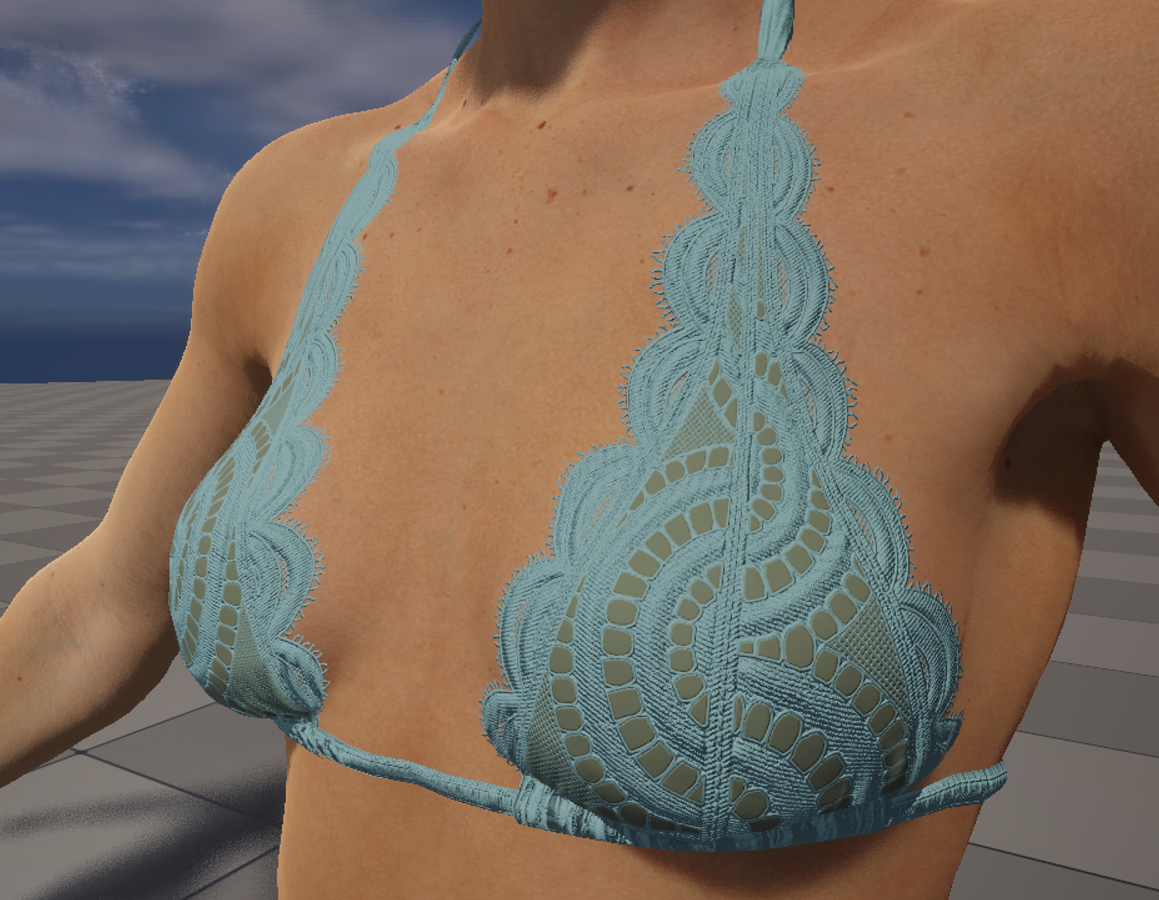
Find the generated normal from the previous step and add it to the second input – and boom, handsome looking combined normal detail has been made possible in Unreal Engine without the use of external tools.
I recommend you make this change on a copy because the Daz to Unreal base materials are in charge of all transferred materials, and this change have unexpected consequences for other objects in your scene. Err on the side of caution and compartmentalise your changes into separate files for a much happier life.
Thanks to Daniel and David form the Daz Bridge team for putting me on the right track here. This is a complex workflow and I’ll cover this in an upcoming video that I’ll add to the top of this article when it’s done.
Happy Normal Mapping 🙂