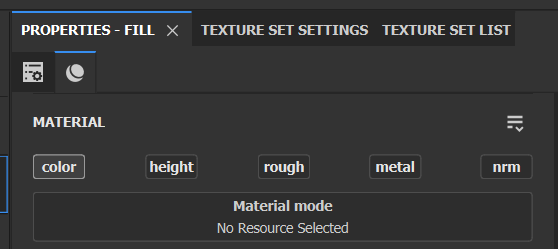
I’m sure we’ve all been there: we want to adjust a property on our Substance material and realise, with some perplexion perhaps, that said channel doesn’t exist. Take this example in which we’re missing the opacity and the emission properties. What if my object needed one of those? How do we bring them in?
This my friends we shall discuss in this very article. Turns out not every shader is created equal, so not every shader we use supports all channels. When it does though, not every channel may be enabled. Let’s take a look both scenarios and how to remedy them.
Enabling a channel
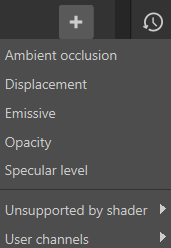
Head over to the Texture Set Settings tab and click that weird little ball looking icon to move to the Channels section. Here we find all channels that are currently enabled on our current shader (our shader is what creates the look of our object in the viewport). Mine is missing both Emission and Opacity.
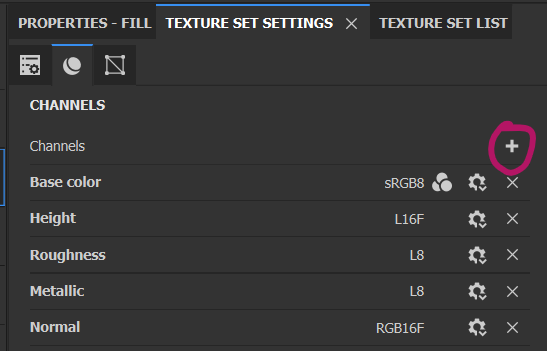
We can use the X icon to remove a channel, and likewise the plus icon at the top right to add a channel, like Emissive in my case.
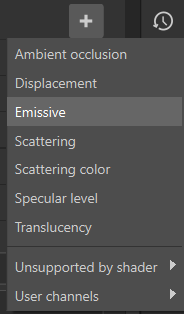
I can’t see an Opacity option though, which means my current shader doesn’t support that channel. To verify this, expand the “Unsupported by shader” menu and take a look at all the other possible channels Substance Painter knows about. It’s a long list! To make Emission happen on my object, I’ll have to change shaders.
Changing Shaders
Note that depending on the target shader I use, changing shaders means I may lose other channels that are currently in use, so make sure to pick one that has everything you need.
To change shaders, click on that weird little “ball with a gear” icon thing (I tell you, UI design and naming conventions in Substance Painter are AWFUL, but at least that awfulness is consistent throughout the entire application). This icon will show us what shader we’re using with our project.

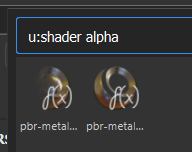
We see what our shader is called under Instance Name, and we see what shader is used (“pbr-metal-rough” in my case). It’s barely noticeable that this is actually a clickable option, but alas it is – so let’s click it to display a variety of other shaders we may change to (all of them barely readable)
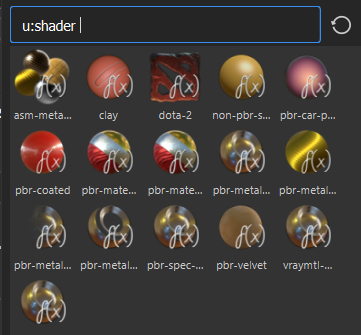
We want something with an alpha channel, so we can type that into the text field and whittle down our options to only two, “pbr-metal-rough-alpha-blend” and “pbr-metal-rough-alpha-test”.
Let’s pick the first one and head back to our channels section from before. Notice nothing has changed here just yet, but we can now use the plus icon and add that Opacity (alpha) channel to our shader. Woohoo!
That’s how it works. Big thanks to Fugazi for this tip, here’s the video in which he explains this: