iClone only shows a frame-code in the timeline by default, but that’s not helpful in all situations, especially when you’re switching between applications. If you need to make a 40 second clip in iClone, you’ll have to so some calculations we might not have mental energy for.
Thankfully there is a (workaround sort of) way to make iClone show us seconds as a guide, but it’s neither one-click not intuitive.
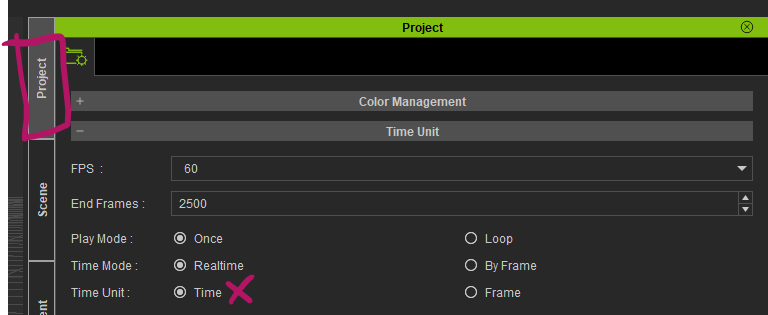
First, we’ll have to open our Project Settings and switch from the default Time Unit of Frame to Time (Edit – Project Settings – Time Unit).
Notice how thing seems to change on the main timeline. That’s because we have to open up that second timeline above the timeline because… reasons I guess. It’s that tiny eyeball icon at the bottom right, just above the timeline (they call it the Play Bar, press F9 to toggle it).
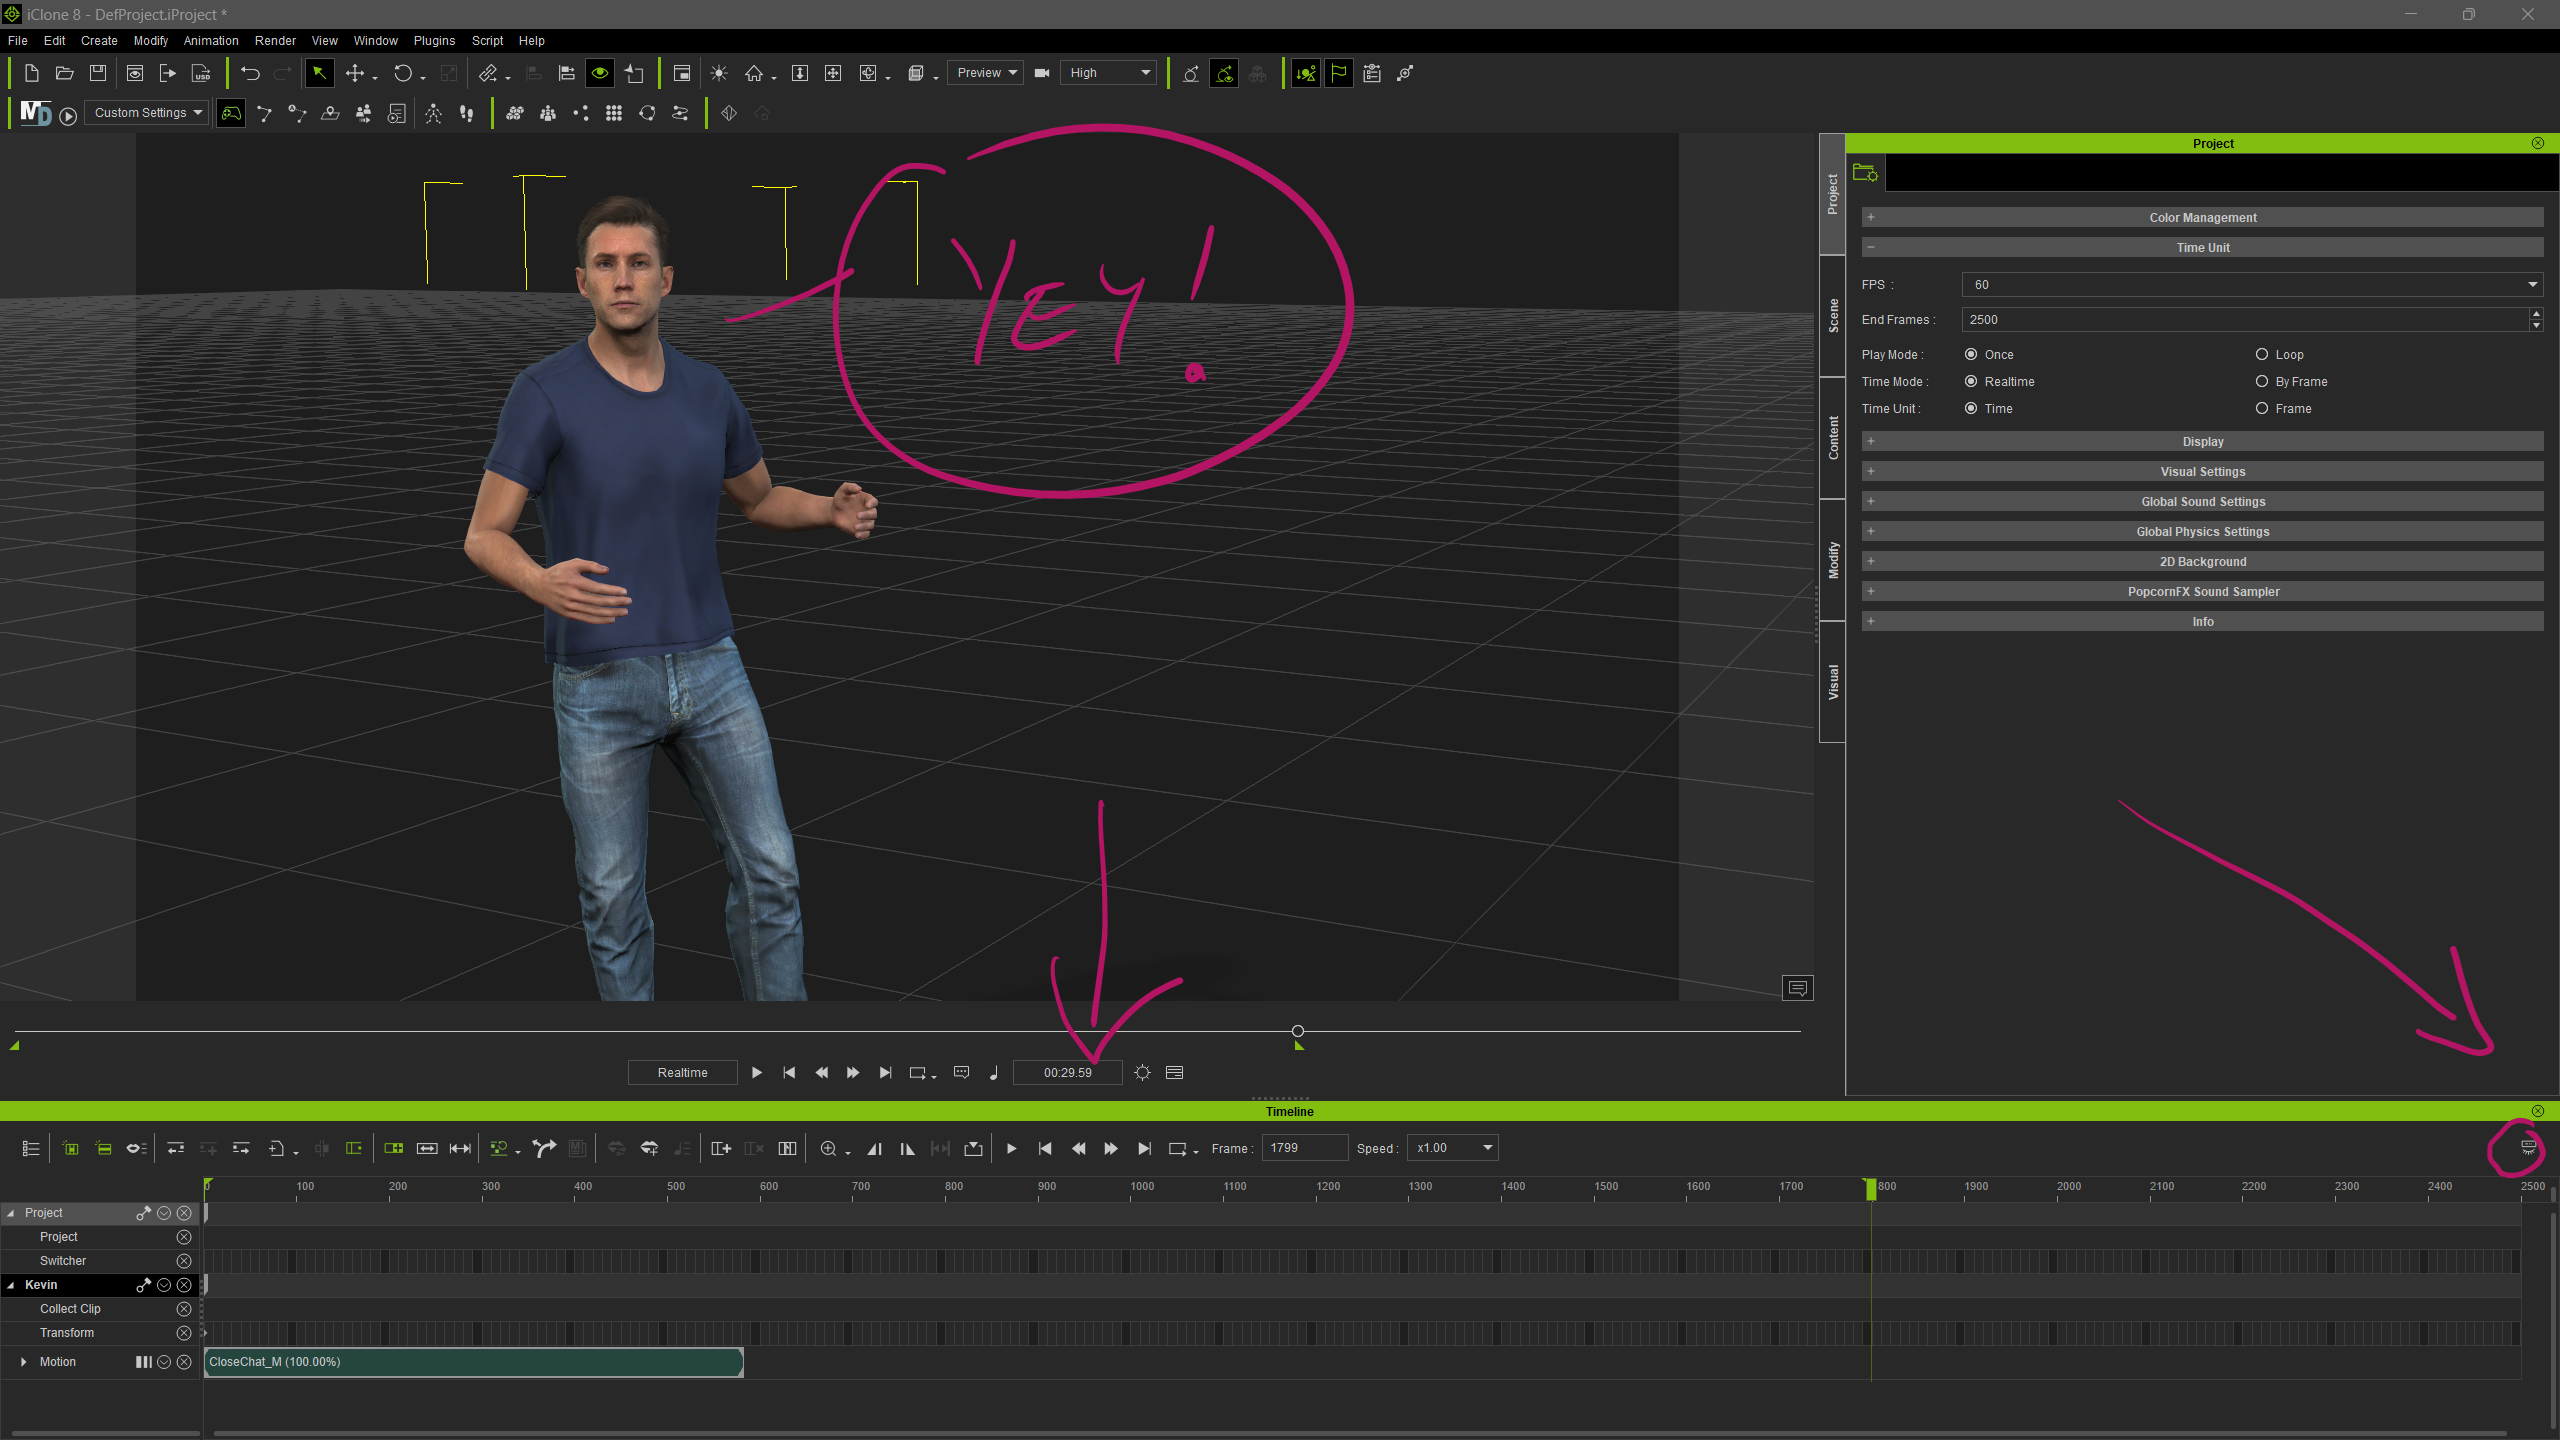
Huzzah! Another animation mystery has been solved!