Character Creator has a similar workflow to Daz Studio when it comes to importing and rigging clothing. We export the avatar, model/fit clothing in MD, export an un-rigged OBJ and transfer the skeleton and weight maps. Pitfalls lurk at every corner of course, so I thought I’d make some notes before I forget it all again.
There’s is actually an “official/correct but not great” and “unofficial/incorrect yet working better” way of doing this. I’ve only just found out about the latter, which is much easier to keep the garment in position. I’ll add that at the end of this article.
Exporting your avatar from CC
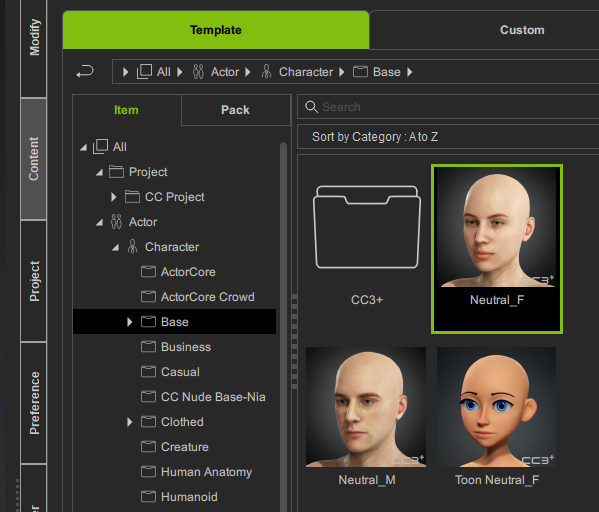
CC doesn’t mind what shape your base character is in for rigging, and it doesn’t seem to be necessary to pick a base character. For this demo thought I’ll use the CC3+ Base Female figure.
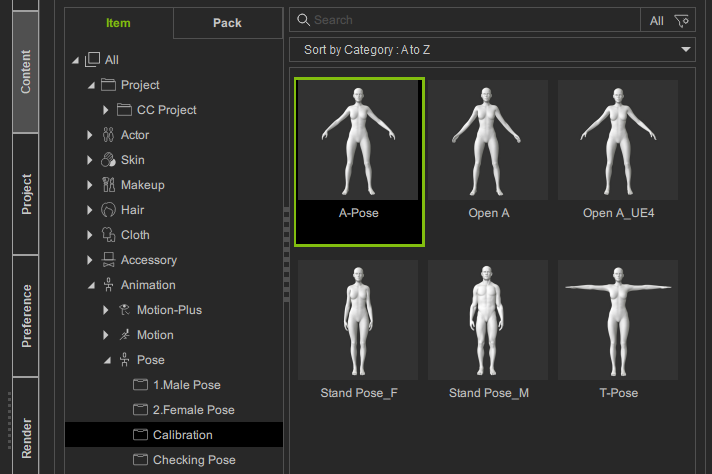
The figure will come in with a casual standing pose, so we’ll need to dial in a usable A-Pose to fit our clothing. You’ll find one under Animation – Pose Calibration.
Now export the character for MD via File – Export – OBJ – Character with Current Pose. Note that there’s no context menu, so we don’t know the scale or which axis is up. Trust me when I say it’ll be centimeters and Y up (you’ll need that info when you import your avatar into Marvelous Designer.
Meanwhile, in Marvelous Designer…
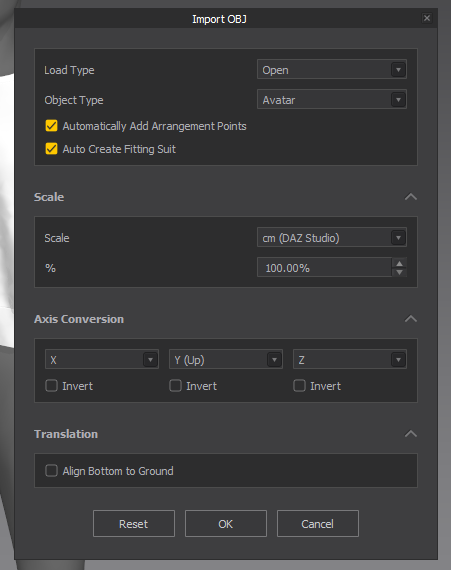
Let’s import our new avatar with the following settings via File – Import – OBJ:
If you use this figure a lot, it helps to save it as an avatar into your library so you can re-use it for future projects. With the help of the fitting suit you’ll be able to have MD calculate the new fit of existing MD patterns via
- 3D Garment – Re-target Draping and
- 2D Pattern – Fitting – Auto Fitting
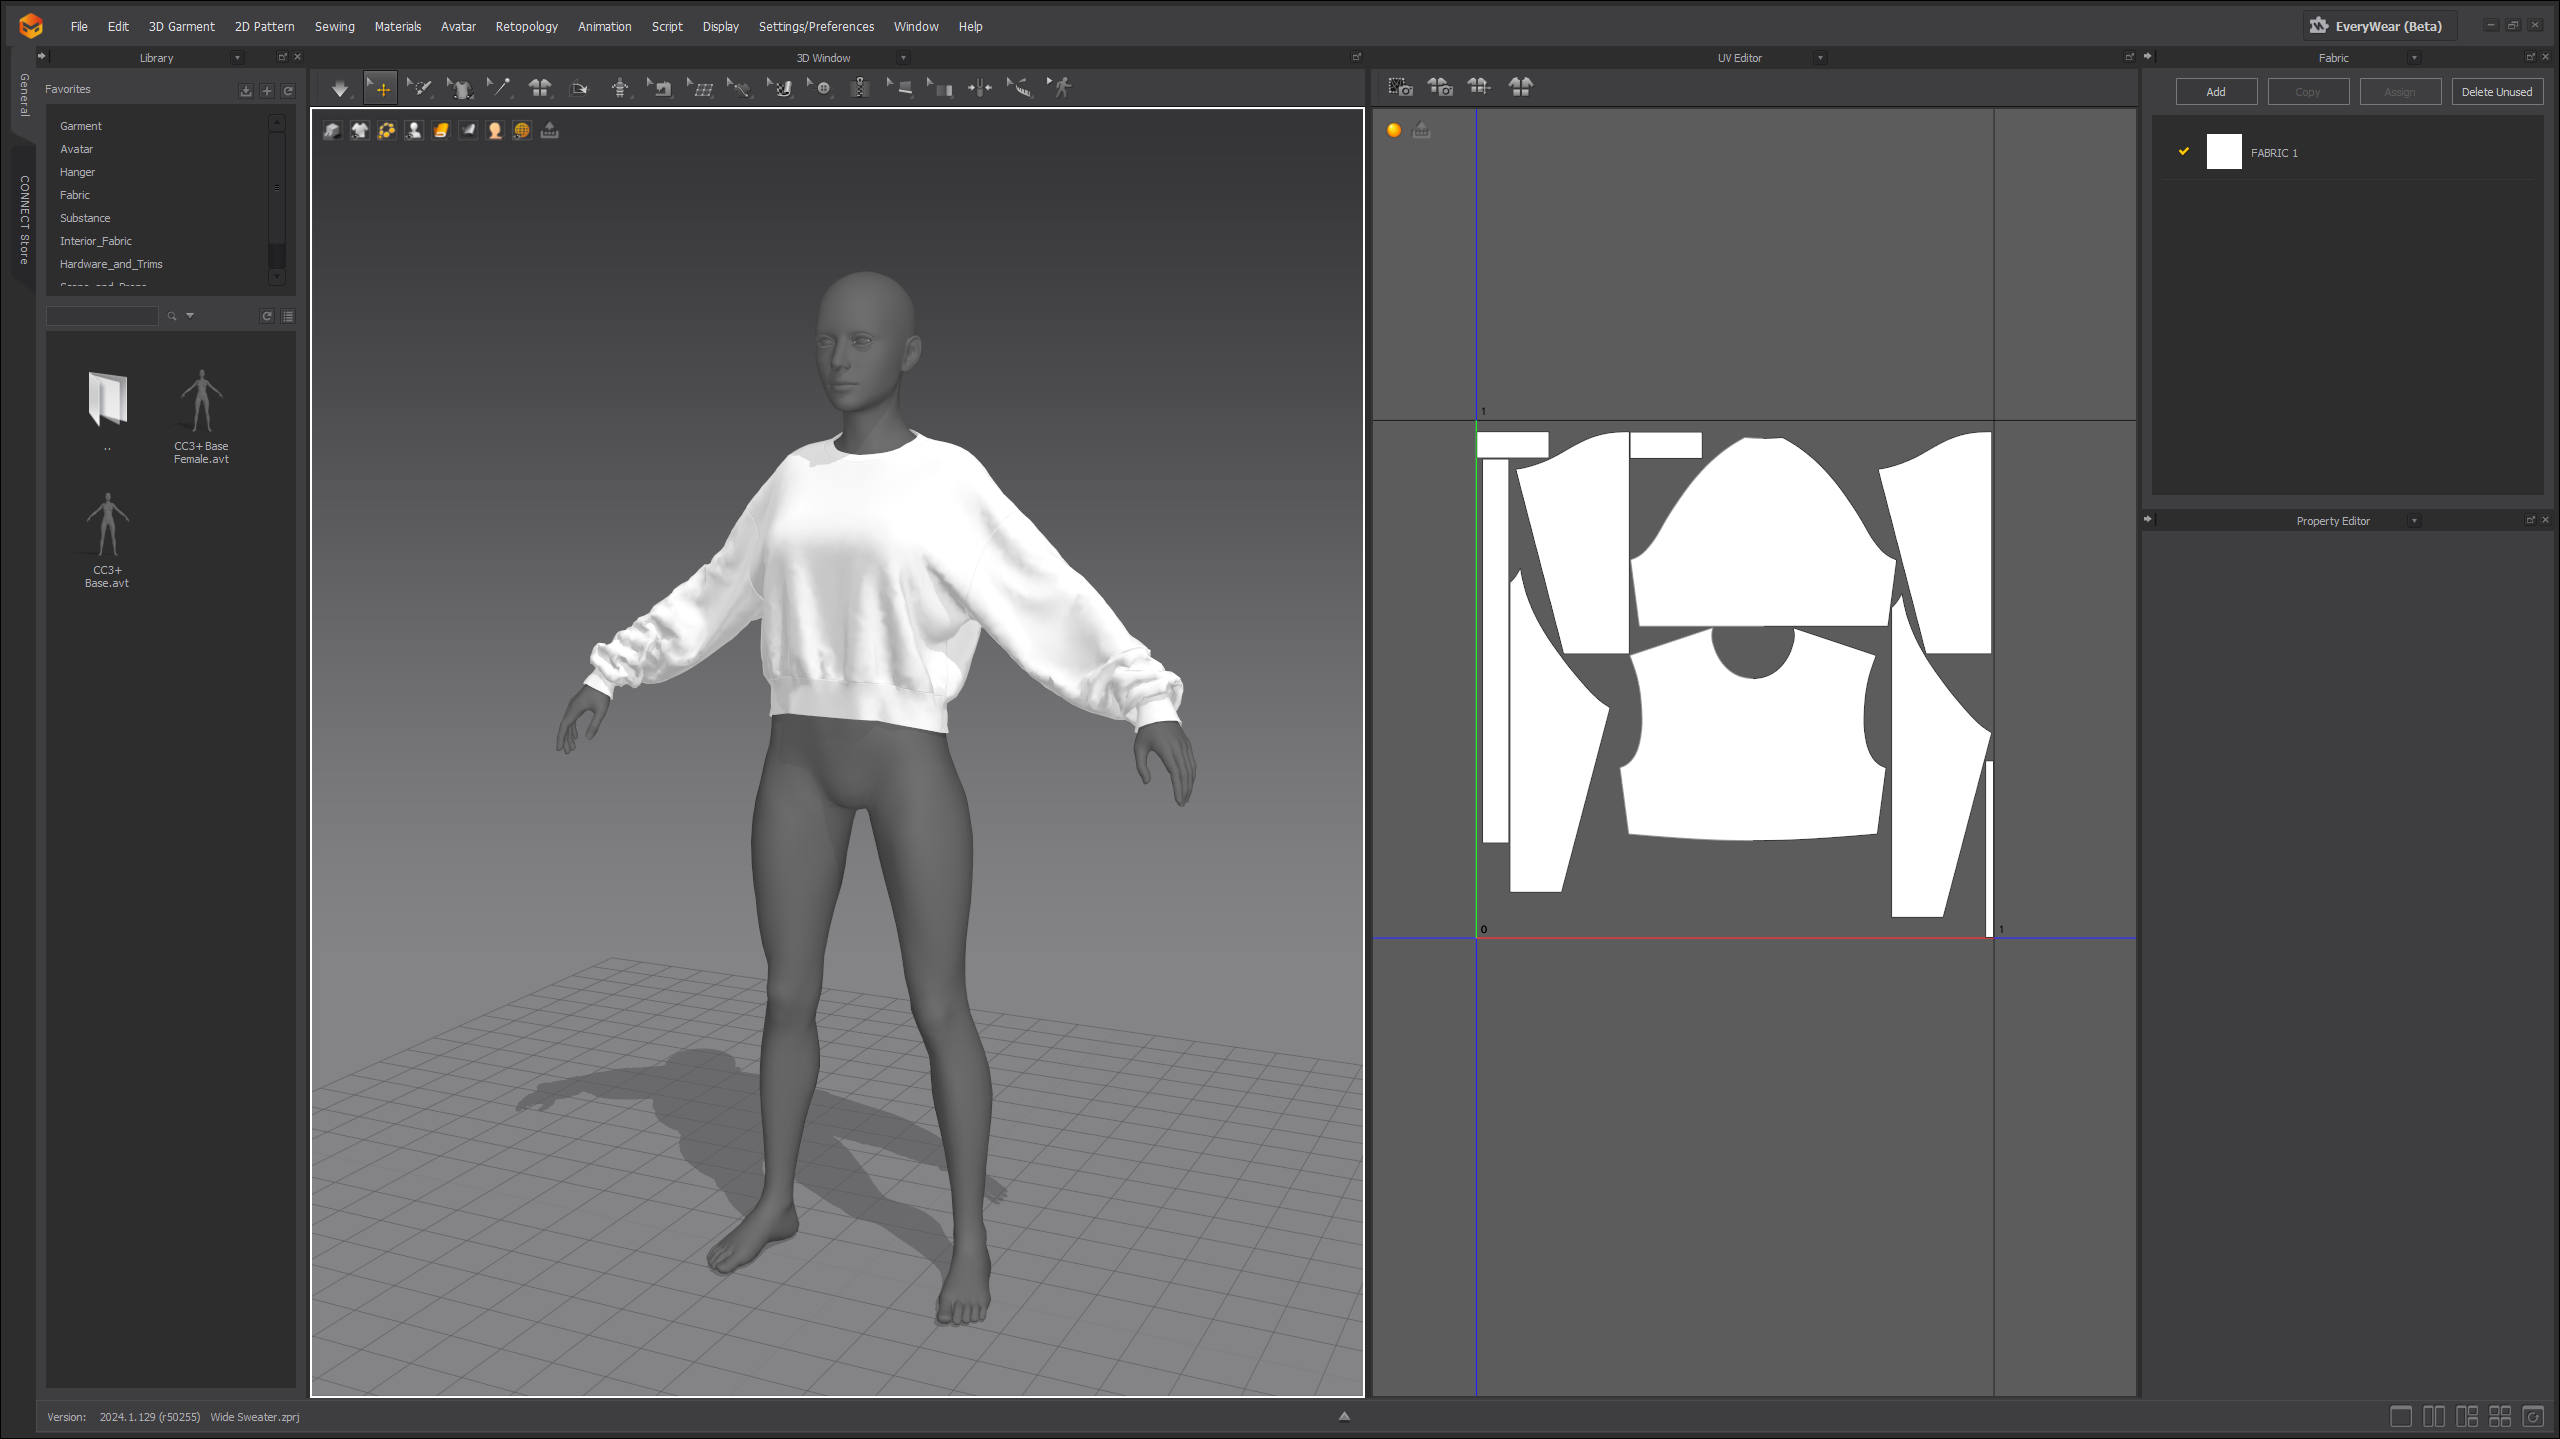
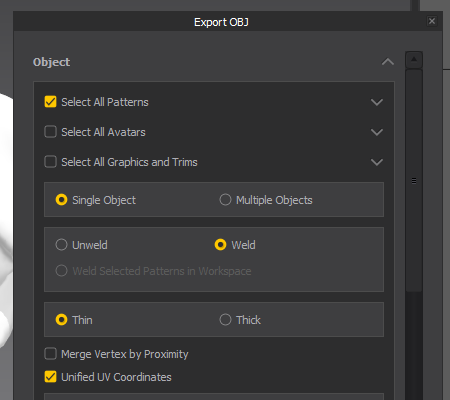
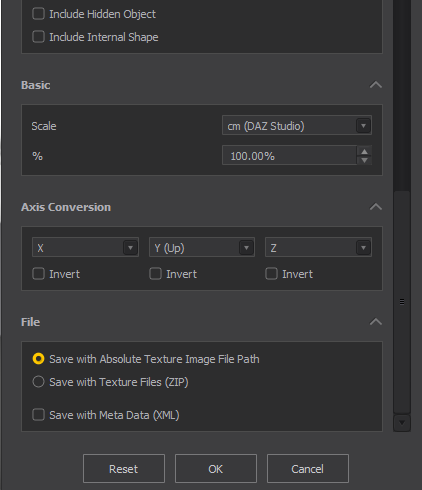
After a quick simulation where necessary, UV mapping and texturing, we’re ready to export our clothing as OBJ with the following settings:
Import clothing into CC (official option)
To import our clothing object, we’ll choose Create – Accessory (not File – import as you may expect). This will load our OBJ into the scene, however you’ll notice that it no longer seems to fit as it did in Marvelous Designer. What’s going on?

Turns out that it’s a “feature”, in which CC matches the position to a sort of socket on the skeleton. Naturally it picks the wrong one for our shirt, but this workflow makes it easier to position things like guns and hair meshes I guess. The unofficial way below will fix this.
To fix this, head over to the Modify tab and find the Attach section. Here you’ll find an icon with three dots that lets us pick the RL_BoneRoot instead of the CC_Base_Hip that’s selected by default. Select Position and Rotation under Align (instead of None) and the outfit should snap right into place.

Transfer rigging and weight maps in CC
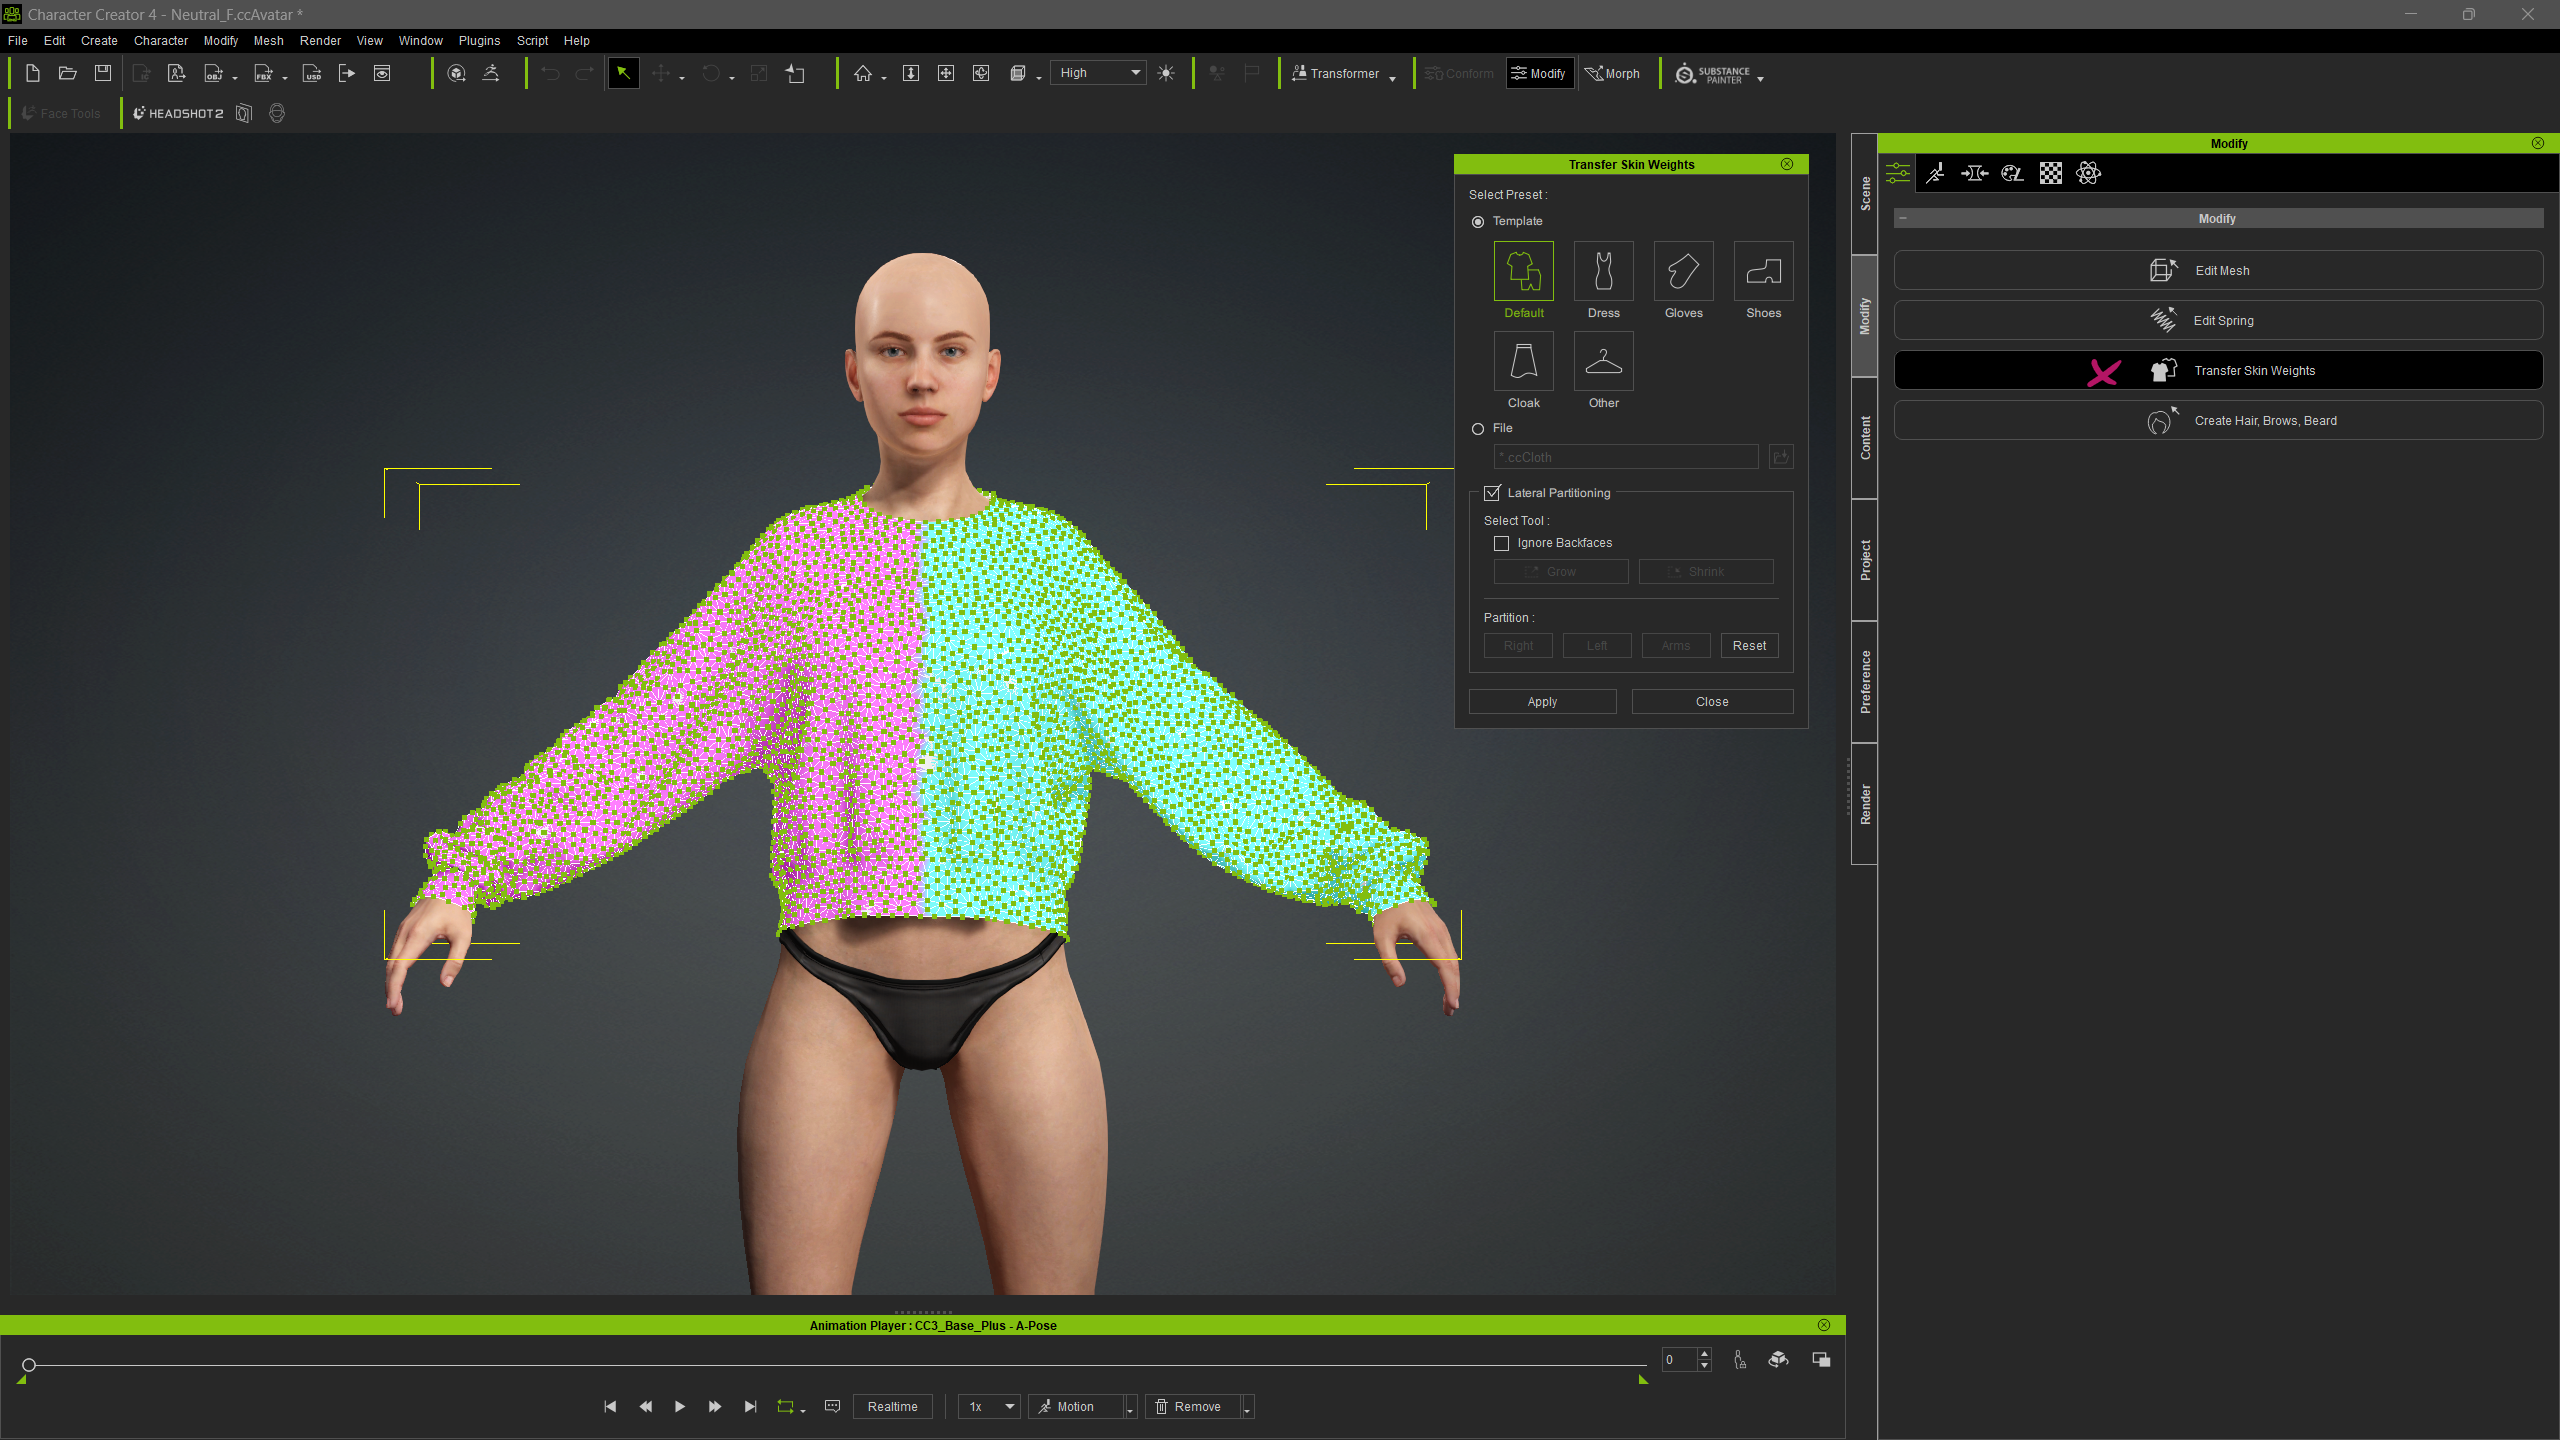
With our clothing item selected, head over to the Modify tab and choose Transfer Skin Weights. This will open a dialogue with presets (pick the right one for your clothing). If you’re lucky, under Laterial Partitioning your mostly symmetrical garment may have been detected into left/right parts as in my case. If you’re not so lucky you can use the selection tool to drag a rectangle around a portion and tell CC what it is.
Now it’s time to fix some of the weight maps that didn’t get transferred as well as we may have wanted them to. In my case the wide sleeves have caused an issue. Select the main character and use the Edit Pose tab to test some movements.
With the garment selected, head over to the Skin Weights tab. This is where you can pick a bone and see the influence it has over which part of the mesh. We have to go through every single one, smoothing/adding/subtracting where appropriate to get the best result for each area (within reason). This process is very similar to how we do it in Daz Studio.
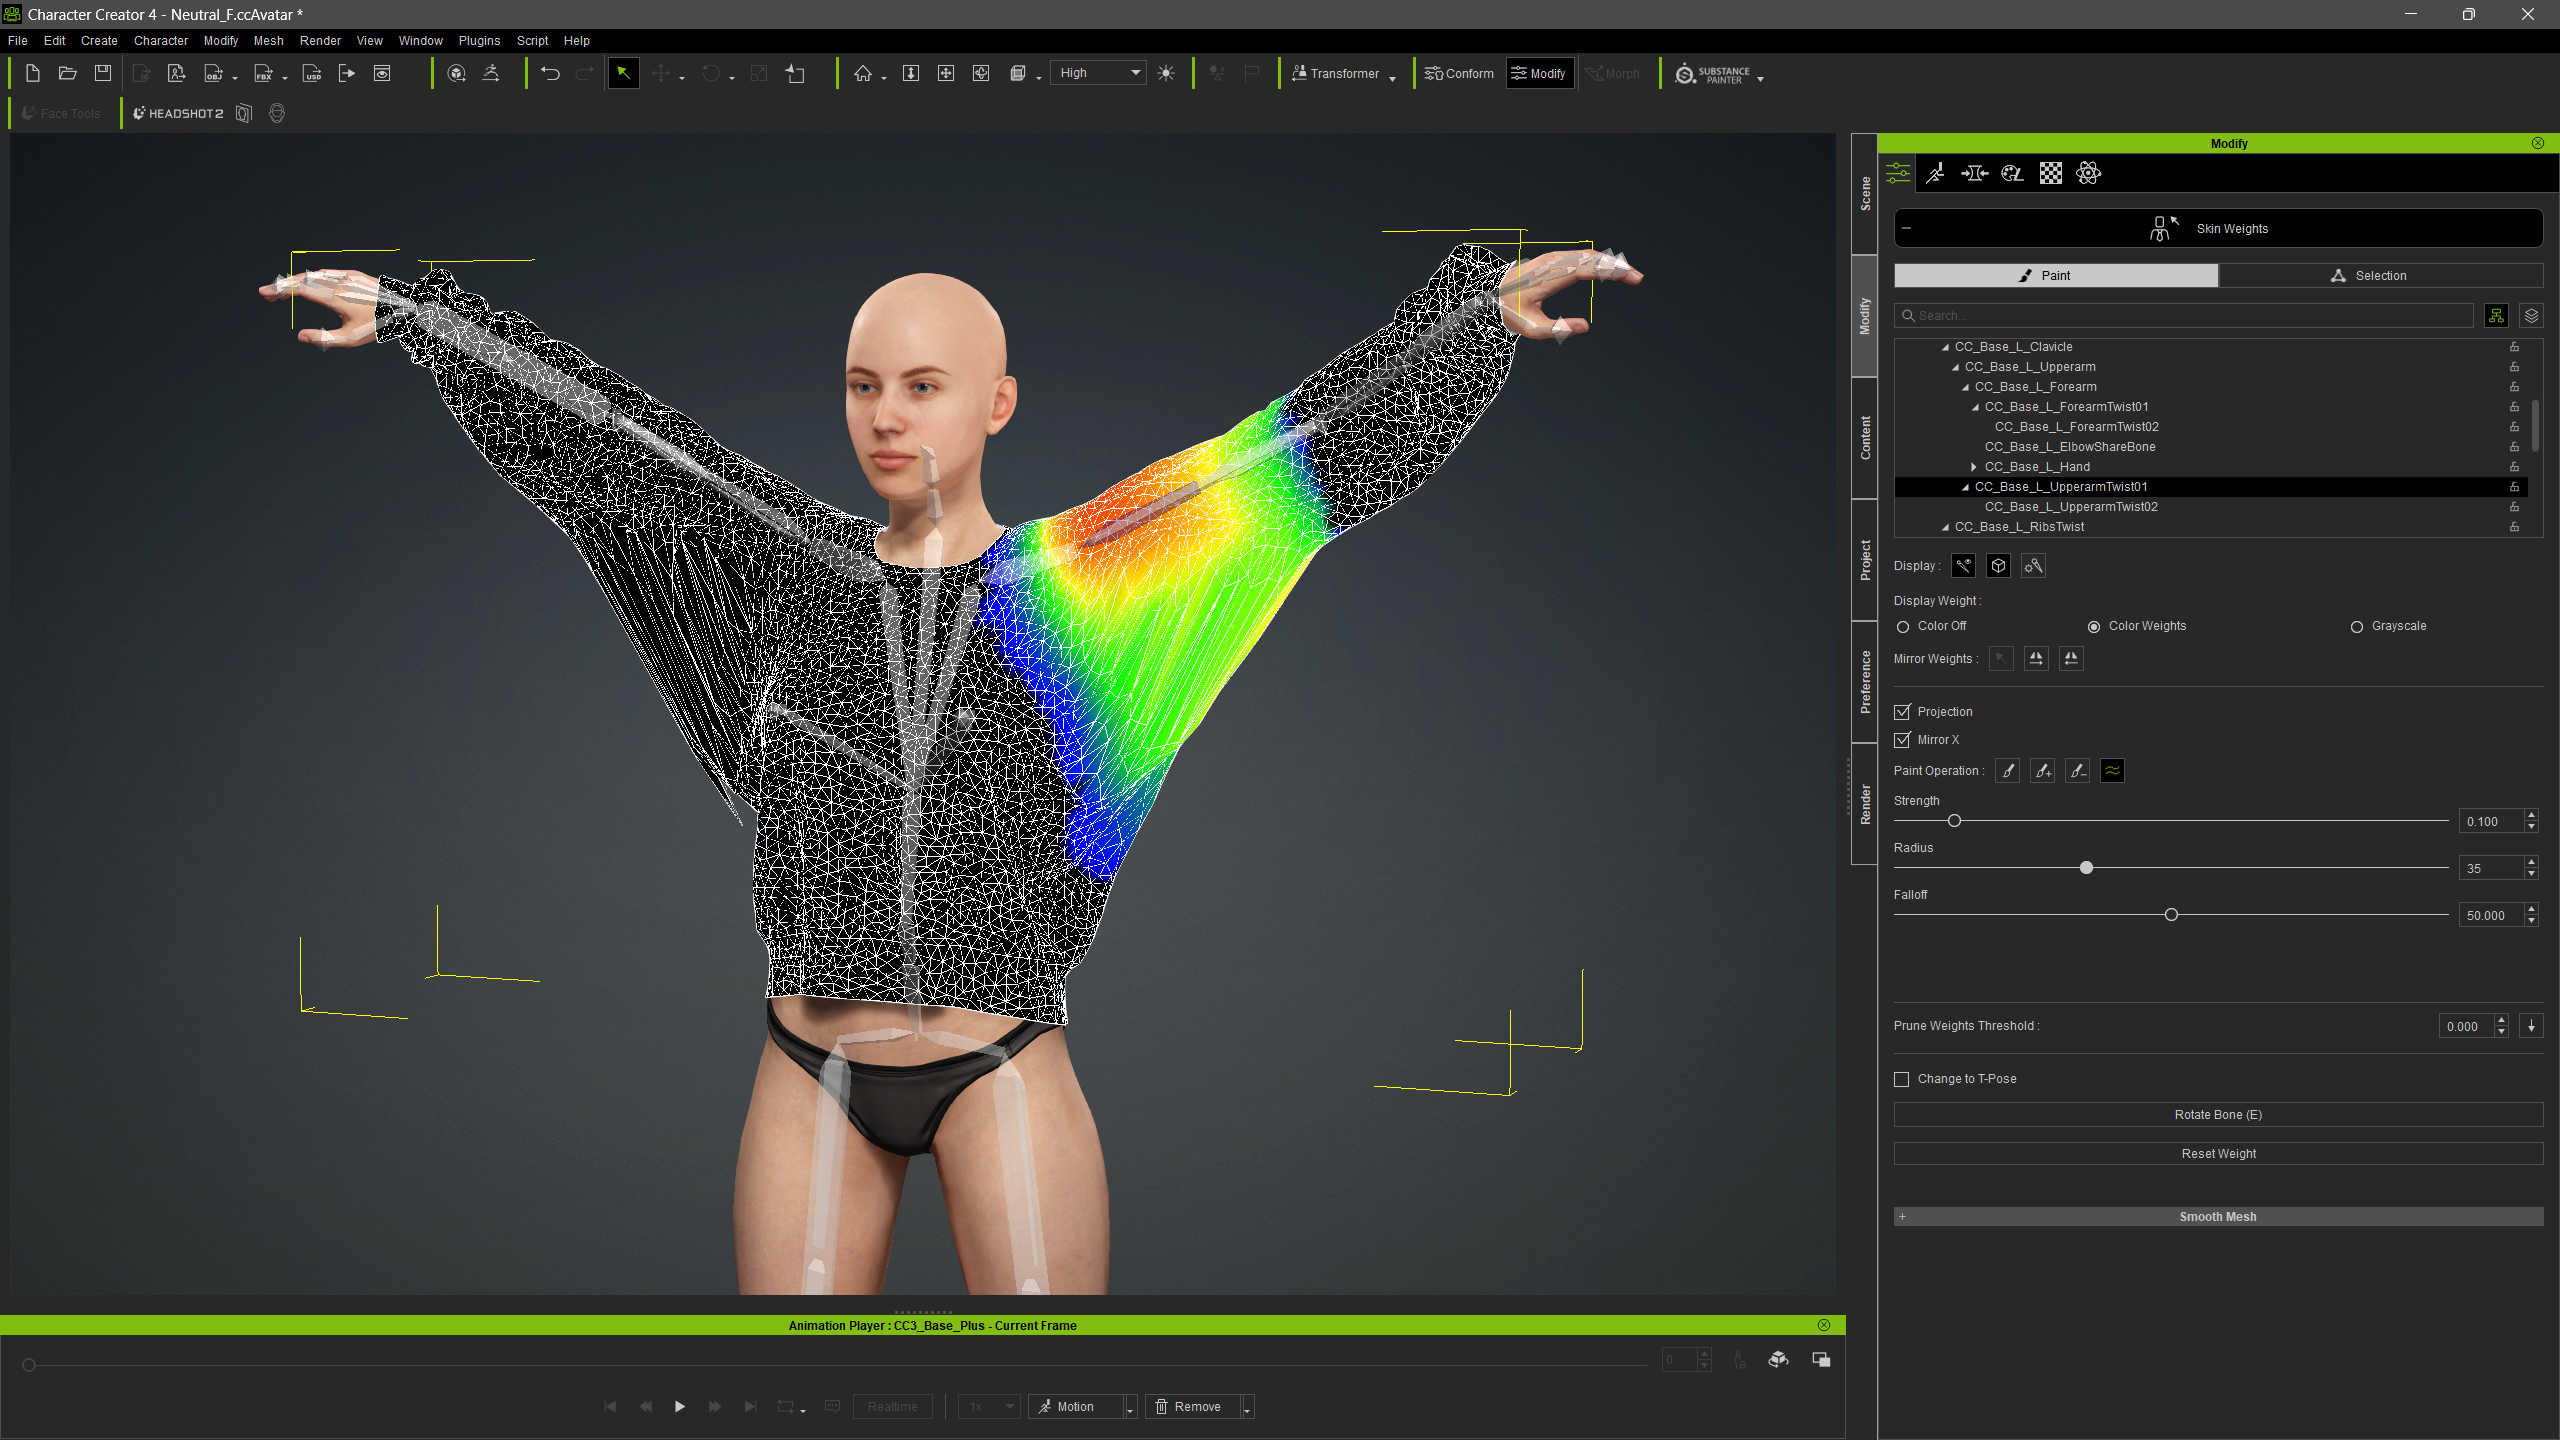
Right-click on a bone to select it (or pick it from the list) and the associated weight is displayed in the viewport. Use the brush tools to paint/add/remove/smooth the values until the garment looks good, or use an external tools like ZBrush to make changes to the mesh (I’m not entirely sure how to do that at the time of writing and might make a note here when I find out).
Note that not all bones have weight, or should have weight. For example the hip shouldn’t have any. On other bones like arms and legs, only the twist bones should have weight, not the non-twist bones. Peter explains more about this at 39:30 in his video.
If you don’t want to fiddle with the weights and intend to use cloth physics instead, I explain how to set those up in my next article.
Unofficial (yet working much better) Import Option
Thanks to Brian, I now know of a better way to import the garment from MD, namely by NOT using the Create – Accessory option. This is the culprit for having the garment in the wrong position, no matter how hard we try to adjust it. Let’s just use File – Import instead, which will leave the garment in the exact position it came out of MD. Go figure!
At this point though, there’s no way we can transfer the weights just yet, because the item is a prop. To solve this, simply attach it to your character’s root node, and it will automagically become an accessory – ready to be rigged (with the added benefit that it’s in the correct position). This is found in the Modify tab.
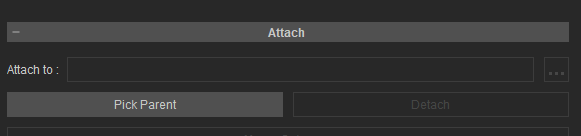
Select Pick Parent, then click on your character and adjust the attach to field to root. That’s it!