Flipping or recalculating normals usually requires a round-trip into a modelling app, but thanks to Unreal Engine’s built-in modelling tools, it can also be done “in-Engine” as they say. Let’s see how to do it!
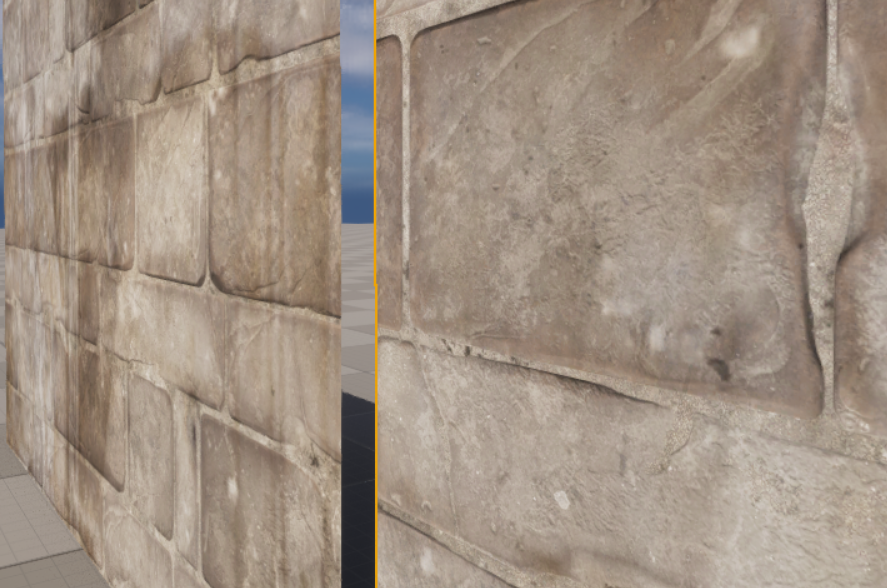
It’s a little hard to see from this screenshot, but the object on the right needs its normals flipped for the material to look correct (the grout should be going in, as it does on the left).
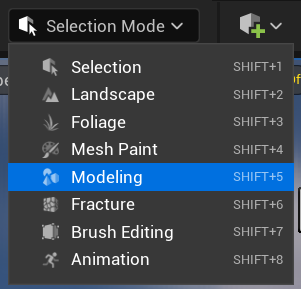
Select the object in question, the switch into Modelling Mode.
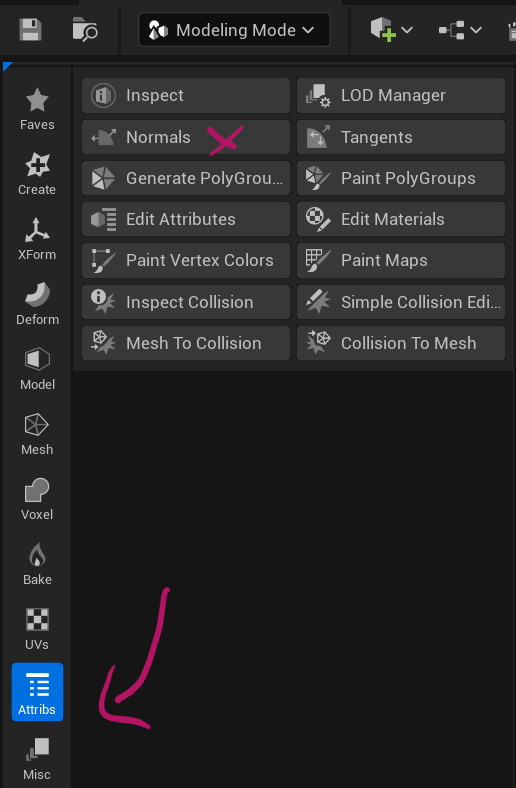
Now switch to Attribs, then click on Normals.
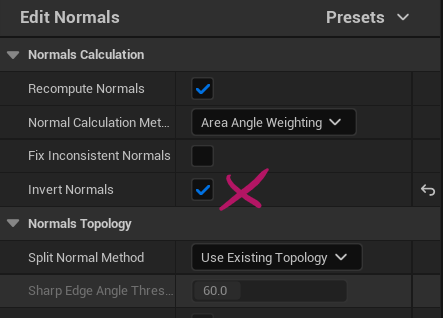
You’ll find several handy options here, such as recalculate (same as in Blender for inconsistent normals), and an Invert Normals tick box. Click that and you’ll see your normals being flipped.
When you’re happy, click accept at the bottom to save the changes to the object. Note that this is always a destructive process, so if you make any change with modelling tools, it’s handy to make a duplicate just in case you need to go back.
Happy Flipping!