This week I had to animate material properties on a number of objects from Sequencer. That’s not a big problem when you can access the object directly, but in my case it was a blueprint that had several child blueprints attached (an array of lightbeam objects, each of which was setup with a dynamic material instance to make the change). There are two ways to animate those, and I thought I’ll leave some notes for my future self and anyone who’s interested in doing the same here.
The first option is to create a custom event that does the animation and fire it from an Events Track in Sequencer. The benefit is that all complex stuff can happen in code, but the downside is that it can’t be previewed and judged/amended in the context of your animation. The second option was a bit more complex, but allows for previewing changes in the viewport and making changes live on the timeline.
In principle, here are the steps to make this happen. I have a main blueprint, which in turn has 24 child blueprint actors as components. I needed several properties, but will focus on just one to describe the principle:
- define the animatable property in the main blueprint (expose to cinematics)
- define a function in the child blueprint to set the new value
- define a function in the master blueprint to read the array of child blueprints and call the previous function (so they all get the new value)
- in the Tick event, compare the current (animated) value to a temp variable that holds the initial value
- if different, fire the “change value” function and update the variable
- and finally, animate the property in sequencer
Note that the tick event is firing when you render, but also when you switch UE to Simulation Mode, which is necessary to preview the changes. Let’s take a look at this step by step now.
Material Prep Work
I found a nice light beam blueprint in the Gothic Interior Megapack by Meshingun/Leartes and will use it as an example. I want to animate its visibility, fading it in and out as necessary. You’ll find it in the Environment/Blueprint/Godrays folder, should you want to follow along.
In my project I’ve added adjustments for width and length, changing colours and adjusting the brightness on ever other beam, but let’s just focus on one property here: the opacity. Sadly the material doesn’t have a property for that, so let’s create it on the parent material. It’s called M_GodRay_MASTER. All I’ll do here is create a scalar parameter called Opacity, then hook it up through a multiply node.
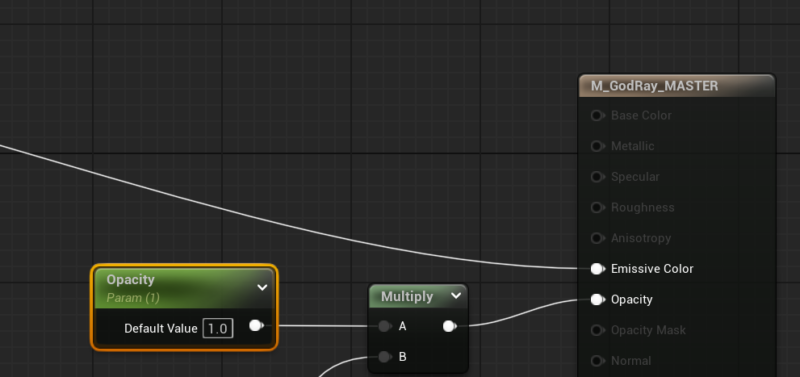
On our BP_LightBeam object, we’re using this via a dynamic material instance so that values can be overridden at runtime. Take a look at the construction script of the light beam blueprint to see how they do it in code. Note the MID variable, which is the dynamic material instance for our light beam’s properties. Our new Opacity value will be accessible with a similar setup in a moment.
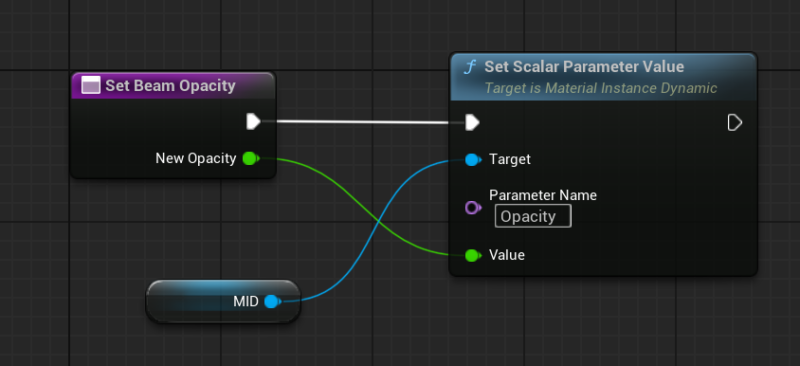
I’m going to create a small helper function on this light beam blueprint that makes it easy to override this value through the dynamic material instance that’s already setup. I’ll use an input called New Opacity, then hook it up like this. I’ll be able to call this from my master blueprint later. You can create similar functions for any other material overrides you want to animate.
Creating our Master Blueprint
Let’s combine several of these light beams together now. You can just drag several copies out into the viewport, then create a blueprint from it, but I thought we’ll get a bit fancier than that. I’m going to make a whole ring of light beams using an Editor Utility Blueprint. That’s a class that can execute things for us, like spawning a number of these beams in a circle. Here’s how I did that:
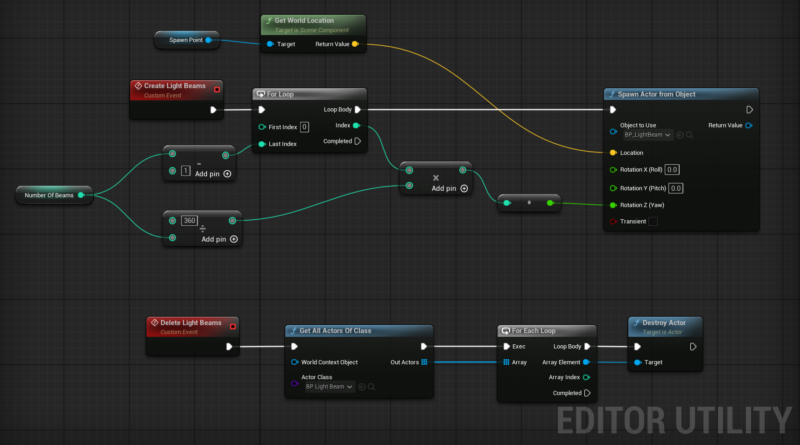
These are two helper events, the first creates x amount of beams from a central spawn point, the second deletes them. Both events can be called in editor, and I have one public integer variable called Number of Beams. This lets me type in a number, click a button and see what the beams look like as an array.
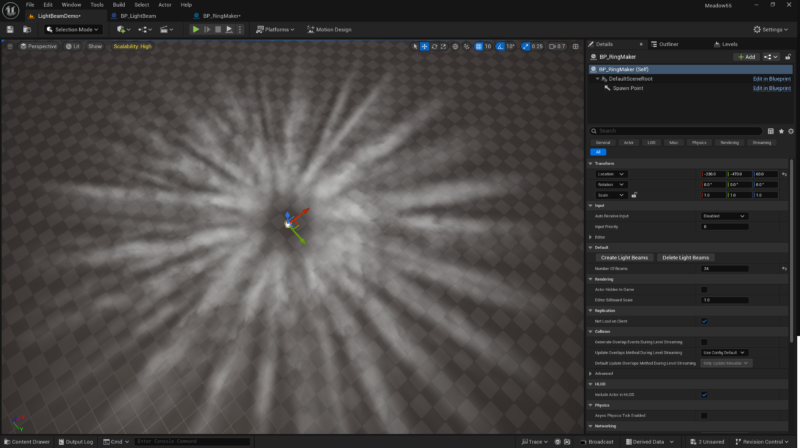
I’m going to stick with 24 light beams and I want to combine them all into a single master blueprint to which we’ll add some functionality. I’ll select them all in the viewport and choose Convert Selection to Blueprint Class.
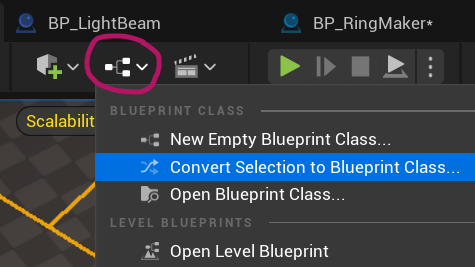
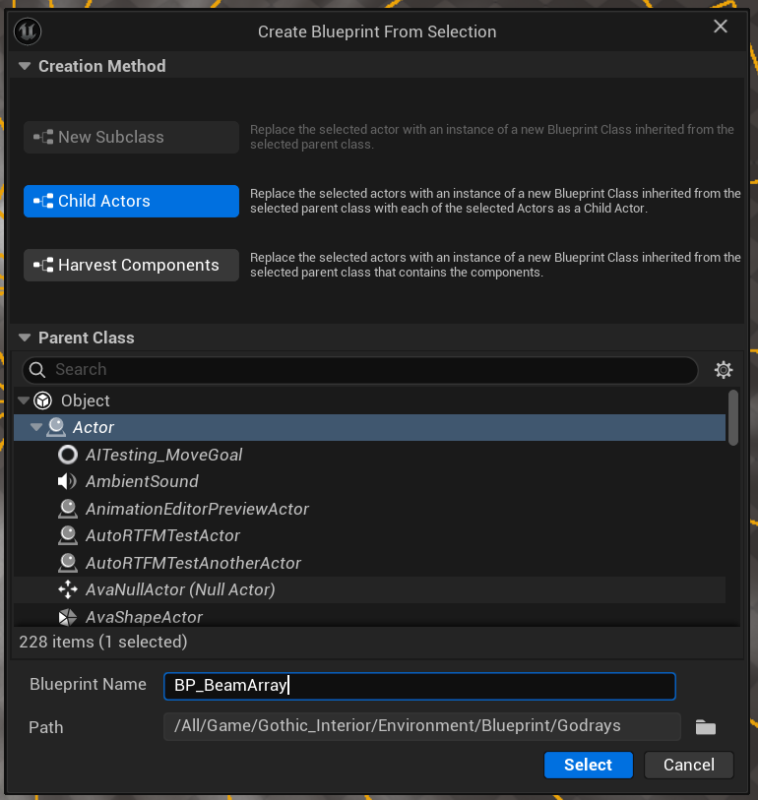
This gives me two choices: Child Actors and Harvest Components. I’ll choose the former, give my new blueprint a name (BP_BeamArray) and that’s going to become my master blueprint.
Construction Script
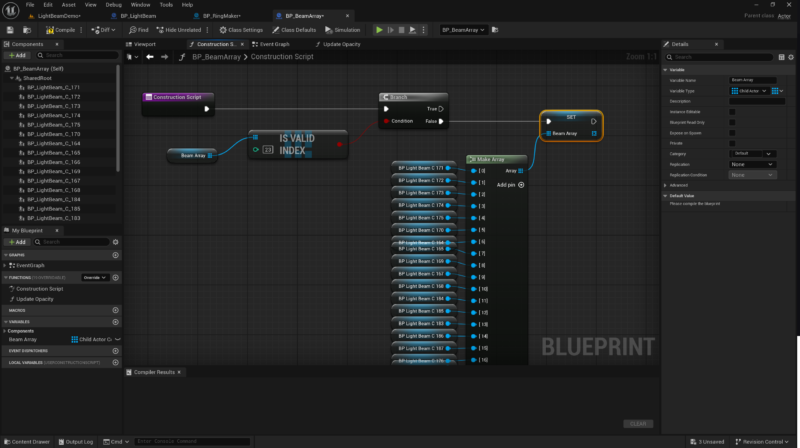
In the construction script, we’ll create an array of beam objects. I’ll add some logic so that the is array only created when it doesn’t already exist. There might be a better way to do this, but for now we’ll just check if my last entry exists. These objects are the ones we see as child actors on the left hand side and they all need to be set to “static” for this to work.
Update Function
Next I’ll make a small helper function that will loop through the array, then cast each child actor to the light beam blueprint and call the Set Beam Opacity function on it we’ve created earlier. This is an expensive operation, but since we’re not using it for a game and only for cinematic rendering, we don’t have to worry about it.

All that remains to build now is the logic to call this whenever our main opacity value changes. Let’s do this next.
Cinematic Preparation
We need a public variable that can be called from Sequencer. A float value will do, let’s call it Opacity. Make sure to set the “Expose to Cinematics” and “Instance Editable” options are set. Compile and give it a default value of 1.
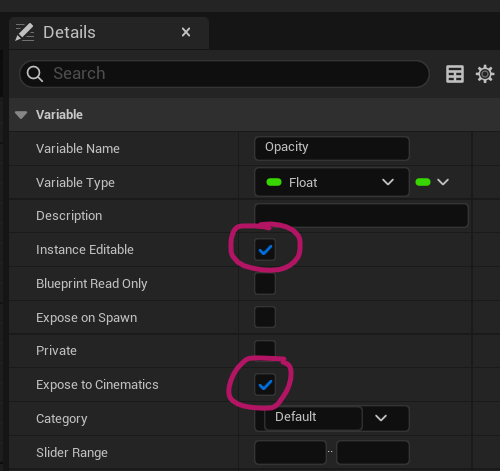
When we now drag our Beams Array blueprint into the viewport, we can type in a new value on the details pane, and add it to a sequencer object to control this value. Sadly it’s not doing anything to our light beams yet.
Delegate Callback Logic
We need a clever callback logic that detects when this value is changed so the function to update the material property can be called. When we animate this change, this needs to run on every tick so it can be updated. Unreal Engine has several ways to handle this, but for our case the easiest way to implement this is by using a second variable with initially the same value as the current one. Then on every tick event, we can check if the value has changed, and if it has, adjust the opacity to the new value.
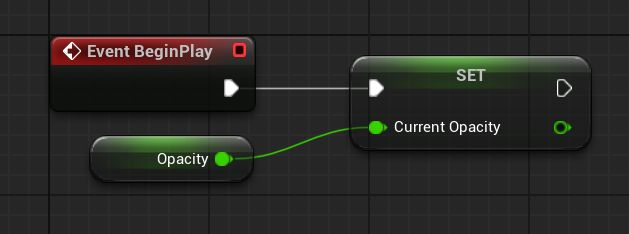
Begin Play is a good place for this, or you can add it to the end of the construction script. This will set Current Opacity (a new variable) to the same value as the public facing and sequencer exposed Opacity value.

In our Tick Event, we compare both values and update the opacity if they’re not the same. Now we can switch Unreal Engine into Simulation Mode and preview our effect in real time when it’s animated in the timeline.
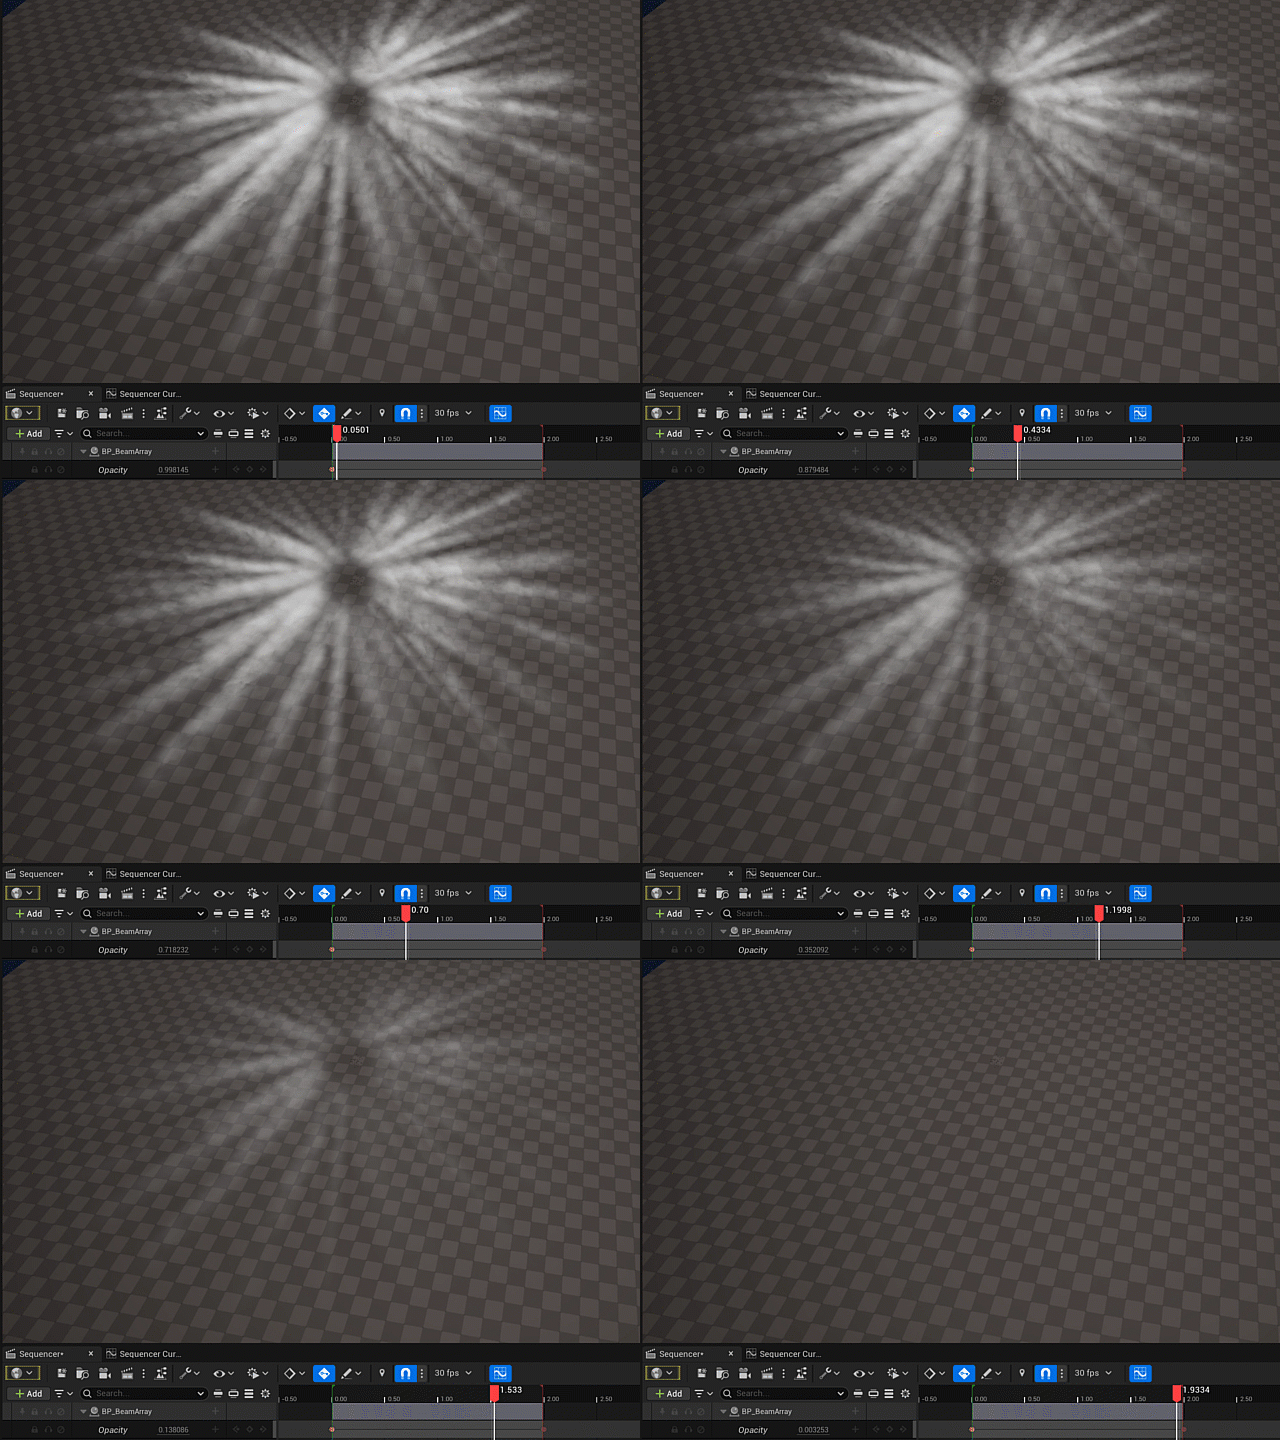
I hope this was insightful and that you’ve learnt something today. The callback logic was a bit of an eye opener to me, and although a little complex to setup, it opens up new possibilities for animating material effects and makes previewing/changing those values in context much easier.
Happy rendering!