3D Archives

My notes on 3D apps I use: ZBrush, Hexagon, DAZ Studio, Poser, Carrara and many others.

How to point the camera at an object in Blender

Other 3D packages usually have a camera setting that allows us to “point at” an object. This can be either part of a scene or a null object which doesn’t show up but can be animated. The idea behind this is that no matter where you move the camera, it will always frame your object of …

Read more

How to use Sculpt Mode in Blender

Blender has an excellent Sculpting Mode that works very similar to Sculptris and ZBrush. It’s very easy to sculpt on a mesh – let me show you how. Create a Mesh Object with a decent amount of topology for sculpting. For example, use Add – Mesh – Ico Sphere. In the init menu on the left, set the …

Read more

How to use Soft Selections in Blender

Soft Selections are those that influence more than what you have selected for a more organic and natural influence around an area. In Blender this concept is called Proportional Editing and it’s disabled by default. To enable it, while in Edit Mode, select SHIFT-O (as in the letter). There’s also a little circle icon which …

Read more

How to apply a Modifier in Blender

Modifiers are forces that act upon your vertex objects, with the added advantage that you can manipulate them later. Carrara has the same concept. Here’s how to create a Modifier in Blender. First, select an object in your scene. Underneath the scene tree, find the little wrench icon and click it. This opens the Modifier Pane …

Read more

Creating selections on Vertex Objects in Blender

To edit a vertex object in Blender, we must first switch into Edit Mode. By default a scene is in Object Mode. Select an object by right-clicking it, then switch into Edit Mode by using the drop-down (or drop-up) menu. The entire object may be selected, which is not exactly what we want. Hit A …

Read more

How to render with Depth of Field in DAZ Studio

Depth of Field is a photographic term that describes how much of a scene is in focus. In the 3D world this has to be calculated and switched on – because otherwise everything in a rendered scene is in focus. A real world photographic lens doesn’t work that way: take a portrait with a long lens, …

Read more

Creating Primitives in Blender

To create a new primitive in Blender, select Add – Mesh from the bottom menu. Alternatively, select SHIFT-A to bring up a similar context menu anywhere on the screen. Pick your poison and it will be inserted into your scene wherever the 3D cursor is located (that weird little red-white ring-thing). You can position the …

Read more

Navigating 3D Space in Blender on Mac

Using Blender with the integrated Magic Trackpad on my MacBook works a treat – it’s  intuitive even! It’s a nice surprise in the otherwise daunting user experience Blender has to offer. Here’s how to navigate a 3D scene using gestures: Rotate using two-finger swipe Zoom using two-finger pinch, or the PLUS and MINUS keys Pan by holding …

Read more

Comparison: 3Delight vs NVIDIA Iray for Animations

For this animation I’ve rendered the same scene twice in DAZ Studio 4.8: once with 3Delight and once with the new NVIDIA Iray engine. It’s interesting to compare the results in an animation rather than a still image due to the different challenges involved.

One thing is that the subject is illuminated differently depending on how far away it is from the camera. Another is that it’s difficult to get matching end results when mixing faster and slower hardware: Iray can take a long time to finish a render if no GPU acceleration is around.

Read more

How to render Iray with transparency in DAZ Studio

DAZ Studio Splash

DAZ Studio 4.8 comes with a new render engine called NVIDIA Iray. From what I understand it’s similar to the Mental Ray engine and – from what I hear – is supposed to become the new default render engine in DAZ Studio. It’s not a replacement for 3Delight, just an addition – selectable on the Render Tab (under Engine).

Unlike 3Delight, Iray renders images without transparency (or alpha channel) by default, which isn’t desirable. There is of course a way to change this, and here’s how to do it.

Read more

Skeleton at the Graveyard

Yesterday I’ve animated this skeleton. The steps involved were rather complex, so I thought I’d better write down how I did it.

In principle, there are four parts to this animation:

  • the animation of the skeleton (using DAZ Studio and aniMate)
  • the cloth draping (using Marvelous Designer)
  • a moving fog layer (using Carrara)
  • a graveyard picture (from Graphic Stock)
  • and finally, blending it all together (in Premiere Pro)

Here’s how I did it step by step.

Read more

How to export garment animations from Marvelous Designer for use in DAZ Studio

In my previous article I’ve explained how to export an animation from DAZ Studio and import it into Marvelous Designer, where we’ve created and animated our garment. In this article I’ll show you the reverse: exporting the garment with animation and import it into DAZ Studio for rendering.

Here’s how this works in principle:

  • export your garment animation from Marvelous Designer as OBJ Sequence
  • import the sequence in DAZ Studio using Morph Loader Pro
  • turn all those morphs into an animation

I’ve explained the whole process step by step in this video:

Read more

How to export animations from DAZ Studio for use in Marvelous Designer

Exporting character animations from DAZ Studio for use in Marvelous Designer is a trifle complicated. In this article I will explain what works for me.

I’m using an animation created in DAZ Studio 4.7 using Michael 6, a Genesis 2 character. I will then create some clothing in Marvelous Designer 4.5, drape and animate it, and eventually export it back to DAZ Studio for rendering.

Here’s how to do it in principle:

  • bake aniMate blocks into DAZ Studio timeline
  • export OBJ file of your first animation frame
  • export the whole animation as MDD cache
  • import OBJ into Marvelous Designer
  • import MDD cache in Marvelous Designer
  • drape and animate cloth

I’ve explained the whole process step by step in this video:

Read more

How to display the camera frame in DAZ Studio

By default DAZ Studio will render everything in the current viewport, whose size depends on now much space the viewport occupies on your computer screen. That’s not necessarily the size or aspect ratio you’d like to render. To frame the camera accurately, we need to be able to see what the camera sees. There are two …

Read more

How to transition from a static pose to aniBlocks in DAZ Studio

The way aniMate works is that we can either animate characters with a traditional keyframe approach, using the standard timeline, or we can use aniBlocks. There’s no easy way to mix and match both approaches. But sometimes it’s necessary to transition from a static pose to an aniBlock to get a smooth transition. The best way to …

Read more

Getting started with the ZModeler in ZBrush

The ZModeler is is a new feature in ZBrush 4R7. With this new gadget we can perform polygonal vertex modelling, something that was not possible before the introduction of this brush. The term “brush” is a tad of an understatement if you ask me: this “minor addition” gives ZBrush abilities that are worth about $1600, which is what …

Read more

Filed under: Categories 3D Tagged as: Tags

How to export a garment from Marvelous Designer

You can export your garment from Marvelous Designer either in OBJ or FBX format. Note that at the time if writing, FBX is highly experimental and appears not to work very well. OBJ on the other hand is doing a fine job. Head over to File – Export and choose OBJ. There’s also an option …

Read more

How to import DAZ characters into Marvelous Designer

Screen Shot 2015-03-25 at 09.24.00
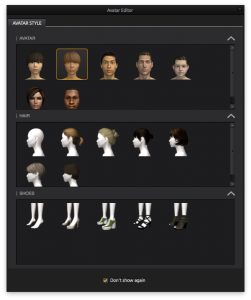
Marvelous Designer comes with 7 default avatars, but it’s very easy to use your own 3D figure and create custom clothing for it.

Simply export your desired character as OBJ, including full body morphs, then import it into Marvellous Designer.

Here’s how to do with with the Genesis 2 Male character from the free essentials pack.


Exporting from DAZ Studio

Load your character into an empty scene and select it in the scene tab. It’s typically located on the right hand side in DAZ Studio.

Screen Shot 2015-03-25 at 09.31.21

Head over to File – Export and pick a location for your files: DAZ Studio will create a .OBJ and a .MTL file. It will also bring up an export dialogue in which you can specify the scale and size for your export. Those need to match the import dialogue of your other app.

Read more

Navigating 2D and 3D Space in Marvelous Designer

Sometimes it’s the simple things they don’t to tell you about in the brochure: Zooming Magic Trackpad: move two fingers up or down, much like you would scroll a web page up or down. Intuos Tablet: hold the lower button down (right-click), then drag the pen. Mouse: rotate the wheel. Moving/Panning Hold the ALT/OPT key down, then: Magic Trackpad: drag …

Read more

How to install Carrara 8.5 in Mac OS X Yosemite

I’m configuring a new Mac Mini 2012 specifically for all my 3D ventures this year. As such I’m installing all my favourite (and annoying) 3D apps fresh from scratch. Being a futuristic kind of guy I’m using “the best operating system ever” (yeah, right!) OS X Yosemite.

Over the last 7 years I’ve installed Carrara more times than I can count and in every version of OS X and Windows that I can remember, and it’s never given me any trouble – neither when installed manually or via the DAZ Install Manager.

Until today, when I’ve received the following message in OS X Yosemite: “The application cannot get the administrator access right”. Thank you, Yosemite!

Screen Shot 2015-02-03 at 11.04.18 PM

What does that even mean? I thought my user account HAS admin privileges.

Turns out they’re just not administrative enough. The solution to this awkward puzzle is to login as root for the initial launch of Carrara. Which leads us to the next adventure:

How do we enable the root user in OS X?

Read more

Navigating 3D Space in DAZ Studio

Nothing is more frustrating that not knowing how to accomplish basic tasks. Navigating 3D space in different apps using different devices in the same day is one such thing. Before I forget, here’s how to navigate your scene in DAZ Studio 4.7. Dolly You can dolly the camera in several ways: by dragging the cube icon in …

Read more

How to group objects in DAZ Studio

Groups are helpful to keep the many items in your scene organised and grouped together. They’re like a “folder”, even though you’re not really moving items to another place. They just appear together with a heading and a disclosure triangle. For example, rather than having a character and five independent clothing items, it’ll be much …

Read more

How to edit 3rd Party Vertex Objects in Carrara

You want to make a quick change to a 3rd party vertex object in Carrara, head over to the Modelling Room, but all your favourite tools are greyed out. What’s going on? Carrara has a feature called Protect Topology, and there’s a good chance it’s switched on for items you bought from a marketplace. It’s …

Read more

Filed under: Categories 3D Tagged as: Tags

How to render DAZ Studio scenes without DAZ Studio

DAZ Studio has one drastic drawback: while you’re rendering a scene you can’t use the app until it’s finished rendering. In fact, DAZ Studio makes use of every available CPU cycle, turning even the fastest computer into something you can’t even check your emails with while you wait for that render to finish.

That’s great for efficiency – but it also sucks because you need a second computer to keep working with, or alternatively use a second computer for rendering while you work with your main machine. Wouldn’t it be great if you could do something akin to Poser’s background rendering, something that lets you setup the next scene in DAZ Studio while it’s rendering at the same time?

I have good news: you can – thanks to something called RIB files. I didn’t know this until recently, and it works a treat. Let me explain how to use this feature.

Read more

The old Empty Smart Content Tab ploy – and how to fix it

One morning I woke up and my entire Smart Content tab in DAZ Studio was empty. Nothing had happened since the day before when it was working perfectly fine. It just stopped working overnight.

What I had done shortly before going to bed was to install the latest service release of Poser Game Dev (SR5). If this was the cause of the problem or not will forever remain a mystery. In this article I’ll explain how I fixed this issue on my Mac.

Screen Shot 2014-11-09 at 15.06.54

Read more

Directory Structure of a Poser Runtime

Poser is a tad – shall we say – pernickety about where it allows you to save files if you’d like them to appear in the Library. You can save files anywhere on your system of course, using the options in the File Menu, but Poser can also save files into the Library with the …

Read more

Filed under: Categories 3D Tagged as: Tags

How to rotate around selected objects in Poser

Other 3D apps rotate around the currently selected object by default. Poser does not. By default Poser chooses to rotate around the center of the universe. That’s great for characters but relatively maddening for larger scenes. The secret lies in the Display menu, in an option called Orbit Selected Mode. Select it and Poser will rotate around your …

Read more

Filed under: Categories 3D Tagged as: Tags